Dell Alienware M15x Service Manual - Page 30
Removing the Center Control Cover - hard drive
 |
UPC - 074450000064
View all Dell Alienware M15x manuals
Add to My Manuals
Save this manual to your list of manuals |
Page 30 highlights
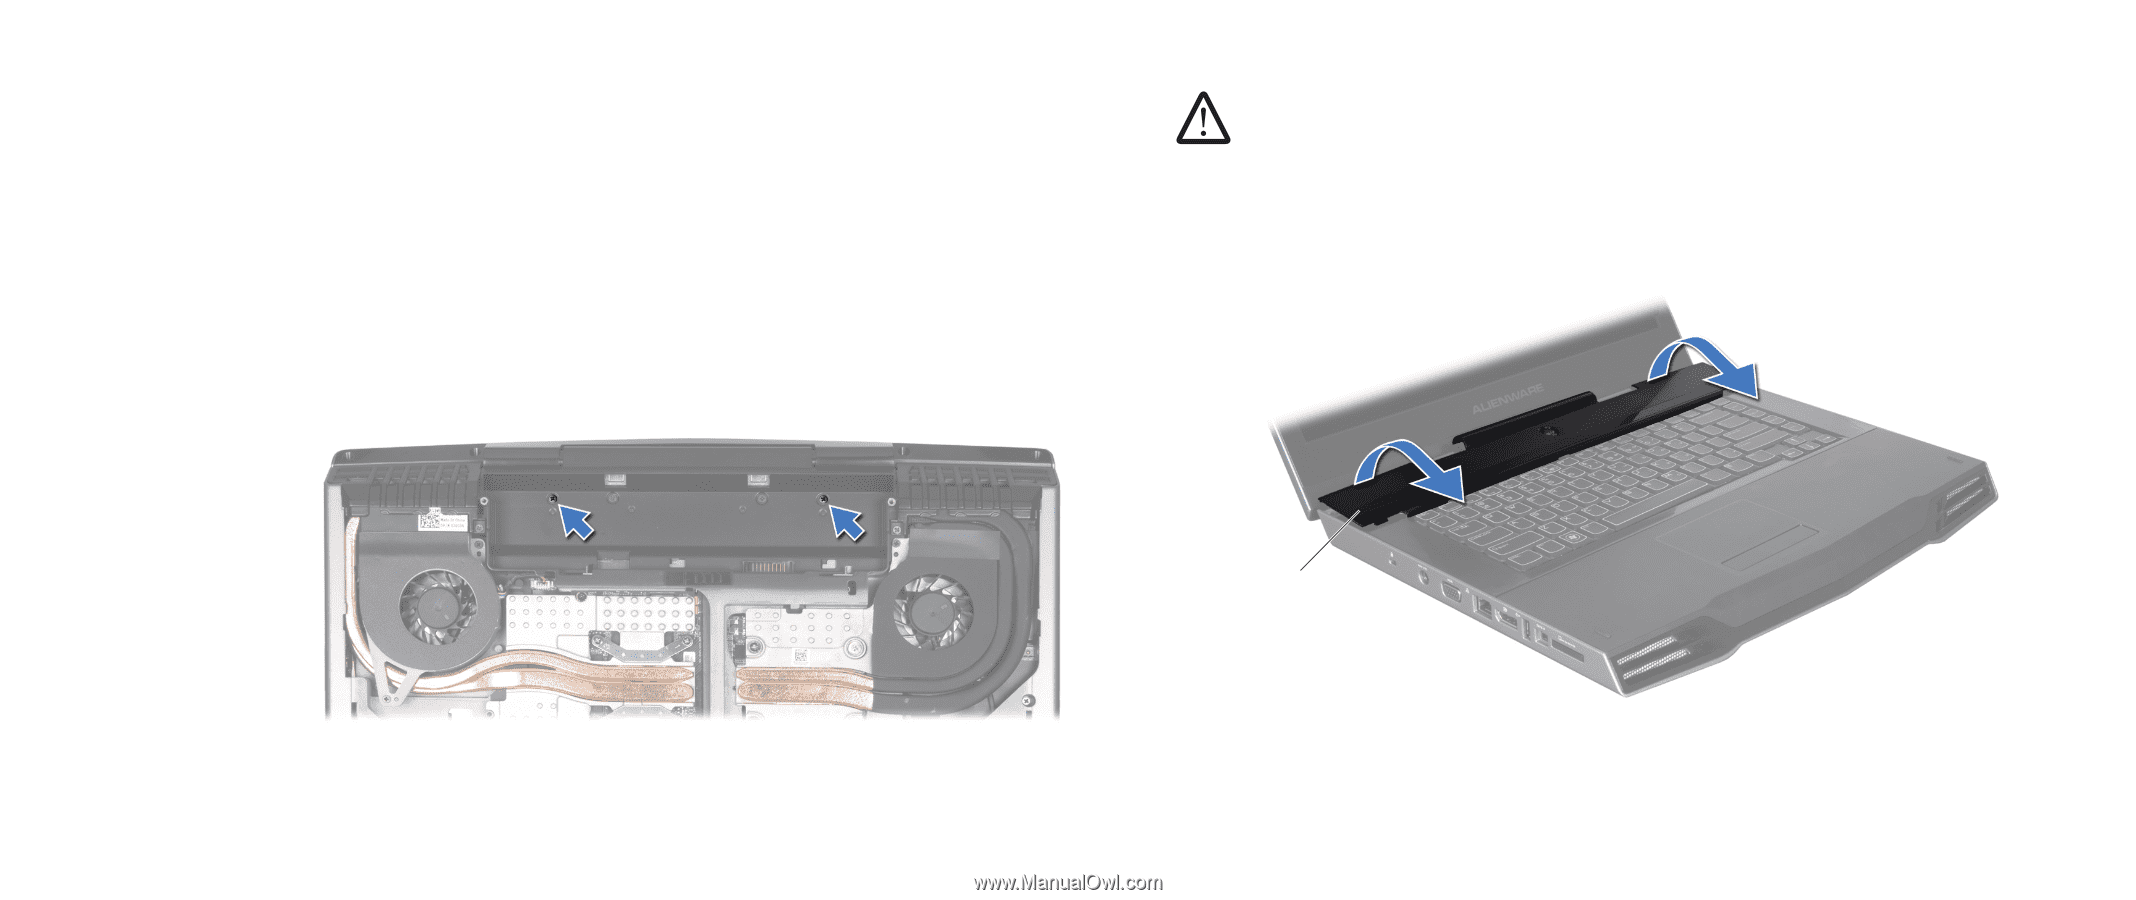
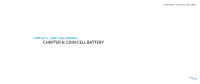
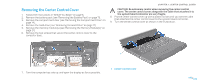
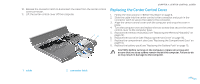
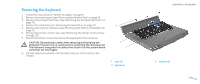
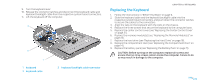
Removing the Center Control Cover 1. Follow the instructions in "Before You Begin" on page 6. 2. Remove the battery pack (see "Removing the Battery Pack" on page 11). 3. Remove the compartment door (see "Removing the Compartment Door" on page 14). 4. Remove the hard drive (see "Removing the Hard Drive" on page 17). 5. Remove the memory module(s) (see "Removing the Memory Module(s)" on page 21). 6. Remove the two screws that secure the center control cover to the computer base. CHAPTER 7: CENTER CONTROL COVER CAUTION: Be extremely careful when removing the center control cover. The center control cover along with the cable that attaches it to the system board connector are very fragile. 8. Pry the center control cover up with a plastic scribe until you see the cable that attaches the center control cover to the system board connector. 9. Turn the center control cover as shown in the illustration. 1 7. Turn the computer top side up, and open the display as far as possible. 1 center control cover 030 /030
-
 1
1 -
2
-
3
-
4
-
5
-
6
-
7
-
8
-
9
-
10
-
11
-
12
-
13
-
14
-
15
-
16
-
17
-
18
-
19
-
20
-
21
-
22
-
23
-
24
-
 25
25 -
 26
26 -
 27
27 -
 28
28 -
 29
29 -
 30
30 -
 31
31 -
 32
32 -
 33
33 -
 34
34 -
 35
35 -
36
-
37
-
38
-
39
-
40
-
41
-
42
-
43
-
44
-
45
-
46
-
47
-
48
-
49
-
50
-
51
-
52
-
53
-
54
-
55
-
56
-
57
-
58
-
59
-
60
-
61
-
62
-
63
-
64
-
65
-
66
-
67
-
68
-
69
-
70
-
71
-
72
-
73
-
74
-
75
-
76
-
77
-
78
-
79
-
80
-
81
-
82
-
83
-
84
-
85
-
86
-
87
-
88
-
89
-
90
-
91
-
92
-
93
-
94
-
95
-
96
-
97
-
98
-
99
-
100
-
101
-
102
-
103
-
104
-
105
-
106
-
107
-
108
-
109
-
110
-
111
-
112
-
113
-
114
-
115
-
116
-
117
-
118
 |
 |