Dell M4400 Service Manual - Page 20
Replacing the Display Bezel, Removing the Display Panel - laptop
 |
View all Dell M4400 manuals
Add to My Manuals
Save this manual to your list of manuals |
Page 20 highlights
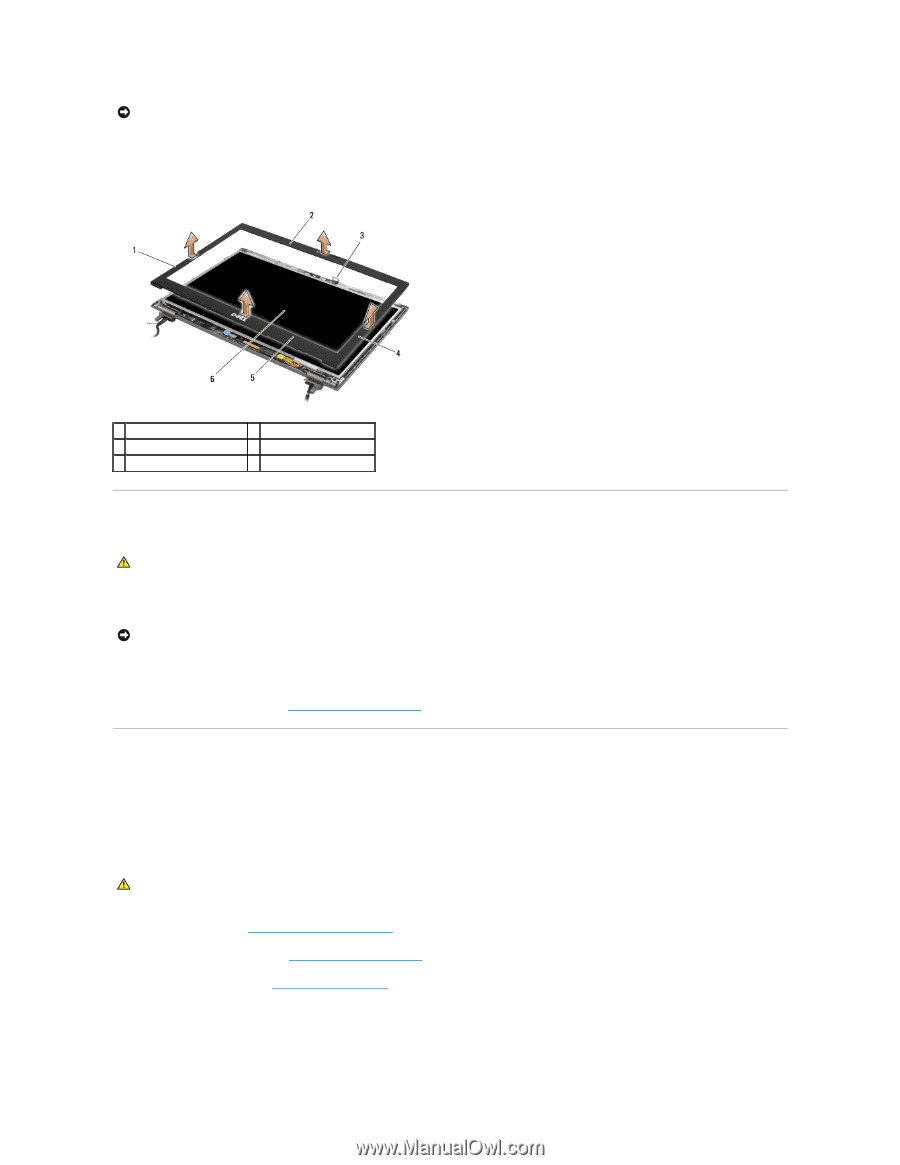
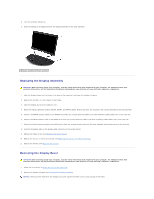
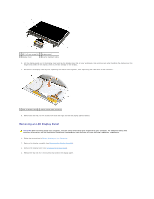
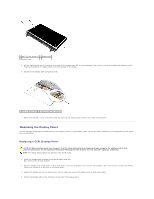
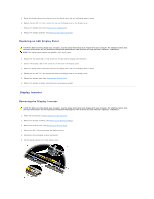
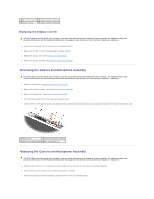
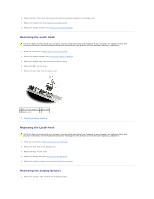
NOTICE: To release the snaps on the left and right sides of the bezel, push the bezel sides away or out from the LCD, while lifting up. To release the snaps along the top and bottom of the bezel, pull the bezel top or bottom toward or in to the LCD, while lifting up. 3. Follow the NOTICEs above to carefully release all bezel snaps. Special attention is required for the corners, especially for the bezels used with LED LCD panels. 4. Once all snaps are released, lift the bezel from the display assembly. 1 left side of display bezel 2 top of display bezel 3 latch hook on display panel 4 right side of display bezel 5 bottom of display bezel 6 display panel Replacing the Display Bezel CAUTION: Before working inside your computer, read the safety information that shipped with your computer. For additional safety best practices information, see the Regulatory Compliance Homepage on www.dell.com at: www.dell.com/regulatory_compliance. 1. Align the latch hook on the display panel with the small rectangular opening on the display bezel. NOTICE: To engage the snaps on the left and right sides of the bezel, pull the bezel sides toward or in to the LCD, while pushing down. To engage the snaps along the top and bottom of the bezel, push the bezel top or bottom away or out from the LCD, while pushing down. 2. Starting at any corner, use your fingers to gently snap the bezel into place to secure it to the display panel. 3. Replace the display assembly (see Replacing the Display Assembly). Removing the Display Panel The Dell Precision M4400 laptop includes either a CCFL display panel or an LED display panel. Use the procedure applicable to the configuration of the laptop you are disassembling. Removing a CCFL Display Panel CAUTION: Before working inside your computer, read the safety information that shipped with your computer. For additional safety best practices information, see the Regulatory Compliance Homepage on www.dell.com at: www.dell.com/regulatory_compliance. 1. Follow the instructions in Before Working on Your Computer. 2. Remove the display assembly (see Removing the Display Assembly). 3. Remove the display bezel (see Removing the Display Bezel). 4. Disconnect the inverter backlight cable from the inverter. 5. Remove the four M2.5 x 5-mm screws from the display panel.
-
 1
1 -
2
-
3
-
4
-
5
-
6
-
7
-
8
-
9
-
10
-
11
-
12
-
13
-
14
-
 15
15 -
 16
16 -
 17
17 -
 18
18 -
 19
19 -
 20
20 -
 21
21 -
 22
22 -
 23
23 -
 24
24 -
 25
25 -
26
-
27
-
28
-
29
-
30
-
31
-
32
-
33
-
34
-
35
-
36
-
37
-
38
-
39
-
40
-
41
-
42
-
43
-
44
-
45
-
46
-
47
-
48
-
49
-
50
-
51
-
52
-
53
-
54
-
55
-
56
-
57
-
58
-
59
-
60
-
61
-
62
-
63
-
64
-
65
-
66
-
67
-
68
-
69
-
70
-
71
-
72
 |
 |