Dewalt DCW100K Instruction Manual - Page 10
OPERATION, Setup Menu
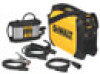 |
View all Dewalt DCW100K manuals
Add to My Manuals
Save this manual to your list of manuals |
Page 10 highlights
English charge. If the device is not used or operated for a specified period of time, it switches off automatically. NOTE: The factory setting for the automatic switch-off time is 15 minutes. To reactivate the device, press the On/Off button (Q) for at least 2 seconds. Overcharge protection: Once the battery has been fully charged, the charger turns off automatically and switches to conservation charging mode. In this mode the device can remain connected to the charger for any period of time. OPERATION WARNING: ALWAYS Check the charger lead, welding torch, welding cable and grounding (earthing) connection for damage before every use. CAUTION: Check that the device has an all-round clearance of 1 ft. 8 in. (0.5 m) to ensure that cooling air can flow in and out freely. Air inlets and outlets must never be covered, not even partially. NOTICE: The onboard battery must be fully charged before using the welder for the first time. Refer to Charging the Welder. Setup Menu ACCESSING THE SETUP MENU 1. Use the welding process button (L) to select the process whose setup parameters are to be changed: - MMA welding - MMA welding with cellulose electrode - TIG welding 2. Press the setting value (O) and welding process buttons together. After releasing the buttons, the code for the first parameter in the Setup menu is displayed. CHANGING WELDING PARAMETERS (FIG. 3) 1. Turn the adjusting dial (R) to select the required parameter. 2. Press the adjusting dial to FIG. 3 M display the preset value of the R parameter in the LCD (M). 3. Turn the adjusting dial (R) to change the value. - The new value becomes effective immediately. - Exception: when restoring the factory settings, press the adjusting dial after changing the value to activate the new value. 4. Press the adjusting dial to return to the list of parameters. EXITING THE SETUP MENU Press the setting value or Welding process button to exit from the Setup menu. Parameters for MMA Welding Parameter Description Range Unit Starting current duration (Hti) 0.1 - 2 for the SoftStart / HotStart function Factory setting: 0.5 seconds Seconds Anti-Stick (Ast) When the anti-stick function is active, the arc is extinguished after 1.5 seconds in the event of a short circuit (sticking of the electrode) Factory setting: ON (activated) On/Off 10 Page dimensions: A5 (8.2677 x 5.8268 inches)
-
 1
1 -
2
-
3
-
4
-
 5
5 -
 6
6 -
 7
7 -
 8
8 -
 9
9 -
 10
10 -
 11
11 -
 12
12 -
 13
13 -
 14
14 -
 15
15 -
16
-
17
-
18
-
19
-
20
-
21
-
22
-
23
-
24
-
25
-
26
-
27
-
28
-
29
-
30
-
31
-
32
-
33
-
34
-
35
-
36
-
37
-
38
-
39
-
40
-
41
-
42
-
43
-
44
-
45
-
46
-
47
-
48
-
49
-
50
-
51
-
52
-
53
-
54
-
55
-
56
-
57
-
58
-
59
-
60
-
61
-
62
-
63
-
64
 |
 |
