Dewalt DCW100K Instruction Manual - Page 7
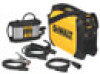
Save These Instructions For, Future Use, Features Fig. 1
 |
View all Dewalt DCW100K manuals
Add to My Manuals
Save this manual to your list of manuals |
Page 7 highlights
English metal hydride or lithium ion batteries to an authorized DEWALT service center or to your local retailer for recycling. You may also contact your local recycling center for information on where to drop off the spent battery. RBRC™ is a registered trademark of the Rechargeable Battery Recycling Corporation. • An extension cord must have adequate wire size (AWG or American Wire Gauge) for safety. The smaller the gauge number of the wire, the greater the capacity of the cable, that is 16 gauge has more capacity than 18 gauge. An undersized cord will cause a drop in line voltage resulting in loss of power and overheating. When using more than one extension to make up the total length, be sure each individual extension contains at least the minimum wire size. The following table shows the correct size to use depending on cord length and nameplate ampere rating. If in doubt, use the next heavier gauge. The smaller the gauge number, the heavier the cord. Minimum Gauge for Cord Sets Volts Total Length of Cord in Feet (meters) Ampere Rating 120 V 25 (7.6) 50 (15.2) 100 (30.5) 150 (45.7) 240 V 50 100 200 300 (15.2) (30.5) (61.0) (91.4) More Not Than More Than AWG 0 6 18 16 16 14 6 10 18 16 14 12 10 12 16 16 14 12 12 16 14 12 Not Recommended SAVE THESE INSTRUCTIONS FOR FUTURE USE FEATURES (FIG. 1) WARNING: Never modify any part of the welder, charger or their accessories. Damage or personal injury could result. WELDER COMPONENTS A. (−) current socket B. (+) current socket C. Air filter D. Charger socket connection E. Carry strap F. Electrode holder G. Grounding clamp H. Setting value indicator I. Unit indicator J. Batter capacity indicator K. Process indicator L. Welding process button M. LCD setting value display N. Status indicators O. Setting value button P. Adjusting dial Q. On/off Button CHARGER COMPONENTS R. Charger control panel S. Charger lead socket T. Mains cable U. Charging indicator V. Quick charging indicator W. Completed indicator X. Error indicator Y. Mains indicator Z. Quick charge button INTENDED USE This portable welder is designed for professional STICK & TIG welding applications. The device is intended solely for commercial use. DO NOT use under wet conditions or in presence of flammable liquids or gases. 7
-
 1
1 -
 2
2 -
 3
3 -
 4
4 -
 5
5 -
 6
6 -
 7
7 -
 8
8 -
 9
9 -
 10
10 -
 11
11 -
 12
12 -
13
-
14
-
15
-
16
-
17
-
18
-
19
-
20
-
21
-
22
-
23
-
24
-
25
-
26
-
27
-
28
-
29
-
30
-
31
-
32
-
33
-
34
-
35
-
36
-
37
-
38
-
39
-
40
-
41
-
42
-
43
-
44
-
45
-
46
-
47
-
48
-
49
-
50
-
51
-
52
-
53
-
54
-
55
-
56
-
57
-
58
-
59
-
60
-
61
-
62
-
63
-
64
 |
 |
