Dymo LabelManager® Wireless PnP User Guide 1 - Page 13
Connection Method, Description, The Wireless Setup tool starts. - labelmanager wireless pnp setup
 |
View all Dymo LabelManager® Wireless PnP manuals
Add to My Manuals
Save this manual to your list of manuals |
Page 13 highlights
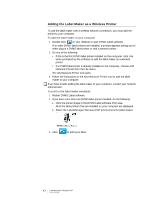
Refer to the documentation that came with your router or access point to determine the connection methods supported. Connection Method Description Standard Use this method if you want the Wireless Setup tool to automatically detect your network. Your network will be detected automatically and you will be prompted to enter your security information. See Configuring Your Label Maker Using Standard. Advanced Use this method if you want to enter all network information manually. The Wireless Setup tool will not automatically detect your network. Use this method only if you are very familiar with your wireless network, or if the other method is unsuccessful. See Configuring Your Label Maker Using Advanced. To configure the label maker on your wireless network 1 Plug one end of the USB cable into the USB port on the back of the label maker. 2 Plug the other end of the USB cable into an available USB port on your computer. 3 If necessary, press the power button to turn on the label maker. 4 Start the built-in software. See Starting the Built-In Software on page 10. 5 Click on the software toolbar. The Wireless Setup tool starts. 6 Select one of the following connection methods: • Standard - See Configuring Your Label Maker Using Standard. Wireless status light • Advanced - See Configuring Your Label Maker Using Advanced. 7 Follow the instructions in the tool to configure the label maker on your wireless network. The wireless status light located on the top of the label maker turns solid blue when the label maker has successfully connected to a wireless network. You cannot use the label maker as a wireless network printer while the label maker is connected to a USB port on your computer. 13 LabelManager® Wireless PnP User Guide
-
 1
1 -
2
-
3
-
4
-
5
-
6
-
7
-
 8
8 -
 9
9 -
 10
10 -
 11
11 -
 12
12 -
 13
13 -
 14
14 -
 15
15 -
 16
16 -
 17
17 -
 18
18 -
19
-
20
-
21
-
22
-
23
-
24
-
25
 |
 |
