Dymo LabelManager® Wireless PnP User Guide 1 - Page 15
Viewing Wireless Settings
 |
View all Dymo LabelManager® Wireless PnP manuals
Add to My Manuals
Save this manual to your list of manuals |
Page 15 highlights
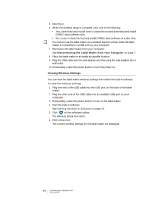
5 Click Next. 6 When the wireless setup is complete, click one of the following: • Yes, download and install now to close the tool and download and install DYMO Label software now. • No, close to close the tool and install DYMO Label software at a later time. You cannot use the label maker as a wireless network printer while the label maker is connected to a USB port on your computer. 7 Disconnect the label maker from your computer. See Disconnecting the Label Maker from Your Computer on page 7. 8 Place the label maker in an easily accessible location. 9 Plug the USB cable into the wall adapter and then plug the wall adapter into a wall outlet. 10 If necessary, press the power button to turn the printer on. Viewing Wireless Settings You can view the label maker wireless settings from within the built-in software. To view the wireless settings 1 Plug one end of the USB cable into the USB port on the back of the label maker. 2 Plug the other end of the USB cable into an available USB port on your computer. 3 If necessary, press the power button to turn on the label maker. 4 Start the built-in software. See Starting the Built-In Software on page 10. 5 Click on the software toolbar. The Wireless Setup tool starts. 6 Click Advanced. The current wireless settings for the label maker are displayed. 15 LabelManager® Wireless PnP User Guide
-
 1
1 -
2
-
3
-
4
-
5
-
6
-
7
-
8
-
9
-
 10
10 -
 11
11 -
 12
12 -
 13
13 -
 14
14 -
 15
15 -
 16
16 -
 17
17 -
 18
18 -
 19
19 -
 20
20 -
21
-
22
-
23
-
24
-
25
 |
 |
