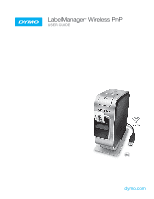
Dymo LabelManager® Wireless PnP User Guide 1 - Page 3
Contents, Using Your Label Maker as a Network Printer
 |
View all Dymo LabelManager® Wireless PnP manuals
Add to My Manuals
Save this manual to your list of manuals |
Page 3 highlights
Contents 4 About Your New Label Maker 4 Registering Your Label Maker 5 Getting to Know the Label Maker 6 Power 6 Power Status Light 6 Wireless Status Light 6 Reset 7 Getting Started 7 Connecting the Power 7 Inserting the Battery Pack 7 Removing the Battery Pack 8 Charging the Battery Pack 9 Inserting the Label Cassette 10 Using Your Label Maker as a Local Printer 10 Connecting the Label Maker to Your Computer 10 Starting the Built-In Software 10 Disconnecting the Label Maker from Your Computer 11 Printing Labels with the Built-In Software 11 Capturing and Inserting an Image 11 Using the Auto-Cut Feature 12 Using Your Label Maker as a Network Printer 12 Configuring Your Label Maker on Your Wireless Network 14 Configuring Your Label Maker Using Standard 14 Configuring Your Label Maker Using Advanced 15 Viewing Wireless Settings 16 Downloading and Installing DYMO Label Software 17 Adding the Label Maker as a Wireless Printer 18 About DYMO Label Software 18 Label Maker Status 19 Caring for the Label Maker 20 Troubleshooting 20 General 21 Wireless 23 Documentation Feedback 23 Environmental Information 24 Safety Precautions for Lithium-Polymer Rechargeable Battery Pack
-
 1
1 -
 2
2 -
 3
3 -
 4
4 -
 5
5 -
 6
6 -
 7
7 -
 8
8 -
 9
9 -
10
-
11
-
12
-
13
-
14
-
15
-
16
-
17
-
18
-
19
-
20
-
21
-
22
-
23
-
24
-
25
 |
 |
