Epson 2180 Product Information Guide - Page 21
Switching Between Printing on, Continuous Paper and Printing on Single, Sheets - lq drivers
 |
UPC - 010343815766
View all Epson 2180 manuals
Add to My Manuals
Save this manual to your list of manuals |
Page 21 highlights
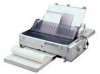
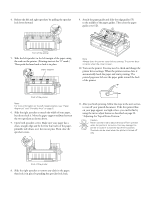
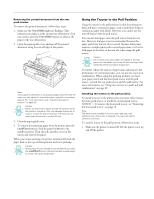
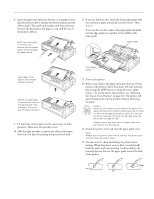
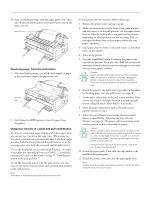
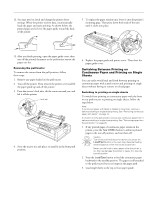
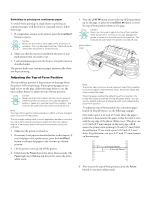
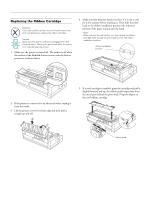
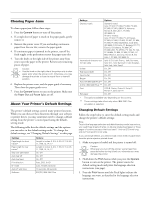
EPSON LQ-2180 12. You may need to check and change the printer driver settings. When the printer receives data, it automatically loads the paper and starts printing. As shown below, the printed pages are fed over the paper guide toward the back of the printer. 5. To replace the paper tension unit, lower it onto the printer's mounting pegs. Then press down both ends of the unit until it clicks into place. 13. After you finish printing, open the paper guide cover; then tear off the printed document at the perforation nearest the paper exit slot. Removing the pull tractor To remove the tractor from the pull position, follow these steps: 1. Remove any paper loaded on the pull tractor. 2. Turn off the printer. Then remove the printer cover and lift the paper guide up and off the printer. 3. Press the tractor's lock tabs, tilt the tractor toward you, and lift it off the printer. lock tab 4. Store the tractor in a safe place, or install it in the front push position. 6. Replace the paper guide and printer cover. Then close the paper guide cover. Switching Between Printing on Continuous Paper and Printing on Single Sheets You can easily switch back and forth between printing on continuous paper with a push tractor and printing on single sheets without having to remove or reload paper. Switching to printing on single sheets To switch from printing on continuous paper with the front or rear push tractor to printing on single sheets, follow the steps below. Note: If continuous paper with labels is loaded in the printer, remove it before switching to single-sheet printing. See "Removing continuous paper with labels" on page 12. If a tractor is in the pull position, remove any continuous paper from it before switching to single-sheet printing. See "Removing paper from the pull tractor" on page 20. 1. If any printed pages of continuous paper remain in the printer, press the Tear Off/Bin button to advance printed pages to the tear-off position, and tear them off. Caution: Tear off your printed document before you press the Load/Eject button in the next step. Reverse feeding several pages at a time may cause a paper jam. Never use the knob to eject paper while the printer is on; this may damage the printer or cause it to lose the tear-off position. 2. Press the Load/Eject button to feed the continuous paper backward to the standby position. The paper is still attached to the push tractor but is no longer in the paper path. 3. Load single sheets in the top or front paper guide. 2/99 EPSON LQ-2180 - 21
-
 1
1 -
2
-
3
-
4
-
5
-
6
-
7
-
8
-
9
-
10
-
11
-
12
-
13
-
14
-
15
-
 16
16 -
 17
17 -
 18
18 -
 19
19 -
 20
20 -
 21
21 -
 22
22 -
 23
23 -
 24
24 -
 25
25 -
 26
26 -
27
-
28
-
29
 |
 |
