Epson 2180 Product Information Guide - Page 25
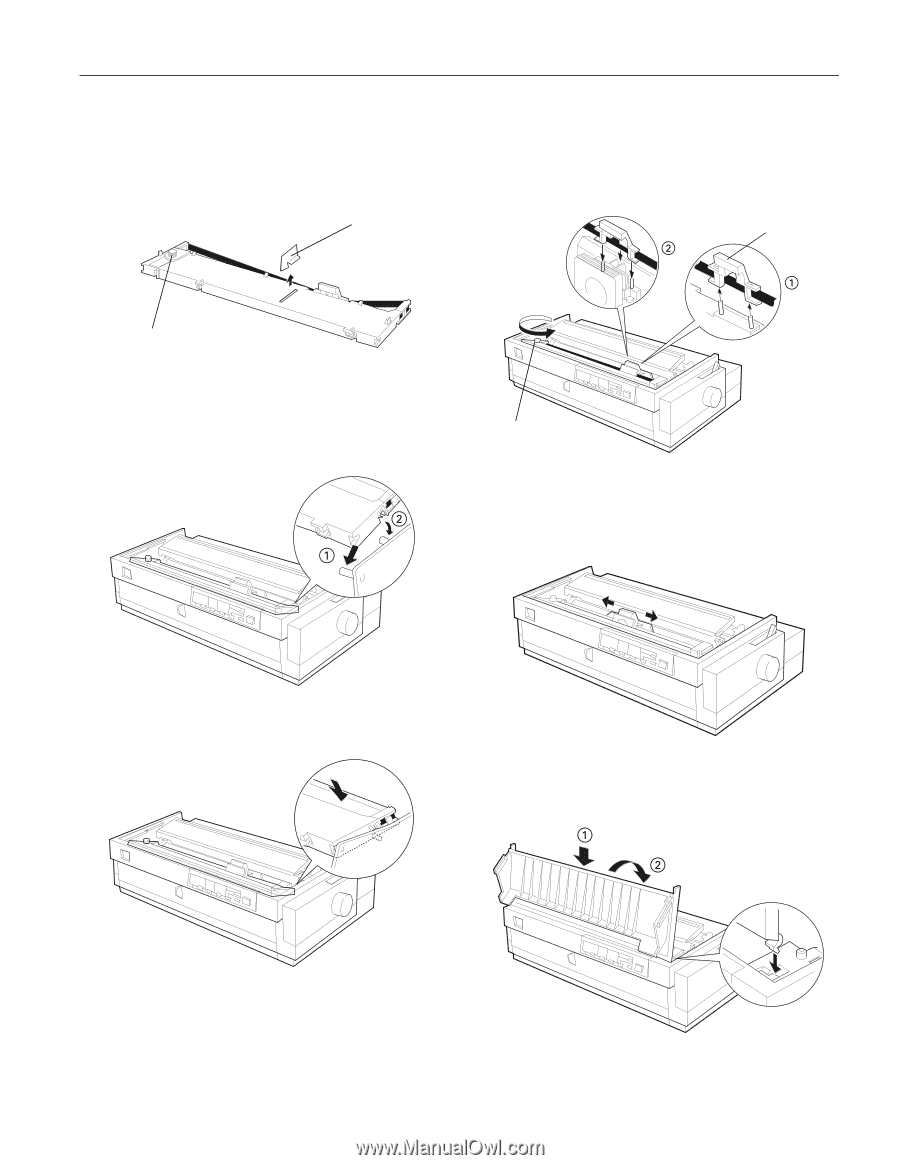
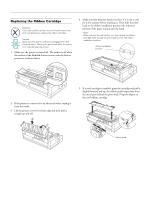
in place behind the print head. Press down the guide until - lq ribbon cartridge
 |
UPC - 010343815766
View all Epson 2180 manuals
Add to My Manuals
Save this manual to your list of manuals |
Page 25 highlights
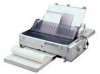
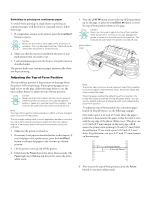
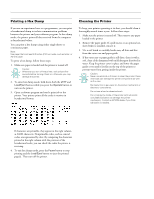
6. After you remove the new ribbon cartridge from the package, remove the separator from the middle of the ribbon cartridge and discard the separator. Then turn the ribbon-tightening knob in the direction of the arrow to remove any slack in the ribbon. separator EPSON LQ-2180 9. Lift the ribbon guide of the ribbon cartridge (c) and insert it firmly over the metal pins behind the print head (d). Make sure the ribbon is not twisted or creased and that it is in place behind the print head. Press down the guide until it clicks into place. ribbon guide ribbon-tightening knob 7. Hold the cartridge with the ribbon-tightening knob up. Fit the two front notches (c) of the ribbon cartridge over the small pegs on each side of the printer as shown below. Then lay the cartridge flat so that the rear notches (d) fit over the corresponding pegs. ribbon-tightening knob 10. Turn the ribbon-tightening knob in the direction of the arrow to remove any slack in the ribbon as shown in step 9. Then slide the print head from side to side to make sure it moves smoothly. 8. Gently press down the cartridge until both ends click into place. 11. Replace the printer cover by first inserting the front tabs into the slots on the printer (c) and then lowering the cover until it clicks into place (d). 2/99 EPSON LQ-2180 - 25
-
 1
1 -
2
-
3
-
4
-
5
-
6
-
7
-
8
-
9
-
10
-
11
-
12
-
13
-
14
-
15
-
16
-
17
-
18
-
19
-
 20
20 -
 21
21 -
 22
22 -
 23
23 -
 24
24 -
 25
25 -
 26
26 -
 27
27 -
 28
28 -
 29
29
 |
 |