Epson 2190N User Manual - Page 24
Front slot, Bottom slot, slot with the printable side
 |
UPC - 010343850026
View all Epson 2190N manuals
Add to My Manuals
Save this manual to your list of manuals |
Page 24 highlights
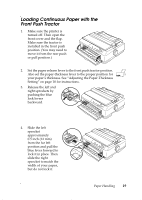
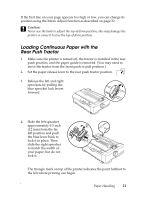
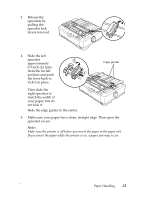
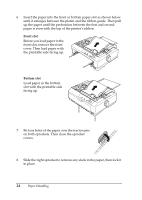
6. Insert the paper into the front or bottom paper slot as shown below until it emerges between the platen and the ribbon guide. Then pull up the paper until the perforation between the first and second pages is even with the top of the printer's ribbon. Front slot Before you load paper in the front slot, remove the front cover. Then load paper with the printable side facing up. Bottom slot Load paper in the bottom slot with the printable side facing up. 7. Fit four holes of the paper over the tractor pins on both sprockets. Then close the sprocket covers. 8. Slide the right sprocket to remove any slack in the paper, then lock it in place. 24 Paper Handling
-
 1
1 -
2
-
3
-
4
-
5
-
6
-
7
-
8
-
9
-
10
-
11
-
12
-
13
-
14
-
15
-
16
-
17
-
18
-
 19
19 -
 20
20 -
 21
21 -
 22
22 -
 23
23 -
 24
24 -
 25
25 -
 26
26 -
 27
27 -
 28
28 -
 29
29 -
30
-
31
-
32
-
33
-
34
-
35
-
36
-
37
-
38
-
39
-
40
-
41
-
42
-
43
-
44
-
45
-
46
-
47
-
48
 |
 |
24
Paper Handling
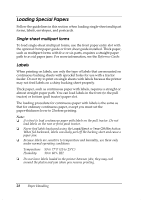
6.
Insert the paper into the front or bottom paper slot as shown below
until it emerges between the platen and the ribbon guide. Then pull
up the paper until the perforation between the first and second
pages is even with the top of the printer’s ribbon.
Front slot
Before you load paper in the
front slot, remove the front
cover. Then load paper with
the printable side facing up.
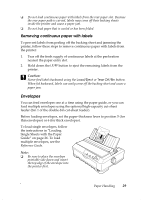
Bottom slot
Load paper in the bottom
slot with the printable side
facing up.
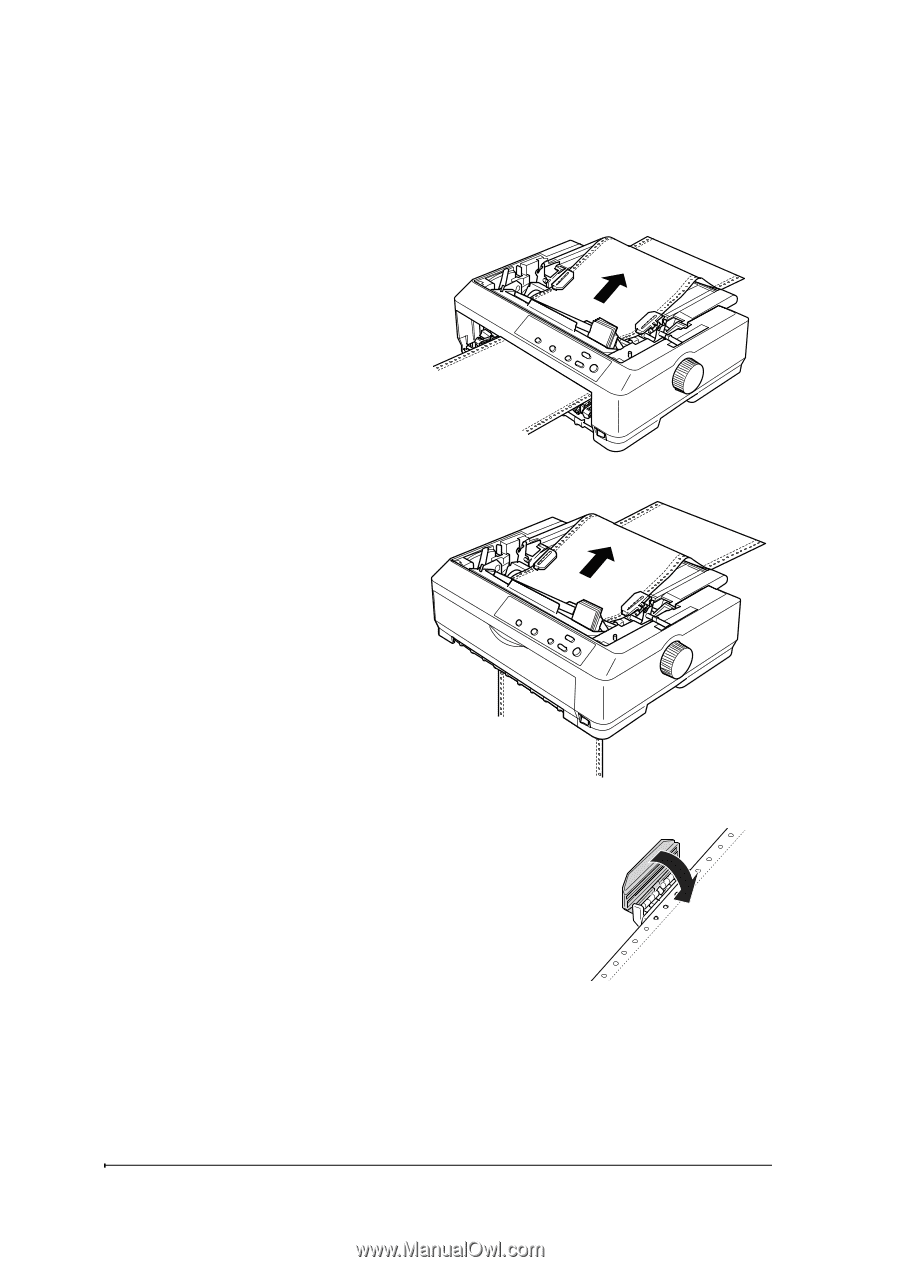
7.
Fit four holes of the paper over the tractor pins
on both sprockets. Then close the sprocket
covers.
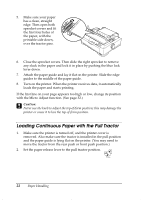
8.
Slide the right sprocket to remove any slack in the paper, then lock it
in place.