Epson 2190N User Manual - Page 9
Slide the ribbon, hear it click into place.
 |
UPC - 010343850026
View all Epson 2190N manuals
Add to My Manuals
Save this manual to your list of manuals |
Page 9 highlights
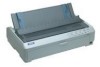
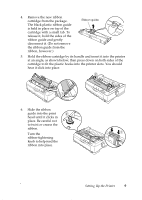
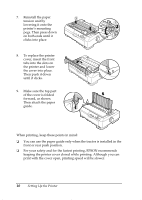
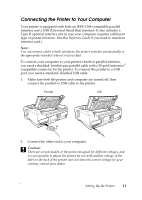
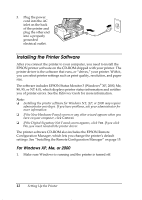
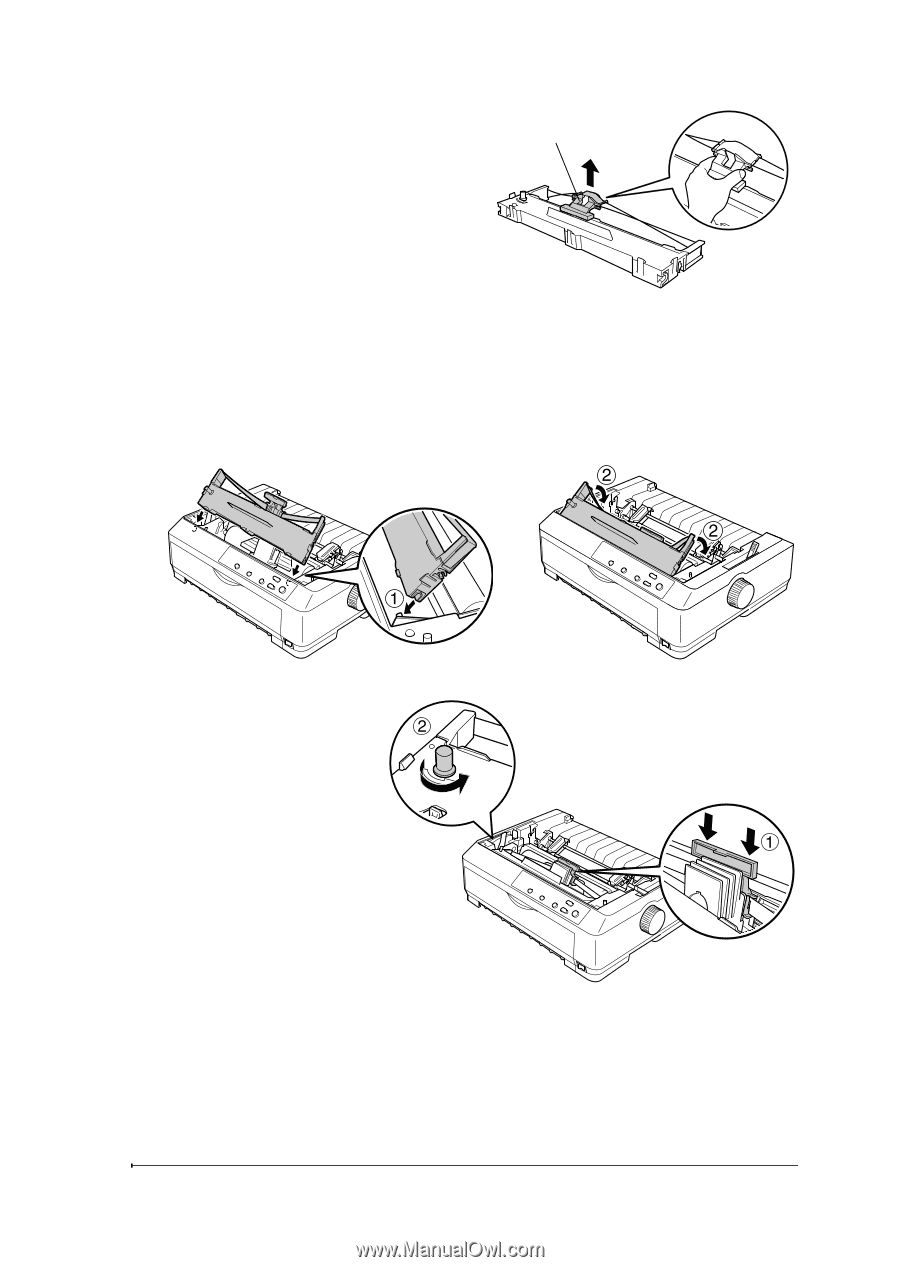
4. Remove the new ribbon cartridge from the package. The black plastic ribbon guide is held in place on top of the cartridge with a small tab. To release it, hold the sides of the ribbon guide and gently disconnect it. (Do not remove the ribbon guide from the ribbon, however.) Ribbon guide 5. Hold the ribbon cartridge by its handle and insert it into the printer at an angle, as shown below; then press down on both sides of the cartridge to fit the plastic hooks into the printer slots. You should hear it click into place. 6. Slide the ribbon guide into the print head until it clicks in place. Be careful not to twist or crease the ribbon. Turn the ribbon-tightening knob to help feed the ribbon into place. Setting Up the Printer 9
-
 1
1 -
2
-
3
-
 4
4 -
 5
5 -
 6
6 -
 7
7 -
 8
8 -
 9
9 -
 10
10 -
 11
11 -
 12
12 -
 13
13 -
 14
14 -
15
-
16
-
17
-
18
-
19
-
20
-
21
-
22
-
23
-
24
-
25
-
26
-
27
-
28
-
29
-
30
-
31
-
32
-
33
-
34
-
35
-
36
-
37
-
38
-
39
-
40
-
41
-
42
-
43
-
44
-
45
-
46
-
47
-
48
 |
 |
Setting Up the Printer
9
4.
Remove the new ribbon
cartridge from the package.
The black plastic ribbon guide
is held in place on top of the
cartridge with a small tab. To
release it, hold the sides of the
ribbon guide and gently
disconnect it. (Do not remove
the ribbon guide from the
ribbon, however.)
5.
Hold the ribbon cartridge by its handle and insert it into the printer
at an angle, as shown below; then press down on both sides of the
cartridge to fit the plastic hooks into the printer slots. You should
hear it click into place.
6.
Slide the ribbon
guide into the print
head until it clicks in
place. Be careful not
to twist or crease the
ribbon.
Turn the
ribbon-tightening
knob to help feed the
ribbon into place.
Ribbon guide