Epson 6100i Operation Guide - EMP Monitor v4.22 - Page 15
Right-click the projector icons to register to the, list view, and select Edit.
 |
UPC - 010343858176
View all Epson 6100i manuals
Add to My Manuals
Save this manual to your list of manuals |
Page 15 highlights
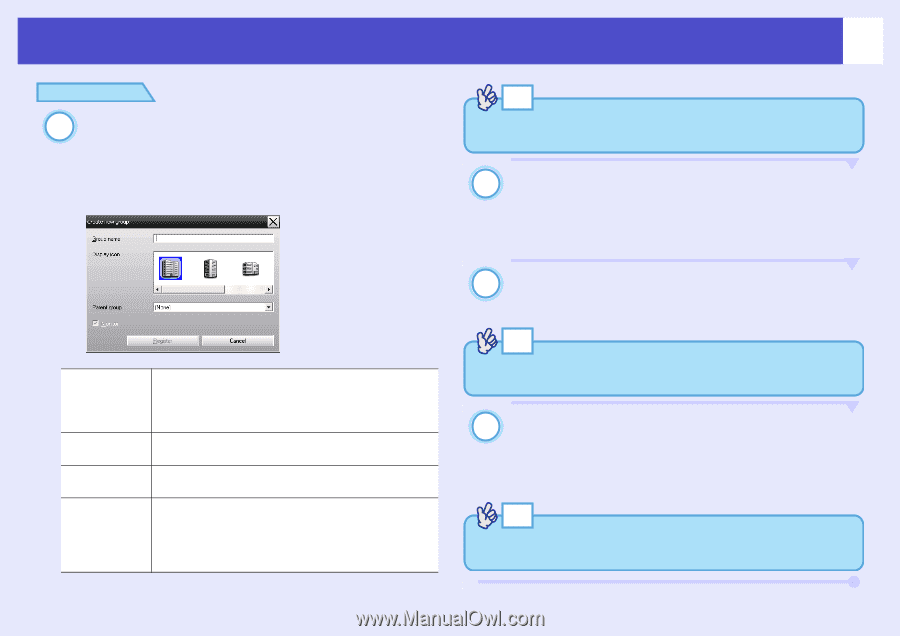
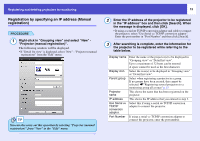
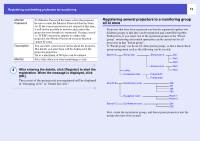
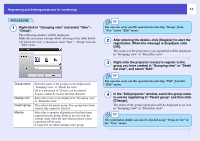
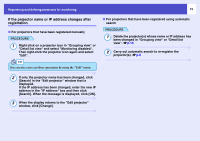
Registering and deleting projectors for monitoring 14 PROCEDURE 1 Right-click in "Grouping view" and select "New" - "Group". The following window will be displayed. Make the necessary settings while referring to the table below. • If "Detail list view" is displayed, select "New" - "Group" from the "Edit" menu. Group name Display icon Parent group Monitor Enter the name of the group(s) to be displayed in "Grouping view" or "Detail list view". Up to a maximum of 32 bytes can be entered. A space cannot be used as the first character. Select the icon(s) to be displayed in "Grouping view" or "Detail list view". This selects the parent group. If no groups have been created, this cannot be selected. Select this to monitor all projectors that have been registered in the group. If this is not selected, the settings made when the individual projectors were registered will be used. It cannot be set when creating a new group. TIP You can also carry out this operation by selecting "Group" from "New" in the "Edit" menu. 2 After entering the details, click [Register] to start the registration. When the message is displayed, click [OK]. The icon(s) of the projector(s) you registered will be displayed in "Grouping view" or "Detail list view". 3 Right-click the projector icon(s) to register to the group you have created in "Grouping view" or "Detail list view", and select "Edit". TIP You can also carry out this operation by selecting "Edit" from the "Edit" menu. 4 In the "Edit projector" window, select the group name to use for registering in "Parent group" and then click [Change]. The status of the group registration will be displayed as an icon in "Grouping view" or "Detail list view". TIP The registration details can also be checked using "Projector list" in the "View" menu.
-
 1
1 -
2
-
3
-
4
-
5
-
6
-
7
-
8
-
9
-
 10
10 -
 11
11 -
 12
12 -
 13
13 -
 14
14 -
 15
15 -
 16
16 -
 17
17 -
 18
18 -
 19
19 -
 20
20 -
21
-
22
-
23
-
24
-
25
-
26
-
27
-
28
-
29
-
30
-
31
-
32
-
33
-
34
-
35
-
36
 |
 |