Epson 6100i Operation Guide - EMP Monitor v4.22 - Page 27
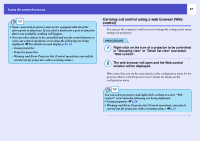
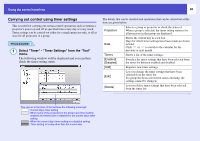
Using the control functions, Carrying out control using control buttons
 |
UPC - 010343858176
View all Epson 6100i manuals
Add to My Manuals
Save this manual to your list of manuals |
Page 27 highlights
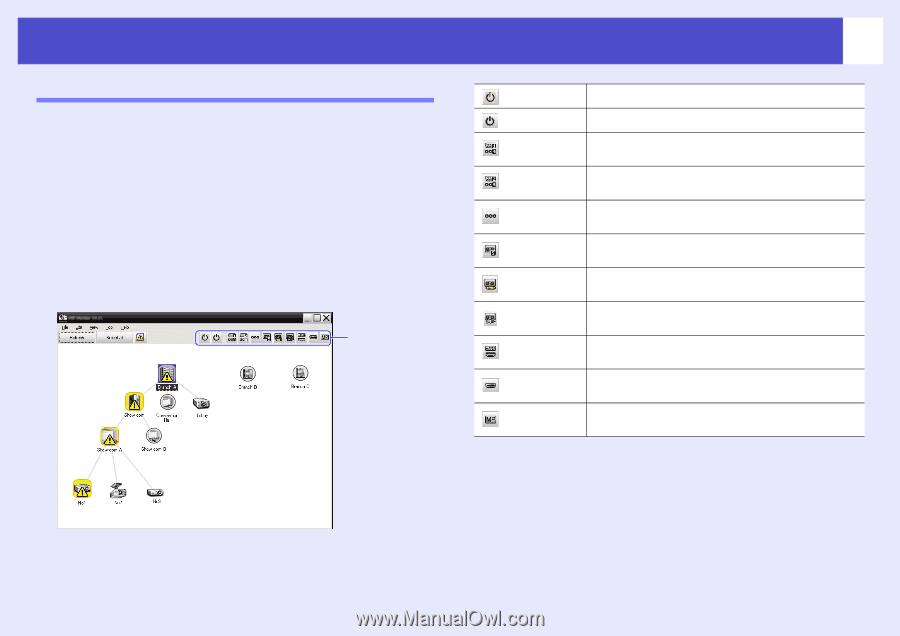
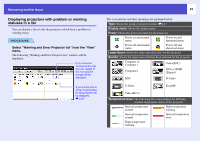
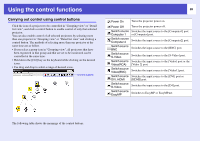
Using the control functions Carrying out control using control buttons Click the icon of a projector to be controlled in "Grouping view" or "Detail list view", and click a control button to enable control of only that selected projector. You can also enable control of all selected projectors by selecting more than one projector in "Grouping view" or "Detail list view" and clicking a control button. The methods of selecting more than one projector at the same time are as follow. • If you select a group icon in "Grouping view", all projectors that have been registered in that group and that are set to be monitored can be controlled at the same time. • Hold down the [Ctrl] key on the keyboard while clicking on the desired icons. • Use drag and drop to select a range of desired icons. Control buttons 26 Power On Turns the projector power on. Power Off Turns the projector power off. Switch source Switches the input source to the [Computer1] port Computer 1 or [Computer] port. Switch source Computer 2 Switches the input source to the [Computer2] port. Switch source BNC Switches the input source to the [BNC] port. Switch source S-Video Switches the input source to the [S-Video] port. Switch source Switches the input source to the [Video] port or the Video(RCA) [Video 2] port. Switch source Video(BNC) Switches the input source to the [Video1] port. Switch source Switches the input source to the [DVI] port or DVI, HDMI [HDMI] port. Switch source D-Video Switches the input source to the [D4] port. Switch source EasyMP Switches to EasyMP or EasyMP.net. The following table shows the meanings of the control buttons.
-
 1
1 -
2
-
3
-
4
-
5
-
6
-
7
-
8
-
9
-
10
-
11
-
12
-
13
-
14
-
15
-
16
-
17
-
18
-
19
-
20
-
21
-
 22
22 -
 23
23 -
 24
24 -
 25
25 -
 26
26 -
 27
27 -
 28
28 -
 29
29 -
 30
30 -
 31
31 -
 32
32 -
33
-
34
-
35
-
36
 |
 |