Epson 836XL User Setup Information
Epson 836XL - Expression - Flatbed Scanner Manual
 |
UPC - 010343820098
View all Epson 836XL manuals
Add to My Manuals
Save this manual to your list of manuals |
Epson 836XL manual content summary:
- Epson 836XL | User Setup Information - Page 1
COLOR SCANNER SETUP GUIDE - Epson 836XL | User Setup Information - Page 2
installation. This equipment generates, uses, and can radiate radio frequency energy and, if not installed and used in accordance with the instructions by the FCC for this equipment. It is the responsibility of the user to obtain and use a shielded equipment interface cable with this device. If - Epson 836XL | User Setup Information - Page 3
assume. EPSON encourages each user to be responsible and respectful of the copyright laws when using digital cameras and scanners. Trademarks EPSON and EPSON Stylus are registered trademarks of SEIKO EPSON CORPORATION. EPSON SoundAdvice is a service mark, ColorTrue and Expression are registered - Epson 836XL | User Setup Information - Page 4
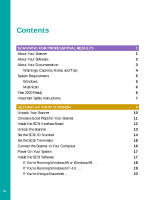
Software 2 About Your Documentation 3 Warnings, Cautions, Notes, and Tips 4 System Requirements 5 Windows 5 Macintosh 6 Year 2000 Ready 6 Important Safety Instructions 7 SETTING UP YOUR SCANNER 9 Unpack Your Scanner 10 Choose a Good Place for Your Scanner 11 Install the SCSI - Epson 836XL | User Setup Information - Page 5
Tips Selecting Resolution Scaling (Resizing) Images Batch Scanning Selecting Your Scanner Driver Recommended Settings Step-by-Step Scanning Instructions Placing Your Original Document Beginning Your Scan Scanning with EPSON TWAIN Pro Scanning with LaserSoft SilverFast 4.0 22 22 24 26 27 27 28 29 29 - Epson 836XL | User Setup Information - Page 6
Auto Document Feeder 50 Installing the Auto Document Feeder 51 PROBLEMS? NEED HELP? 55 Problems and Solutions 55 Setup Problems 56 Scanner Problems 57 Software Problems 58 Image Problems 59 Where To Get Help 62 EPSON Technical Support 62 Software Technical Support 63 INDEX 65 - Epson 836XL | User Setup Information - Page 7
) let you scan incredibly sharp images from practically any source. The scanner includes a state-of-the art PCI SCSI interface board for use in a Windows® system or Macintosh.® About Your Scanner Your EPSON Expression 836XL scanner includes the following features: s Superior image quality with true - Epson 836XL | User Setup Information - Page 8
About Your Software The EPSON Expression 836XL scanner includes these leading-edge applications for professional-quality scans: EPSON TWAIN Pro Ideal general-purpose driver for scanning from hundreds of applications. Includes Text Enhancement Technology (TET) and Auto Area Segmentation (AAS) for - Epson 836XL | User Setup Information - Page 9
scanner and software, installing the optional TPU and ADF, and viewing your electronic manuals, plus scanning tips and troubleshooting advice. For instructions on using the optional equipment, see your EPSON Expression 836XL User's Guide in the Manuals folder on the EPSON Expression 836XL Scanning - Epson 836XL | User Setup Information - Page 10
: Warnings must be followed carefully to avoid bodily injury. Cautions must be observed to avoid damage to your equipment. Notes contain important information about your scanner. Tips contain additional hints for great scanning. 4 - Epson 836XL | User Setup Information - Page 11
MonacoSCAN s Microsoft® Windows 95, Windows 98, or Windows NT® 4.0 (Service Pack 3) s 16MB RAM for Windows 95 and Windows 98; 32MB RAM for Windows NT (32MB RAM recommended for all systems) s 50MB available hard disk space s PCI slot for the Adaptec® SCSI card (included with your scanner) s CD-ROM - Epson 836XL | User Setup Information - Page 12
, monitor, and software. See the documentation for these products for details. EPSON TWAIN Pro supports the Apple® ColorSync™ 2.5 color management system and QuickTime.™ These extensions are automatically installed during the EPSON TWAIN Pro installation. Year 2000 Ready Your EPSON scanner is Year - Epson 836XL | User Setup Information - Page 13
's ampere rating. s Do not attempt to service the scanner yourself. s Unplug the scanner and refer servicing to qualified service personnel under the following conditions: If the power cord or plug is damaged; if liquid has entered the scanner; if the scanner has been dropped or the cabinet damaged - Epson 836XL | User Setup Information - Page 14
8 - Epson 836XL | User Setup Information - Page 15
. 6. Power on your scanner, then power on your computer. 7. Install the SCSI software and scanner software. 8. Install MonacoSCAN, LaserSoft SilverFast 4.0, and Adobe Photoshop 5.0 LE (optional). 9. Install Adobe Acrobat Reader if it's not already on your system. View your electronic manuals. 9 - Epson 836XL | User Setup Information - Page 16
in case you need it later. Your EPSON Expression 836XL comes with these items: EPSON Expression 836XL Scanning Tools CD-ROM scanner Adobe Photoshop 5.0 LE CD-ROM* LaserSoft SilverFast 4.0 CD-ROM (Quick Start Guide is located in CD-ROM case)* PCI SCSI interface board IT8 target* power cable - Epson 836XL | User Setup Information - Page 17
you can easily unplug the power cord, and where the SCSI cable can reach your computer. s Keep the scanner away from direct sunlight and strong light sources. s Be sure there's enough room behind the scanner for the cables, and above the scanner so you can fully raise the document cover. s Avoid - Epson 836XL | User Setup Information - Page 18
Install the SCSI Interface Board You must install your SCSI board before installing the scanner driver and software applications. If you have a Macintosh with a SCSI interface, or if you already have a SCSI board installed in your PC, skip this section. For additional installation information, see - Epson 836XL | User Setup Information - Page 19
shown. Always lock the scanner before transporting it; otherwise, the scanner may be damaged. Be sure the scanner lamp is in the home position. To ensure this, always turn off the scanner before locking the carriage. See your electronic EPSON Expression 836XL User's Guide for more information. If - Epson 836XL | User Setup Information - Page 20
also not recommended, as these may be used for the hard disk. If you select the asterisk (*), the scanner won't work. Use this setting when you need to prepare the scanner for transportation. For more information on selecting an ID number, see your electronic EPSON Expression 836XL User's Guide. 14 - Epson 836XL | User Setup Information - Page 21
, with a switch to turn it on or off on the scanner's back panel. If the scanner is your only SCSI device or the last device in the chain, leave the terminator turned ON (the default setting). ON OFF SW ON OFF SW If the scanner is in the middle of a chain, turn the switch - Epson 836XL | User Setup Information - Page 22
, see your electronic EPSON Expression 836XL User's Guide. 4. Plug in the power cables for your computer, scanner, and other external SCSI devices. If you're using Windows 95 or Windows 98, you can also connect the scanner to your computer's bidirectional parallel port. Use a bidirectional - Epson 836XL | User Setup Information - Page 23
READY light comes on. Install the SCSI Software The EPSON Expression 836XL Scanning Tools CD-ROM includes the Windows 95, Windows 98, Windows NT, and Macintosh drivers for your SCSI board. You need to install the SCSI software for your system before you can use your scanner. Before you begin, make - Epson 836XL | User Setup Information - Page 24
1. Turn on your scanner first; then turn on your computer. A message appears saying that your system has detected new hardware. If your system doesn't automatically detect the SCSI board, run EZ-SCSI, a special Windows SCSI configuration utility. Insert your EPSON Expression 836XL Scanning Tools CD - Epson 836XL | User Setup Information - Page 25
Controllers. You should see your Adaptec PCI SCSI Controller in the list.) If You're Running Windows NT 4.0. . . Depending on how your computer system was originally set up, you may be asked to insert your Windows NT CD-ROM during the scanner installation. Please have your CD-ROM handy, in case it - Epson 836XL | User Setup Information - Page 26
You see the dialog box on the right. 3. Click the Drivers tab. Then click the Add button. After a moment, you see the Install Driver dialog box. 4. In the Manufacturers list, click Adaptec. 20 - Epson 836XL | User Setup Information - Page 27
/AHA-394X or AIC-78XX PCI SCSI Controller. 6. Click OK. If you see a prompt to install the Windows NT CD-ROM, insert it and click OK. Or use the Browse function to go to D:\Adaptec\Win NT\Winnt\4_0 (where D: is your CD-ROM drive). The necessary driver files are copied to your hard - Epson 836XL | User Setup Information - Page 28
the SCSI board that came with the scanner in your Macintosh, you need to install its driver software. 1. Turn on your Macintosh and disable any anti-virus programs. 2. Insert the EPSON Expression 836XL Scanning Tools CD-ROM in your drive. 3. Double-click the CD-ROM icon to open the CD-ROM window - Epson 836XL | User Setup Information - Page 29
5. After installing the software, click Next to open the EPSON TWAIN Pro Setup window. 6. If it's not already selected, choose the interface to which you connected the scanner: SCSI or BiD Parallel. Windows automatically detects your SCSI ID. 7. If you've changed the SCSI ID, select the new ID in - Epson 836XL | User Setup Information - Page 30
4.0 driver, see the instructions that came with the LaserSoft SilverFast CD-ROM. If You're Using a Macintosh. . . 1. Turn on your scanner and wait for the READY light to come on. Then turn on your Macintosh and turn off any virus protection programs you're using. 2. Insert the EPSON Expression 836XL - Epson 836XL | User Setup Information - Page 31
Calibration window. before EPSON Scanner folder. You can now install any additional software that came with your scanner. See the instructions for installing MonacoSCAN (page 27) and Adobe Photoshop 5.0 LE (page 29). For instructions on installing the SilverFast 4.0 driver, see the instructions - Epson 836XL | User Setup Information - Page 32
with any application that supports ISIS drivers, such as Adobe Acrobat Capture.® Before you install the driver, make sure you install the application you intend to use it with, and select the EPSON ISIS driver. Then follow these steps: 1. Insert the EPSON Expression 836XL Scanning Tools CD-ROM - Epson 836XL | User Setup Information - Page 33
Next. You see the software license agreement. 6. Read the agreement and click Yes. 7. Follow the instructions on the screen to complete the installation. 8. When you see the Setup Complete window, click Finish. Follow the instructions in your online MonacoSCAN User's Guide to use the program. 27 - Epson 836XL | User Setup Information - Page 34
EPSON Expression 836XL Scanning Tools CD-ROM in your drive. 3. Double-click the CD-ROM icon to open the CD-ROM window, if necessary. Then open the MonacoSCAN 2.6 folder. 4. Double-click the MonacoSCAN 2.6 Installer icon. The MonacoSCAN title screen appears. 5. Click Continue. You see the software - Epson 836XL | User Setup Information - Page 35
. When you see the User Information dialog box, enter your name and company, and then enter the serial number (including the hyphen) of your software exactly as it appears on the CD-ROM case. Then click Next. 7. Follow the instructions on the screen to install the software and create a Photoshop - Epson 836XL | User Setup Information - Page 36
card. Click Next. 7. Follow the instructions on the screen to install the software and create an Adobe Photoshop 5.0 LE folder on your hard disk. 8. When installation is complete, restart your computer. For more detailed installation instructions, see the Install file on the Adobe Photoshop 5.0 CD - Epson 836XL | User Setup Information - Page 37
includes step-by-step scanning instructions. Scanning an image allows you software. This is the software application where you'll import your scanned image. This is the scanner driver you're using. Your scanner comes with EPSON TWAIN Pro and LaserSoft SilverFast window for use in your document. 31 - Epson 836XL | User Setup Information - Page 38
some corrections in your scanning software, you'll need to do major photo retouching in a program such as Adobe Photoshop to correct or mask problems such as a coffee stain " in your electronic EPSON TWAIN Pro User's Guide or the section on Prescanning in your electronic SilverFast documentation. 32 - Epson 836XL | User Setup Information - Page 39
Design" in your electronic SilverFast manual or "Creating Multiple Marquees" in your electronic EPSON TWAIN Pro User's Guide for more information. Selecting Your Scanner Driver The scanner driver is what you select as the "source" in your application. This is the software that allows your computer - Epson 836XL | User Setup Information - Page 40
" on page 36 shows you how to select a driver and settings. For details on using EPSON TWAIN Pro, see your electronic EPSON TWAIN Pro User's Guide on your EPSON Expression 836XL Scanning Tools CD-ROM. For details on using LaserSoft SilverFast 4.0, see the electronic documentation on the LaserSoft - Epson 836XL | User Setup Information - Page 41
Windows steps are the same. Placing Your Original Document 1. Raise the scanner cover and place your document face down on the document table. If you're scanning a transparency, the optional transparency unit should be installed Documents" in your electronic EPSON Expression 836XL User's Guide. 35 - Epson 836XL | User Setup Information - Page 42
and selected your scanner driver, continue with the instructions under "Scanning with EPSON TWAIN Pro" below or "Scanning with LaserSoft SilverFast 4.0" on page 39. If you're using the ISIS driver, see your electronic EPSON Expression 836XL ISIS Driver User's Guide. Scanning with EPSON TWAIN Pro - Epson 836XL | User Setup Information - Page 43
3. Open the scanner software. For example, choose Import from Photoshop 5.0 LE's File menu. In Windows, select TWAIN_32. On a Macintosh, select TWAIN_Acquire. The EPSON TWAIN Pro main window appears. 4. Choose the Document Source, Preview Image Type, and Destination. button For example, if you - Epson 836XL | User Setup Information - Page 44
on the front of the scanner flickers while it's scanning. In a few moments, a scanned image is imported into your host application's window. (If the READY light continues to blink, it may indicate an error condition. See your electronic EPSON TWAIN Pro User's Guide for more information.) 8. Click - Epson 836XL | User Setup Information - Page 45
-quality interface between your EPSON Expression 836XL scanner and the sophisticated imaging environment of Adobe Photoshop. If your scanner didn't come with SilverFast, skip to page 41. 1. Start Photoshop. 2. Choose Import from the File menu and select SilverFast (Epson). The personalization dialog - Epson 836XL | User Setup Information - Page 46
on the front of the scanner flickers while it's scanning. In a few moments, the scanned image is imported into Photoshop 5.0 LE. (If the READY light continues to blink, it may indicate an error condition. See your electronic EPSON Expression 836XL User's Guide for more information.) Don't leave - Epson 836XL | User Setup Information - Page 47
CD-ROM includes the following electronic manuals: s EPSON Expression 836XL User's Guide (E836XL.pdf) s EPSON TWAIN Pro User's Guide (TwainPro.pdf) s ISIS Driver User's Guide (Isis.pdf) s MonacoSCAN User's Guide (Monaco.pdf, included only with the standard version of the scanner) If you have the - Epson 836XL | User Setup Information - Page 48
Acrobat Reader Follow these instructions to install Adobe Acrobat Reader 4.0. If you have an earlier version of Acrobat Reader on your system, you should uninstall it before you install Adobe Acrobat Reader 4.0. If You're Running Windows. . . 1. Insert the EPSON Expression 836XL Scanning Tools CD - Epson 836XL | User Setup Information - Page 49
If You're Using a Macintosh. . . 1. Insert the EPSON Expression 836XL Scanning Tools CD-ROM in your drive. 2. Double-click the CD-ROM icon. 3. Double-click the Manuals folder, then double-click the Adobe Acrobat Reader 4.0 folder. 4. Double-click the Reader Installer icon. You see the Reader 4.0 - Epson 836XL | User Setup Information - Page 50
an electronic manual, you'll bookmarks, if the manual has them. Some manuals only have a table of contents, but you can also use this to navigate the manual if the chapter and the right side of the document to move through a manual. (The box to the left of the scroll bar displays the current - Epson 836XL | User Setup Information - Page 51
the reflective document mat that came with the unit. This section explains how to install the TPU. For instructions on scanning transparencies, using the film holders, and scanning normal documents with the transparency unit installed, see your electronic EPSON Expression 836XL User's Guide. 45 - Epson 836XL | User Setup Information - Page 52
Unit Make sure all these items are included in the box with the TPU. Contact your EPSON dealer if anything is missing or damaged. transparency unit reflective document mat transparency guide guide and adjust pins 35 mm slide holder 35 mm filmstrip holder medium format film holder 4 × 5-inch - Epson 836XL | User Setup Information - Page 53
outer holes labeled CLAMP. You must also lock the transportation lock screw on the scanner before transporting it. (See your electronic EPSON Expression 836XL User's Guide.) If you can't replace the shipping screws, the TPU's lamp assembly may not be in its home position. Reattach the TPU to the - Epson 836XL | User Setup Information - Page 54
Installing the Transparency Unit 1. Make sure the scanner is turned off. Then unplug the power cable from the scanner. 2. Remove the document cover by grasping it beside the hinges and lifting it straight up. 3. Align the TPU hinge pins with the holes in the scanner, then lower the TPU until the - Epson 836XL | User Setup Information - Page 55
Lift the TPU. 2. If your scanner doesn't already have a guide pin and adjust pin installed, insert the guide pin and adjust pin that came with the TPU. Make sure the adjust pin's arrow faces the guide pin. guide pin 3. Place the transparency guide above the scanner's document table over the pins - Epson 836XL | User Setup Information - Page 56
glass and cause scanning errors. For more information, see your electronic EPSON Expression 836XL User's Guide. Auto Document Feeder The auto document feeder (ADF) automatically loads multi-page documents into your scanner. It is particularly useful for OCR (optical character recognition) scanning - Epson 836XL | User Setup Information - Page 57
and heavy. Clear a wide space around the scanner before unpacking and installing the ADF. You may need to have someone help you lift it. 1. Make sure your scanner is turned off, then unplug the scanner's power and interface cables. 2. Remove your scanner's document cover by grasping it beside the - Epson 836XL | User Setup Information - Page 58
screws with the holes as shown: . The ADF is heavy, so you may need to have someone help you lift it. 6. Twist the knobs onto the ends of the screws and tighten them using the enclosed screwdriver. 7. Attach the ADF's connector to the scanner's option interface. Secure the connection by tightening - Epson 836XL | User Setup Information - Page 59
" pages. Using the ISIS driver Place the document stack face down, top edge first. Use the 1 to N setting. Place the document stack face down, top edge first. Use the 1 to N setting. For additional instructions on scanning with the ADF, see your electronic EPSON Expression 836XL User's Guide. 53 - Epson 836XL | User Setup Information - Page 60
54 - Epson 836XL | User Setup Information - Page 61
gives you the basics for diagnosing and solving scanner problems. For additional solutions, see the "Troubleshooting" sections of your electronic EPSON TWAIN Pro User's Guide and EPSON Expression 836XL User's Guide. If none of the suggestions solve your problem, see "Where To Get Help" on page 62 - Epson 836XL | User Setup Information - Page 62
it should be active. s Make sure your SCSI board is installed correctly. If it isn't seated firmly in the PCI slot, the computer may not recognize it. s Run EZ-SCSI, a special SCSI configuration utility for Windows 95, 98, and NT. Insert your EPSON Expression 836XL Scanning Tools CD-ROM. Click Start - Epson 836XL | User Setup Information - Page 63
sure you selected Expression 836XL if you are using LaserSoft SilverFast 4.0, or EPSON TWAIN Pro if you are using EPSON TWAIN Pro. s Make sure that the SCSI terminator is set up correctly. See "Connect the Scanner to Your Computer" on page 16 for details. s Run the scanner test (Windows only) to - Epson 836XL | User Setup Information - Page 64
sure the unit is correctly installed and connected to the scanner's OPTION interface. s Make sure you're selecting the correct Document Source (EPSON TWAIN Pro) or Image Type (LaserSoft SilverFast) setting for your image. Software Problems If you can't open the scanner driver. . . s Check the cable - Epson 836XL | User Setup Information - Page 65
. s Check your software installation. Make sure that your software is correctly installed and set up. If all else fails, uninstall your software, then reinstall it. If you need to reinstall your scanner software. . . See the installation instructions beginning on page 22. Image Problems If the file - Epson 836XL | User Setup Information - Page 66
or has gaps. . . s Check the brightness. Decrease the software or driver's brightness setting. s Try adjusting the Gamma setting. s Check and condition of your document. Make sure the document is placed flat against the scanner's document table glass. If only part of the image is blurred, part of - Epson 836XL | User Setup Information - Page 67
If the edges of the document are not scanned. . . Check the position of your source document. Adjust your document's position so that the image is within the glass area. If your image scans at an angle. . . Check the position of your source document. It may be placed at an angle on the document - Epson 836XL | User Setup Information - Page 68
support services Service Access World Wide Web From the Internet, you can reach EPSON's Home Page at http://www.epson.com. EPSON Internet FTP Site If you have Internet FTP capability, use your Web browser (or other software for FTP downloading) to log onto ftp.epson.com with the user - Epson 836XL | User Setup Information - Page 69
(EPSON Expression 836XL) s Product serial number (located on the back of scanner) s Computer configuration s Description of the problem You can purchase genuine EPSON supplies and accessories from EPSON Accessories at (800) 873-7766 or visit our web site at www.epsonsupplies.com (U.S. sales only - Epson 836XL | User Setup Information - Page 70
64 - Epson 836XL | User Setup Information - Page 71
Pro installing, 22 to 25 scanning with, 36 to 38 Exposure setting, 37, 40 EZ-SCSI, 18, 56 F File size, 59 B Batch scanning, 33 Blurred image, 60 C Cable length, 16 Calibrating your screen, 23 to 25 Connecting the scanner to your computer, 16 G Guide pin, 49 H Help EPSON, 62 to 63 software, 63 - Epson 836XL | User Setup Information - Page 72
Installing SCSI interface board, 12 software, 17 to 30 ISIS driver, installing, 26 L LaserSoft SilverFast, 39 to 40 Lock, transportation, 13 M Macintosh installing SCSI board, 12 installing software, 24 to 25, 28, 30 system requirements, 6 Manuals, viewing electronic, 41 to 44 Marquee, setting scan - Epson 836XL | User Setup Information - Page 73
, 37, 40 SilverFast, 39 to 40 Software problems, 58 to 59 Software settings, 34 Software, installing Macintosh, 24 to 25, 28, 30 Windows, 17 to 24, 29 Source, selecting, 33 Space requirements, 11 Stopper, installing, 53 Support, 62 to 63 System requirements, 5 to 6 Troubleshooting image quality, 59
-
 1
1 -
 2
2 -
 3
3 -
 4
4 -
 5
5 -
 6
6 -
 7
7 -
8
-
9
-
10
-
11
-
12
-
13
-
14
-
15
-
16
-
17
-
18
-
19
-
20
-
21
-
22
-
23
-
24
-
25
-
26
-
27
-
28
-
29
-
30
-
31
-
32
-
33
-
34
-
35
-
36
-
37
-
38
-
39
-
40
-
41
-
42
-
43
-
44
-
45
-
46
-
47
-
48
-
49
-
50
-
51
-
52
-
53
-
54
-
55
-
56
-
57
-
58
-
59
-
60
-
61
-
62
-
63
-
64
-
65
-
66
-
67
-
68
-
69
-
70
-
71
-
72
-
73
 |
 |

COLOR SCANNER
SETUP GUIDE