Epson 836XL User Setup Information - Page 46
moments, the scanned image is imported into Photoshop 5.0 LE., light continues to blink
 |
UPC - 010343820098
View all Epson 836XL manuals
Add to My Manuals
Save this manual to your list of manuals |
Page 46 highlights
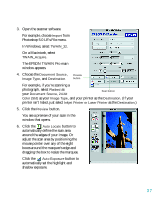
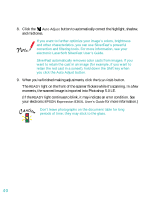
8. Click the Auto Adjust button to automatically correct the highlight, shadow, and midtones. If you want to further optimize your image's colors, brightness and other characteristics, you can use SilverFast's powerful correction and filtering tools. For more information, see your electronic LaserSoft SilverFast User's Guide. SilverFast automatically removes color casts from images. If you want to retain the cast in an image (for example, if you want to retain the red cast in a sunset), hold down the Shift key when you click the Auto Adjust button. 9. When you've finished making adjustments, click the Scan RGB button. The READY light on the front of the scanner flickers while it's scanning. In a few moments, the scanned image is imported into Photoshop 5.0 LE. (If the READY light continues to blink, it may indicate an error condition. See your electronic EPSON Expression 836XL User's Guide for more information.) Don't leave photographs on the document table for long periods of time; they may stick to the glass. 40
-
 1
1 -
2
-
3
-
4
-
5
-
6
-
7
-
8
-
9
-
10
-
11
-
12
-
13
-
14
-
15
-
16
-
17
-
18
-
19
-
20
-
21
-
22
-
23
-
24
-
25
-
26
-
27
-
28
-
29
-
30
-
31
-
32
-
33
-
34
-
35
-
36
-
37
-
38
-
39
-
40
-
 41
41 -
 42
42 -
 43
43 -
 44
44 -
 45
45 -
 46
46 -
 47
47 -
 48
48 -
 49
49 -
 50
50 -
 51
51 -
52
-
53
-
54
-
55
-
56
-
57
-
58
-
59
-
60
-
61
-
62
-
63
-
64
-
65
-
66
-
67
-
68
-
69
-
70
-
71
-
72
-
73
 |
 |
