Epson B-510DN User's Guide - Page 131
Cleaning the Print Head, Using the Head Cleaning Utility for Windows
 |
View all Epson B-510DN manuals
Add to My Manuals
Save this manual to your list of manuals |
Page 131 highlights
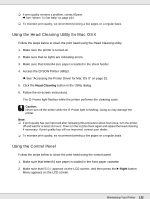
Cleaning the Print Head If you find that your printouts are unexpectedly faint or have gaps in them, you may be able to solve these problems by cleaning the print head, which ensures that the nozzles are delivering ink properly. You can clean the print head from your computer using the Head Cleaning utility in the printer driver or from the printer by using the control panel or buttons. Note: ❏ Clean the print head only if print quality declines; for example, if the printout is blurry or the color is incorrect or missing. ❏ Use the Nozzle Check utility first to confirm that the print head needs to be cleaned. This saves ink. ❏ When ink is low you may not be able to clean the print head. When ink is expended you cannot clean the print head. Replace the appropriate ink cartridge first. & See "Replacing an Ink Cartridge" on page 120. Using the Head Cleaning Utility for Windows Follow the steps below to clean the print head using the Head Cleaning utility. 1. Make sure the printer is turned on. 2. Make sure that no lights are indicating errors. 3. Make sure that letter/A4 size paper is loaded in the front paper cassette. 4. Right-click the printer icon on the taskbar, then select Head Cleaning. If the printer icon does not appear, refer to the following section to add the icon. & See "From the Shortcut Icon on the Taskbar" on page 15. 5. Follow the on-screen instructions. The P Power light flashes while the printer performs the cleaning cycle. c Caution: Never turn off the printer while the P Power light is flashing. Doing so may damage the printer. Note: ❏ If print quality has not improved after repeating this procedure, turn off the printer and wait for at least six hours. Then run the nozzle check again and repeat the head cleaning if necessary. Maintaining Your Printer 131
-
 1
1 -
2
-
3
-
4
-
5
-
6
-
7
-
8
-
9
-
10
-
11
-
12
-
13
-
14
-
15
-
16
-
17
-
18
-
19
-
20
-
21
-
22
-
23
-
24
-
25
-
26
-
27
-
28
-
29
-
30
-
31
-
32
-
33
-
34
-
35
-
36
-
37
-
38
-
39
-
40
-
41
-
42
-
43
-
44
-
45
-
46
-
47
-
48
-
49
-
50
-
51
-
52
-
53
-
54
-
55
-
56
-
57
-
58
-
59
-
60
-
61
-
62
-
63
-
64
-
65
-
66
-
67
-
68
-
69
-
70
-
71
-
72
-
73
-
74
-
75
-
76
-
77
-
78
-
79
-
80
-
81
-
82
-
83
-
84
-
85
-
86
-
87
-
88
-
89
-
90
-
91
-
92
-
93
-
94
-
95
-
96
-
97
-
98
-
99
-
100
-
101
-
102
-
103
-
104
-
105
-
106
-
107
-
108
-
109
-
110
-
111
-
112
-
113
-
114
-
115
-
116
-
117
-
118
-
119
-
120
-
121
-
122
-
123
-
124
-
125
-
 126
126 -
 127
127 -
 128
128 -
 129
129 -
 130
130 -
 131
131 -
 132
132 -
 133
133 -
 134
134 -
 135
135 -
 136
136 -
137
-
138
-
139
-
140
-
141
-
142
-
143
-
144
-
145
-
146
-
147
-
148
-
149
-
150
-
151
-
152
-
153
-
154
-
155
-
156
-
157
-
158
-
159
-
160
-
161
-
162
-
163
-
164
-
165
-
166
-
167
-
168
-
169
-
170
-
171
-
172
-
173
-
174
-
175
-
176
-
177
-
178
-
179
-
180
-
181
-
182
-
183
-
184
-
185
-
186
-
187
-
188
-
189
-
190
 |
 |
