Epson TM T88II User Manual - Page 17
Connecting the Drawer - serial cable
 |
View all Epson TM T88II manuals
Add to My Manuals
Save this manual to your list of manuals |
Page 17 highlights
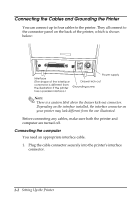
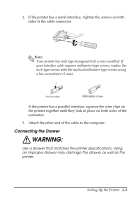
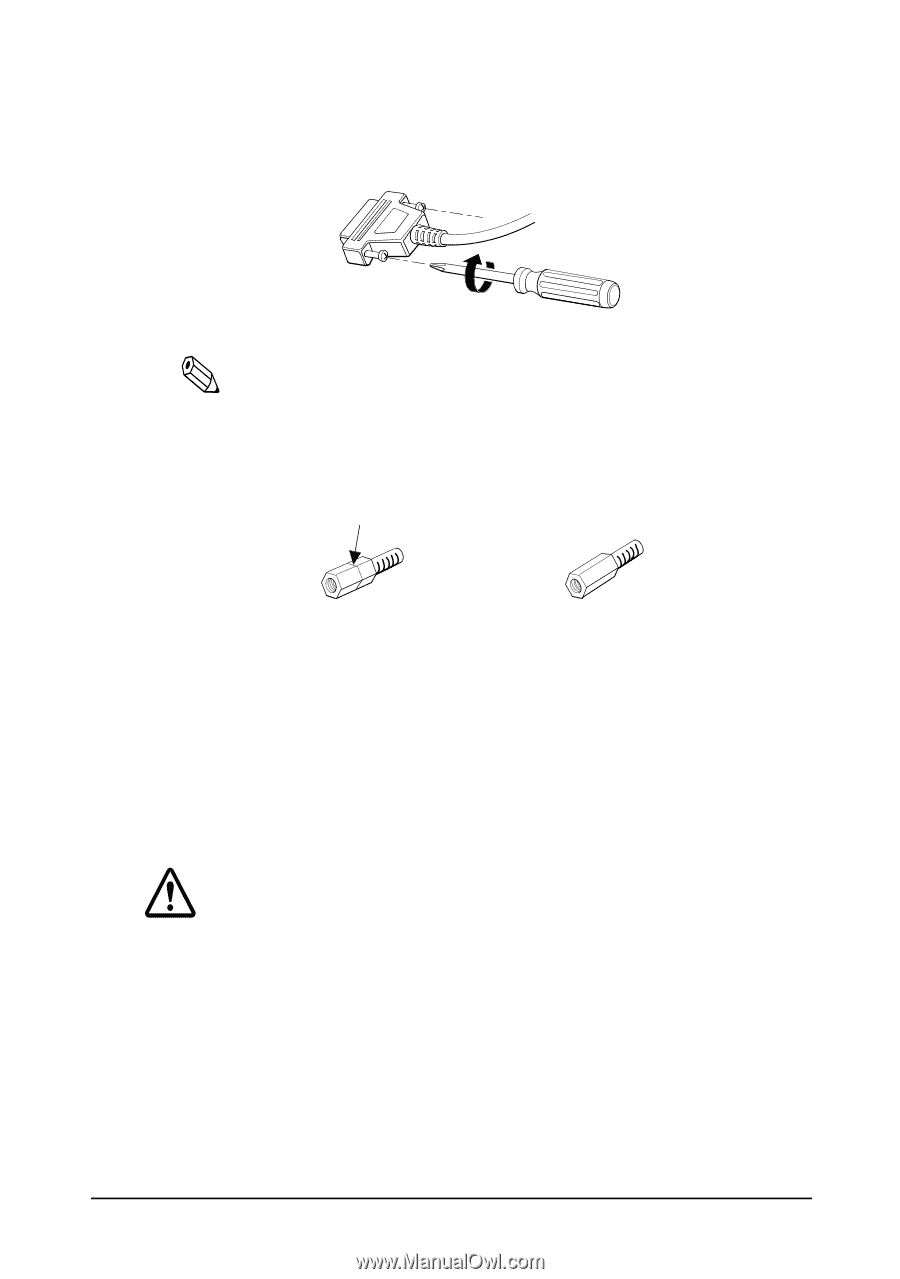
2. If the printer has a serial interface, tighten the screws on both sides of the cable connector. Note: Your printer has inch-type hexagonal lock screws installed. If your interface cable requires millimeter-type screws, replace the inch-type screws with the enclosed millimeter-type screws using a hex screwdriver (5 mm). Inch screw Millimeter screw If the printer has a parallel interface, squeeze the wire clips on the printer together until they lock in place on both sides of the connector. 3. Attach the other end of the cable to the computer. Connecting the Drawer WARNING: Use a drawer that matches the printer specifications. Using an improper drawer may damage the drawer as well as the printer. Setting Up the Printer 1-3
-
 1
1 -
2
-
3
-
4
-
5
-
6
-
7
-
8
-
9
-
10
-
11
-
 12
12 -
 13
13 -
 14
14 -
 15
15 -
 16
16 -
 17
17 -
 18
18 -
 19
19 -
 20
20 -
 21
21 -
 22
22 -
23
-
24
-
25
-
26
-
27
-
28
-
29
-
30
-
31
-
32
-
33
-
34
-
35
-
36
-
37
-
38
-
39
-
40
-
41
-
42
-
43
-
44
-
45
-
46
-
47
-
48
-
49
-
50
-
51
-
52
 |
 |
Setting Up the Printer
1-3
2.
If the printer has a serial interface,
tighten the screws on both
sides of the cable connector.
Note:
Your printer has inch-type hexagonal lock screws installed. If
your interface cable requires millimeter-type screws, replace the
inch-type screws with the enclosed millimeter-type screws using
a hex screwdriver (5 mm).
If the printer has a parallel interface, squeeze the wire clips on
the printer together until they lock in place on both sides of the
connector.
3.
Attach the other end of the cable to the computer.
Connecting the Drawer
WARNING:
Use a drawer that matches the printer specifications. Using
an improper drawer may damage the drawer as well as the
printer.
Inch screw
Millimeter screw