Epson TM T88II User Manual - Page 49
Adjusting the Paper Near End Detector
 |
View all Epson TM T88II manuals
Add to My Manuals
Save this manual to your list of manuals |
Page 49 highlights
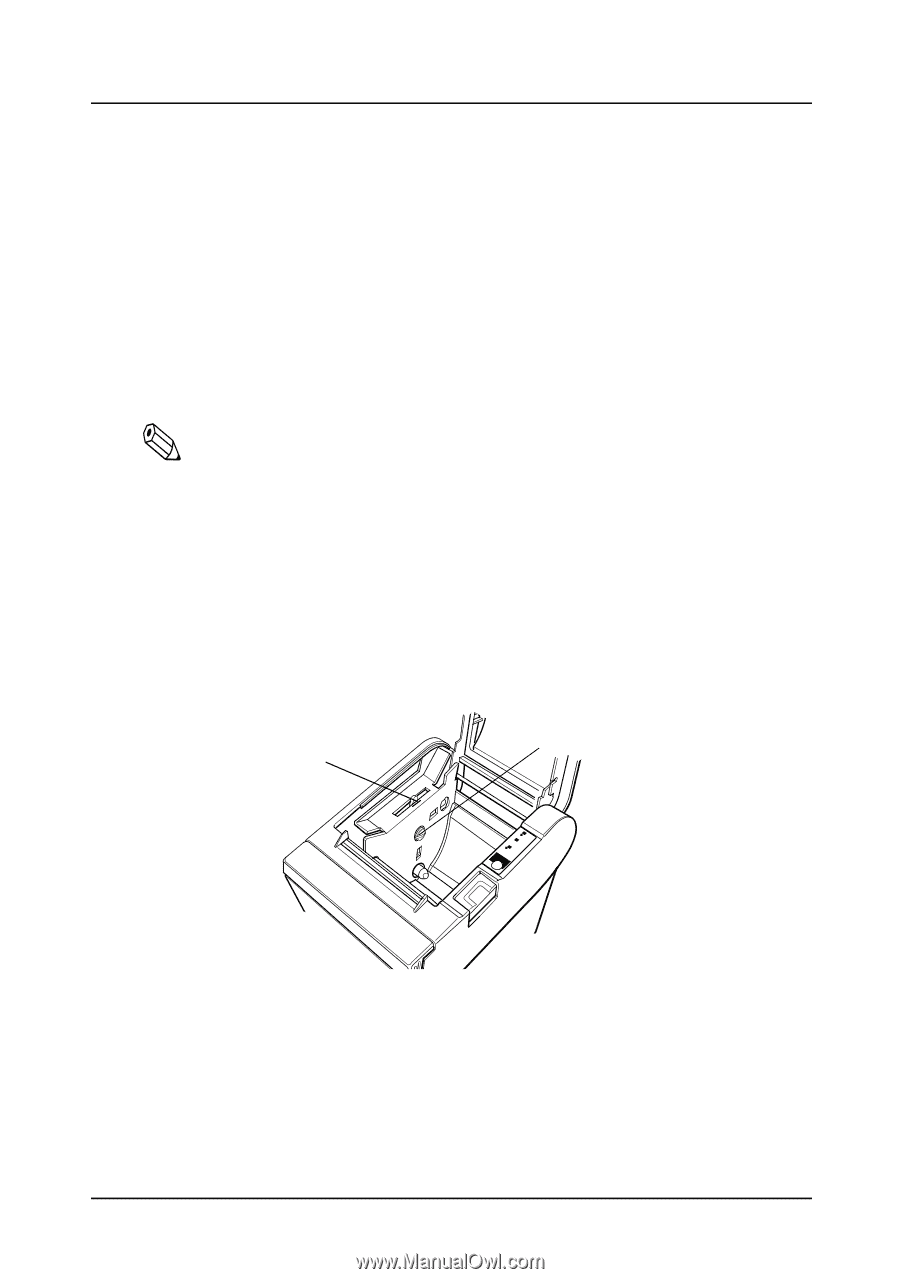
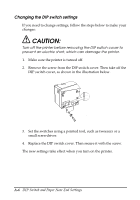
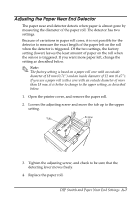
Adjusting the Paper Near End Detector The paper near end detector detects when paper is almost gone by measuring the diameter of the paper roll. The detector has two settings. Because of variations in paper roll cores, it is not possible for the detector to measure the exact length of the paper left on the roll when the detector is triggered. Of the two settings, the factory setting (lower) leaves the least amount of paper on the roll when the sensor is triggered. If you want more paper left, change the setting as described below. Note: The factory setting is based on a paper roll core with an outside diameter of 18 mm (0.71") and an inside diameter of 12 mm (0.47"). If you use a paper roll with a core with an outside diameter of more than 18 mm, it is better to change to the upper setting, as described below. 1. Open the printer cover, and remove the paper roll. 2. Loosen the adjusting screw and move the tab up to the upper setting. Tab Screw FOEEUPDTAPEERRRPOORWER 3. Tighten the adjusting screw, and check to be sure that the detecting lever moves freely. 4. Replace the paper roll. DIP Switch and Paper Near End Settings A-7
-
 1
1 -
2
-
3
-
4
-
5
-
6
-
7
-
8
-
9
-
10
-
11
-
12
-
13
-
14
-
15
-
16
-
17
-
18
-
19
-
20
-
21
-
22
-
23
-
24
-
25
-
26
-
27
-
28
-
29
-
30
-
31
-
32
-
33
-
34
-
35
-
36
-
37
-
38
-
39
-
40
-
41
-
42
-
43
-
 44
44 -
 45
45 -
 46
46 -
 47
47 -
 48
48 -
 49
49 -
 50
50 -
 51
51 -
 52
52
 |
 |