Epson XP-800 Quick Guide - Page 36
Connect the Printer to Your Wireless Network, when you're finished entering your network name. - wireless setup
 |
View all Epson XP-800 manuals
Add to My Manuals
Save this manual to your list of manuals |
Page 36 highlights
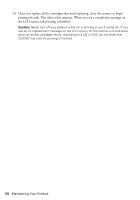
Connect the Printer to Your Wireless Network If you are unable to connect to your wireless network using the product CD and the Start Here sheet, you can use the touch screen on your product. Before you start, make sure you know your network name (SSID) and password. 1. Press if necessary, then select Wi-Fi Setup on the touch screen. 2. Select Wi-Fi Setup Wizard. 3. Scroll down until you see the name of your wireless network, then select it. Continue with step 6. If you don't see your network name, select Other Networks. You see this screen: 4. Enter your network name (SSID). ■ Press the touch screen buttons repeatedly to scroll through characters. ■ If your network name has uppercase (ABC) or lowercase (abc) letters, make sure you enter them correctly. ■ Press or to move the cursor. ■ Press to enter symbols. ■ Press to delete. 5. Select Done when you're finished entering your network name. 6. If your network has security enabled, you see the password screen: 7. Follow the instructions above to enter the password. If your network password has uppercase or lowercase letters, be sure to enter them correctly. 8. Select Done when you're finished entering your password. When the printer is connected to your network, the WiFi light should be green, and not flashing. Make sure you install the software on every computer from which you want to print. When prompted during software setup, select The printer is already on my wireless network. 36 Solving Problems
-
 1
1 -
2
-
3
-
4
-
5
-
6
-
7
-
8
-
9
-
10
-
11
-
12
-
13
-
14
-
15
-
16
-
17
-
18
-
19
-
20
-
21
-
22
-
23
-
24
-
25
-
26
-
27
-
28
-
29
-
30
-
 31
31 -
 32
32 -
 33
33 -
 34
34 -
 35
35 -
 36
36 -
 37
37 -
 38
38 -
 39
39 -
 40
40 -
 41
41 -
42
-
43
-
44
-
45
-
46
-
47
-
48
-
49
-
50
-
51
-
52
 |
 |
