Fujitsu T4220 T4220 User's Guide - Page 109
Connection To The Network
 |
View all Fujitsu T4220 manuals
Add to My Manuals
Save this manual to your list of manuals |
Page 109 highlights
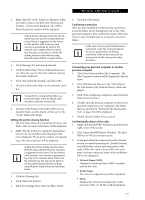
Wireless LAN User's Guide WPA-PSK 802.1x Pre-Shared Key None Enables WPA-Pre-Shared Key. Click on the Configure button to enter the WPA Passphrase. If these settings are not known to you, please consult with your network administrator for the correct settings. Enables 802.1x security. If these settings are not known to you, please consult with your network administrator for the correct settings. Choosing this option opens the 802.1x EAP type drop-down menu. Options include TLS, PEAP, and LEAP Enables the use of pre-shared keys that are defined on both the access point and the station. This is where static WEP keys are entered. Click the Configure button to fill in the Define Pre-Shared Keys window. No security 9. Click OK 10. Click the Advanced tab 11. The Advanced tab allows for the configuration of the options detailed in the table below. Field Name Power Save Mode Network Type 802.11b Preamble Transmit Power Level Wireless Mode Wireless Mode when Starting Ad Hoc Network Description Options are Maximum, Normal, or Off Options are AP (Infrastructure) or Ad Hoc Specifies the preamble setting in 802.11b. The default setting is Short and Long (Access Point mode), which allows both short and long headers in the 802.11b frames. Set to Long Only to override allowing short frames. Options are 100%, 50%, 25%, 12.5% or Lowest transmit power (0mW) Specifies the wireless mode in an access point network. Specifies 5GHz 54 Mbps, 5 GHz 108 Mbps, 2.4 GHz 11 Mbps, or 2.4 GHz 54 Mbps to start an Ad Hoc network if no matching network name is found after scanning all available modes. 12. Click OK 13. If the profile you just created does not activate immediately, click the Profile Management tab, highlight the desired Profile, and click Activate. 14. Click OK to close the Atheros Client Utility. CONNECTION TO THE NETWORK This section explains connection to the network. If there is an administrator of the network, contact the network administrator for data settings. Setting the network Perform the "Setting TCP/IP" and "Confirming the computer and work group names" operations required for network connection. Setting TCP/IP To change the setting of the IP address, you need to be logged in from Windows as an administrator. 1. Click the [Start] button first and then [Control Panel]. 2. If the Control Panel is in Category view, switch to Classic view by clicking "Switch to Classic View" under Control Panel the left frame. (If you are already in Classic view, "Switch to Category View" will be displayed.) 3. Double-click [Network Connections]. A list of currently installed networks will be displayed. 4. Right-click [Wireless Network Connection] in the list, and then click [Properties] in the menu displayed. The [Wireless Network Connection Properties] window will be displayed. 5. Click the [General] tab if it is not already selected. 6. Click [Internet Protocol (TCP/IP] and then click [Properties]. The [Internet Protocol (TCP/IP) Properties] window will be displayed. 7. Set the IP address as follows: ■ For ad hoc connection: Select [Use the following IP address:] and then enter data for [IP address] and [Subnet mask]. See page 108 for IP address setting. ■ For access point (infrastructure) connection: If your network uses DHCP, select [Obtain an IP address automatically] and [Obtain DNS server address automatically]. If your network uses static IP addresses, consult with your network administrator for the correct IP address settings. 8. Click the [OK] button. Processing will return to the [Wireless Network Connection Properties] window. 9. Click the [OK] button. 10. Close the [Network Connection] window. 101
-
 1
1 -
2
-
3
-
4
-
5
-
6
-
7
-
8
-
9
-
10
-
11
-
12
-
13
-
14
-
15
-
16
-
17
-
18
-
19
-
20
-
21
-
22
-
23
-
24
-
25
-
26
-
27
-
28
-
29
-
30
-
31
-
32
-
33
-
34
-
35
-
36
-
37
-
38
-
39
-
40
-
41
-
42
-
43
-
44
-
45
-
46
-
47
-
48
-
49
-
50
-
51
-
52
-
53
-
54
-
55
-
56
-
57
-
58
-
59
-
60
-
61
-
62
-
63
-
64
-
65
-
66
-
67
-
68
-
69
-
70
-
71
-
72
-
73
-
74
-
75
-
76
-
77
-
78
-
79
-
80
-
81
-
82
-
83
-
84
-
85
-
86
-
87
-
88
-
89
-
90
-
91
-
92
-
93
-
94
-
95
-
96
-
97
-
98
-
99
-
100
-
101
-
102
-
103
-
 104
104 -
 105
105 -
 106
106 -
 107
107 -
 108
108 -
 109
109 -
 110
110 -
 111
111 -
 112
112 -
 113
113 -
 114
114 -
115
-
116
-
117
-
118
-
119
-
120
-
121
-
122
-
123
-
124
-
125
-
126
-
127
-
128
-
129
-
130
-
131
-
132
-
133
-
134
-
135
-
136
 |
 |
