GE A1456W User Manual (a1456w-usermanual-eng) - Page 72
Connecting the camera and printer.
 |
UPC - 846951000641
View all GE A1456W manuals
Add to My Manuals
Save this manual to your list of manuals |
Page 72 highlights
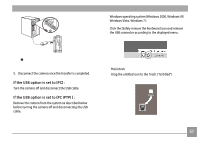
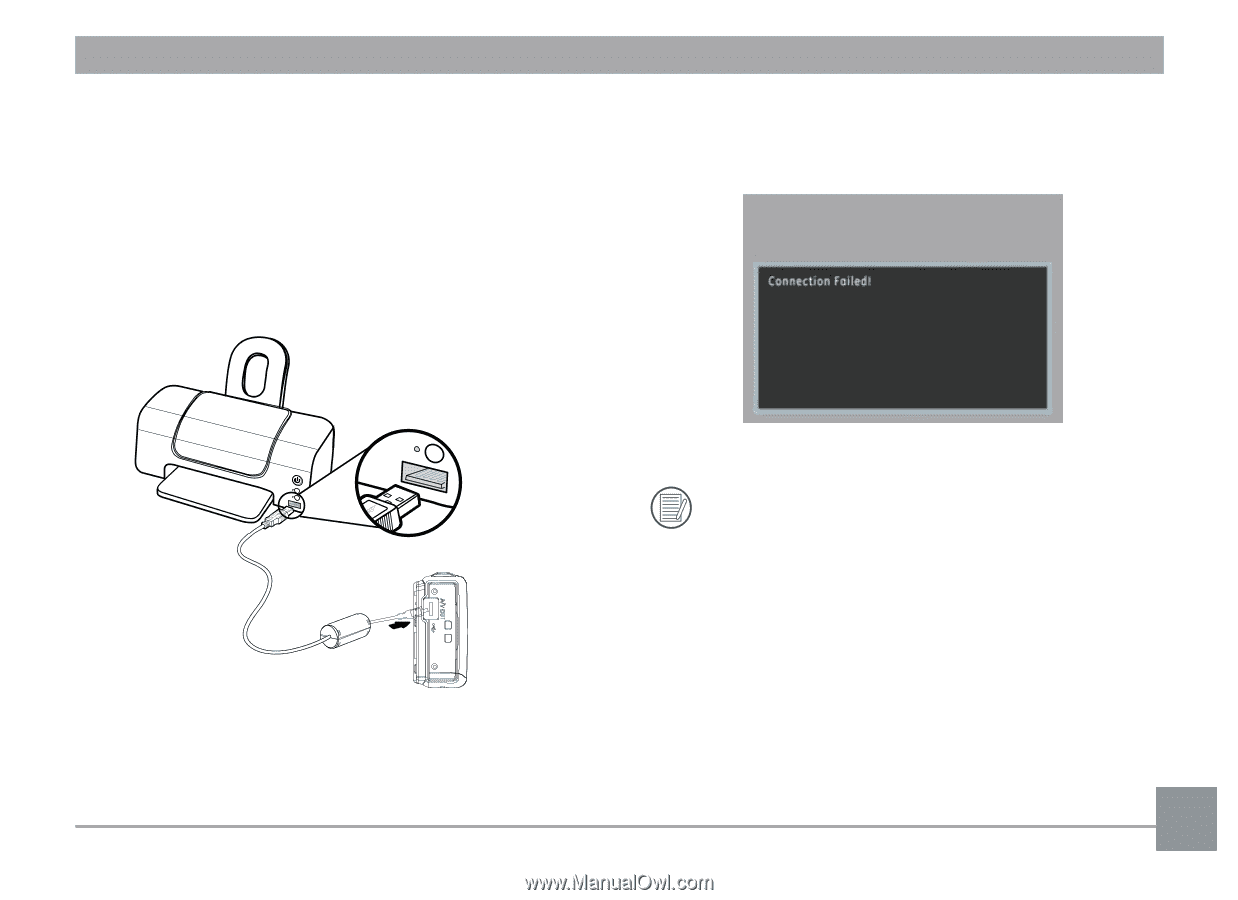
Connecting the camera and printer. 1. Make sure both the camera and printer are turned on. 2. Connect one end of the supplied USB cable to the USB port on your camera. 3. Connect the other end of the cable to the USB port on the printer. If the camera is not connected to a PictBridge compatible printer, the following error message will appear on the LCD screen. The above error message would also appear if the USB mode were set incorrectly, in which case you should disconnect the USB cable, check the USB mode settings, ensure that the Printer is turned on, and then try connecting the USB cable again. 69
-
 1
1 -
2
-
3
-
4
-
5
-
6
-
7
-
8
-
9
-
10
-
11
-
12
-
13
-
14
-
15
-
16
-
17
-
18
-
19
-
20
-
21
-
22
-
23
-
24
-
25
-
26
-
27
-
28
-
29
-
30
-
31
-
32
-
33
-
34
-
35
-
36
-
37
-
38
-
39
-
40
-
41
-
42
-
43
-
44
-
45
-
46
-
47
-
48
-
49
-
50
-
51
-
52
-
53
-
54
-
55
-
56
-
57
-
58
-
59
-
60
-
61
-
62
-
63
-
64
-
65
-
66
-
 67
67 -
 68
68 -
 69
69 -
 70
70 -
 71
71 -
 72
72 -
 73
73 -
 74
74 -
 75
75 -
 76
76 -
 77
77 -
78
-
79
-
80
-
81
-
82
-
83
-
84
-
85
 |
 |
69
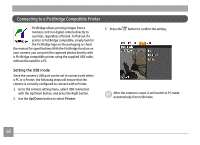
Connecting the camera and printer.
1.
Make sure both the camera and printer are turned on.
2.
Connect one end of the supplied USB cable to the USB port
on your camera.
3.
Connect the other end of the cable to the USB port on the
printer.
If the camera is not connected to a PictBridge compatible
printer, the following error message will appear on the LCD
screen.
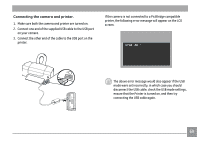
The above error message would also appear if the USB
mode were set incorrectly, in which case you should
disconnect the USB cable, check the USB mode settings,
ensure that the Printer is turned on, and then try
connecting the USB cable again.