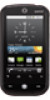
Gigabyte GSmart G1310 User manual- GSmart G1310 English Version
Gigabyte GSmart G1310 Manual
 |
View all Gigabyte GSmart G1310 manuals
Add to My Manuals
Save this manual to your list of manuals |
Gigabyte GSmart G1310 manual content summary:
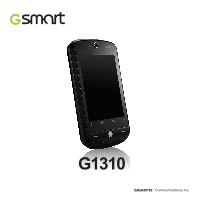
- Gigabyte GSmart G1310 | User manual- GSmart G1310 English Version - Page 1
G1310 - Gigabyte GSmart G1310 | User manual- GSmart G1310 English Version - Page 2
in this document in any form without the prior written permission of GIGA-BYTE COMMUNICATIONS INC. is prohibited. GIGA-BYTE Group, GIGA-BYTE COMMUNICATIONS INC. G1310│0-1 - Gigabyte GSmart G1310 | User manual- GSmart G1310 English Version - Page 3
the battery away from fire since this may cause the battery to explode. • Do not attempt to open or service the battery yourself. • Do not dispose battery in fire or water. • Recycle or dispose used batteries according an aircraft. The phone's network signals may cause interference to the G1310│0-2 - Gigabyte GSmart G1310 | User manual- GSmart G1310 English Version - Page 4
law in most countries to use the phone on board an aircraft. Copyright © 2010. All Rights Reserved. Android is a trademark of Google Inc. Use of this trademark is subject to Google Permissions. Bluetooth and the Bluetooth waste equipment at the time of disposal will allow us to help G1310│0-3 - Gigabyte GSmart G1310 | User manual- GSmart G1310 English Version - Page 5
contact your local city center, household waste disposal service, shop from where you purchased the equipment, Java-Script-based application SW. Google, the Google logo, Android, the Android logo, Gmail, and YouTube are trademarks of Google Inc. Bluetooth and the Bluetooth logo Association. G1310│0-4 - Gigabyte GSmart G1310 | User manual- GSmart G1310 English Version - Page 6
remove the battery from the device during charging. • Before inserting SIM card into the device, make sure that the device is switched servicing to the provider, or an authorized technician under the following conditions: 1. The device has been damaged. 2. When you follow the instructions G1310│0-5 - Gigabyte GSmart G1310 | User manual- GSmart G1310 English Version - Page 7
Getting Started ...1-1 1.1 Your Phone ...1-1 1.2 Installing or uninstalling the SIM Card, Battery and Memory Card 1-3 1.3 Charging the Battery...1-6 1.4 Videos ...5-1 5.2 Viewing Photos and Videos ...5-4 5.3 Music ...5-4 Chapter 6 Programs ...6-1 6.1 Browser ...6-2 6.2 Calculator ...6-4 G1310│0-6 - Gigabyte GSmart G1310 | User manual- GSmart G1310 English Version - Page 8
Manager ...6-10 6.21 Android Manager ...6-10 6.22 USB Manager ...6-11 6.23 Install USB Driver ...6-11 Chapter 7 Managing Your Phone ...7-1 7.1 Phone Settings ...7-1 7.2 Managing Basic Settings ...7-4 7.3 Protecting Your Phone ...7-5 7.4 Resetting Your Phone ...7-6 7.5 Specifications ...7-6 G1310│0-7 - Gigabyte GSmart G1310 | User manual- GSmart G1310 English Version - Page 9
Key • Make or answer a call. • Activate Phone function. • End or reject a call. 13 End Key • To set your phone to sleep mode, press the power G1310│ 1-1 - Gigabyte GSmart G1310 | User manual- GSmart G1310 English Version - Page 10
You can insert your Micro SD card. • Tap to activate the camera. 20 Camera Key • In Camera/Camcorder mode, press to take a photo or video. G1310│ 1-2 - Gigabyte GSmart G1310 | User manual- GSmart G1310 English Version - Page 11
shooting. The camera on the back of 23 5 Megapixels the device supports Camera 5-mega-pixel photo and high-quality video. You need to open the cover 24 Back cover to install or uninstall the battery and the SIM card. NOTE: The battery can also be charged while connecting to a computer - Gigabyte GSmart G1310 | User manual- GSmart G1310 English Version - Page 12
cover with your fingertip to remove it. SIM card The SIM card contains your phone number, memory storage, and the details of the network service. To insert the SIM card Insert the SIM card. Make sure the gold contacts are the battery are aligned with the connectors on the battery slot. G1310│ 1-4 - Gigabyte GSmart G1310 | User manual- GSmart G1310 English Version - Page 13
risk of fire: Use only the original battery designated for the phone. Do not store the battery in temperatures below -10ºC or higher than 45ºC G1310│ 1-5 - Gigabyte GSmart G1310 | User manual- GSmart G1310 English Version - Page 14
the computer. To ensure safety, do not remove the battery from the phone while the AC adapter is connected or while it is being charged. G1310│ 1-6 - Gigabyte GSmart G1310 | User manual- GSmart G1310 English Version - Page 15
Off After installing the SIM card and charging the mail) 1.7 Initial Settings Please insert your SIM card first. When you turn on your phone for the first time or you reset your phone, you need to follow the . 2. Tap the Android Robot icon to begin. In this step, you can tap "Emergency dial" to - Gigabyte GSmart G1310 | User manual- GSmart G1310 English Version - Page 16
Google to use My Location for Google search results and other Google services. Then, tap "Next" to finish the whole initial settings. a headset as it may damage your hearing. • The following instructions are only provided with the original headset of the original manufacturer: silent G1310│ 1-8 - Gigabyte GSmart G1310 | User manual- GSmart G1310 English Version - Page 17
, if you want to view the contacts whose initial letter is M, tap M in the letter Index. Tap to go back to the list of contacts. G1310│ 1-9 - Gigabyte GSmart G1310 | User manual- GSmart G1310 English Version - Page 18
Contacts to phone 1. Tap Application Drawer > Contacts. 2. On Contacts tab, tap Menu > Import/Export > Sim Manager. 3. Tap Menu > Export to phone. Select the contacts you want, or tap Select All to select of missed calls, received messages, battery, and the status of the connection. G1310│ 1-10 - Gigabyte GSmart G1310 | User manual- GSmart G1310 English Version - Page 19
the home page have different functions: Icons Descriptions Tap to launch Application Drawer Tap and hold it to review the five home screens at the same time. Tap to launch Contacts. Tap to launch Call log. Synchronization. Tap to adjust the brightness. Tap to switch SIM1/SIM2. G1310│ 1-11 - Gigabyte GSmart G1310 | User manual- GSmart G1310 English Version - Page 20
on. Volume Speaker is on. Earphone is connected Headset is connected Battery is full. Battery Battery is low. Battery is very low. Battery is charging. G1310│ 1-12 - Gigabyte GSmart G1310 | User manual- GSmart G1310 English Version - Page 21
Network Connection No network signal / No SIM card inserted. Maximum signal strength. PC Sync mode. General notification. FM radio is on. Playing a song. Downloading an application. Shortcut Icons Tap shortcut icons to activate the related functions. Tap and Can Icon to delete it. G1310│ 1-13 - Gigabyte GSmart G1310 | User manual- GSmart G1310 English Version - Page 22
, and the Trash Can Icon appears at the bottom of the Home Screen. Drag the folder icon to the Trash Can Icon to delete it. G1310│ 1-14 - Gigabyte GSmart G1310 | User manual- GSmart G1310 English Version - Page 23
to call, and then, tap or to dial. You can select SIM1 or SIM2 (If SIM2 inserted). 2. When the third party answers your call, tap G1310│2-1 - Gigabyte GSmart G1310 | User manual- GSmart G1310 English Version - Page 24
also. NOTE: Conference call is a network service. Check with your network provider for the the characters. Setting the Input Method Your phone supports several text input methods, and you can select Help you check the version of Guobi. Android keyboard Vibrate on keypress: Phone vibrates G1310│2-2 - Gigabyte GSmart G1310 | User manual- GSmart G1310 English Version - Page 25
Method Tap to activate the settings of Guobi input method. Tap to move to the next text zone. Using Android keyboard To toggle between upper and lower case letter display, tap . To display the numerical and capital letters. Smart input method. Tap to change into normal input method. G1310│2-3 - Gigabyte GSmart G1310 | User manual- GSmart G1310 English Version - Page 26
select SIM1 or SIM2 (If SIM2 inserted). To delete all messages 1. Tap Application Drawer > Messaging. 2. Tap Menu > Delete threads. 3. Tap Delete to delete all messages. G1310│3-1 - Gigabyte GSmart G1310 | User manual- GSmart G1310 English Version - Page 27
-screen keyboard. 8. Tap Send MMS to send your message. 3.3 Voice Message Your phone can send Voice message. To create a voice message 1. Tap Application Drawer > Messaging. G1310│3-2 - Gigabyte GSmart G1310 | User manual- GSmart G1310 English Version - Page 28
displays a successful message. If the e-mail settings are not found, Manual setup is in process automatically. You can follow the instructions to complete the settings. 4. Enter Account name and Your Name, and then Email or Compose (You need to create or log in Gmail) in the submenu. G1310│3-3 - Gigabyte GSmart G1310 | User manual- GSmart G1310 English Version - Page 29
. When you open the e-mail, it shows only a part of the message, unless it is a very short message. Download the e-mail to view the complete content. To reply or forward an e-mail 1. Open an e-mail. 2. Do any of to launch the submenu, and then, tap Remove account. 3. Tap OK to confirm. G1310│3-4 - Gigabyte GSmart G1310 | User manual- GSmart G1310 English Version - Page 30
> Settings > Wireless & networks. 2. Tap Wi-Fi settings. 3. In Wi-Fi networks, tap Add Wi-Fi network. A new window will be displayed. 4. Follow the on-screen instructions and enter the necessary information, and then, tap Save to store settings - Gigabyte GSmart G1310 | User manual- GSmart G1310 English Version - Page 31
VPN to add VPNs. Manual settings for Cellular Data Network Check the availability of these connections with your network service provider and obtain the manually. 1. Tap Application Drawer > Settings > Wireless & networks > Mobile networks > you can select SIM1 or SIM2 (If SIM2 inserted) > GSM/UMTS - Gigabyte GSmart G1310 | User manual- GSmart G1310 English Version - Page 32
selected device to launch device options menu. NOTE: Once a partnership has been created, connecting to that device again will no longer require inputting the password. G1310│ 4-3 - Gigabyte GSmart G1310 | User manual- GSmart G1310 English Version - Page 33
and camera mode. Tap to take a picture. Configuring camera settings. Tap to turn on/off the Geo-tagging function. Tap to set white balance. Icon G1310│5-1 Functions Indicates the recording time. Displays the last video. Tap to go to Review Screen. You have to insert your SD card before recording. - Gigabyte GSmart G1310 | User manual- GSmart G1310 English Version - Page 34
a photo After taking a photo, the function of reviewing photos: Icon Function Tap Set as to set the picture as the contact icon or the wallpaper. Tap Share to share the picture. Tap Delete to delete the picture. Reviewing a video After recording video, the function of reviewing video: G1310│5-2 - Gigabyte GSmart G1310 | User manual- GSmart G1310 English Version - Page 35
, CIF, QVGA, and QCIF MPEG4 and H263 AMRNB, QCELP,EVRC, and AAC 30 seconds (MMS), 10 minutes, and 30 minutes Restore to defaults Auto, Incandescent, G1310│5-3 - Gigabyte GSmart G1310 | User manual- GSmart G1310 English Version - Page 36
mode Video Quality Daylight, and Cloudy On and Off High(30m), Low(30m), MMS(Low, 30s), YouTube(High,10m ), and custom 5.2 Viewing Photos and Videos To view photos in the album 1. Tap Music. Music Screen Playback screen: Displays the playback area with the playback controls. G1310│5-4 - Gigabyte GSmart G1310 | User manual- GSmart G1310 English Version - Page 37
: Tap to go to Now playing list. Use the icons on the left of each media file to arrange the sequence of files for playback. G1310│5-5 - Gigabyte GSmart G1310 | User manual- GSmart G1310 English Version - Page 38
a playlist. 1. Tap Application Drawer > Music. 2. In Library, tap and hold the song you want to add. Then, tap Add to playlist in the pop-up G1310│5-6 - Gigabyte GSmart G1310 | User manual- GSmart G1310 English Version - Page 39
SIM Manager File Manager Talk YouTube Places You can share your location with your friends and view your friends' locations on the map. Find applications and fun games which you can download and install on your phone. To assist you in merging friends' various accounts of Social Networking Services - Gigabyte GSmart G1310 | User manual- GSmart G1310 English Version - Page 40
up alarm clock. Stores names, numbers, e-mail, and other information. Google's search service. Google's news and weather services. Help you get the destination. Views and edits photos and videos. Sends and receives all You can use your fingers to zoom in or zoom out some web pages also. G1310│6-2 - Gigabyte GSmart G1310 | User manual- GSmart G1310 English Version - Page 41
to select from the list of the saved favorite web pages to visit. Review the previous web pages. Tap to exit the web page. Tap to adjust the text on the web page. Select text Page info Share page Downloads Settings Tap to select text on the web page. Tap to view Open in background: G1310│6-3 - Gigabyte GSmart G1310 | User manual- GSmart G1310 English Version - Page 42
warnings: Show warning if there is a problem with a site's security. Advance settings settings for individual websites. Reset to default: Restore default settings. an account in Add an account screen. Please follow the on-screen instruction to log in your account. After log in, you can: 3. - Gigabyte GSmart G1310 | User manual- GSmart G1310 English Version - Page 43
the Google account. Please follow the on-screen instruction to log in. 3. Once logged in, you can begin reading and sending emails from your Gmail account. 6.5 Maps Google's mapping service help you search for the places you want. to attend the destination. You can select Car, Bus, or Walk G1310│6-5 - Gigabyte GSmart G1310 | User manual- GSmart G1310 English Version - Page 44
"Sign in" to sign in the Google account. Please follow the on-screen instruction to log in. 3. Once logged in, tap your account to change your direction. Tap to dial the phone number. Tap to select other service. 6.8 Navigation Navigation is an Internet-connected GPS navigation system with G1310│6-6 - Gigabyte GSmart G1310 | User manual- GSmart G1310 English Version - Page 45
Please follow the on-screen instruction to log in. 3. Once YouTube YouTube is an online video streaming service that allows you to view, search, and upload videos. To Play YouTube 1. Tap Application Drawer > YouTube YouTube or Google account. 6.13 Market Android Market allows you to find and download - Gigabyte GSmart G1310 | User manual- GSmart G1310 English Version - Page 46
you have downloaded. 6. More information: Tap Menu > More. It includes Update Frequency, Update Notification, Demo, and About. 7. If you want to update the weather manually, please and news. 2. Tap Menu > Refresh to update the information. 3. Tap Menu > Settings. You can adjust the settings of the - Gigabyte GSmart G1310 | User manual- GSmart G1310 English Version - Page 47
With this function, you can find the web links to the services you need easily. 1. Tap Application Drawer > Best Choice. 2. Click the desired function, and then, download it online. 6.18 FM Radio You can listen to music/news to go to the available FM stations or tap or to fine tune the G1310│6-9 - Gigabyte GSmart G1310 | User manual- GSmart G1310 English Version - Page 48
Android Manager You can use Android Manager on your PC to synchronize data in your device. Please download Android Manager from Gsmart 's official website and install it in your PC. NOTE: Only Windows XP, Windows Vista, and Windows 7 (32/64 bit) support Android - Gigabyte GSmart G1310 | User manual- GSmart G1310 English Version - Page 49
to manage the downloaded applications. Files: connect and access Android Manager. Android Manager on your GSmart Driver. Wait for a few seconds for the process, then tap "Done" to have the process completed. NOTE: Only Windows XP Service Pack 3 and higher versions support the installation. G1310 - Gigabyte GSmart G1310 | User manual- GSmart G1310 English Version - Page 50
phone. Dual SIM Settings Application SIM Name data roaming, and GSM/UMTS options. Call settings You can select SIM1 or SIM2 (If SIM2 inserted.) Application Description Fixed Dialing Manage the fixed Numbers dialing numbers. Voicemail service Check the service G1310│7-1 - Gigabyte GSmart G1310 | User manual- GSmart G1310 English Version - Page 51
Turn on for some location-based services(LBS). Check to enable GPS satellites. Lock screen with a pattern, PIN, or password. Lock SIM card and change the pin of your SIM card. Enable/disable to show the storage password. Clear credential storage of all contents and reset its password. G1310│7-2 - Gigabyte GSmart G1310 | User manual- GSmart G1310 English Version - Page 52
control the currently running services. Options for the data Automatic restore Factory data reset Description Check to back Android keyboard. You can add, edit, and delete the self-defined words. Voice input & output Application Voice recognizer Description Google' settings of the G1310 - Gigabyte GSmart G1310 | User manual- GSmart G1310 English Version - Page 53
the system will get the information of the current date and time automatically. You can set up the date and the time manually also. 3. Tap Set date. Please use + or - to adjust the month, the day, and the year. Tap Activate an alarm Tap an alarm to activate it and the icon will turn to G1310│7-4 - Gigabyte GSmart G1310 | User manual- GSmart G1310 English Version - Page 54
the SIM/ SIM/RUIM 1 or SIM/RUIM 2 (If SIM2 inserted.) 3. Check Lock SIM/RUIM card. Input the PIN, and then, tap OK. Enable the PIN of the SIM/RUIM card 1. Tap Application Drawer > Settings > Location & security > Set up SIM/RUIM card lock. 2. Select SIM/RUIM 1 or SIM/RUIM 2 (If SIM2 inserted.) G1310 - Gigabyte GSmart G1310 | User manual- GSmart G1310 English Version - Page 55
3. Tap Change SIM/RUIM PIN. Type the old PIN. Then reset > Reset phone > Erase everything to reset the phone. NOTE: Before you reset your device, please back up the data and information. 7.5 Specifications System Information Platform Android individual usage.) Radio Band & Standard G1310│7-6 - Gigabyte GSmart G1310 | User manual- GSmart G1310 English Version - Page 56
card exists at one time when making phone call or internet browsing. Network supporting: (a) SIM 1: 3G (WCDMA), (b) SIM 2: 2G (GSM). If this document is modified, please download the latest version on GSmart's official website. GIGA-BYTE COMMUNICATIONS INC. B2, No.207, Sec.3, Pai-Hsin Road, Hsin
-
 1
1 -
 2
2 -
 3
3 -
 4
4 -
 5
5 -
 6
6 -
 7
7 -
8
-
9
-
10
-
11
-
12
-
13
-
14
-
15
-
16
-
17
-
18
-
19
-
20
-
21
-
22
-
23
-
24
-
25
-
26
-
27
-
28
-
29
-
30
-
31
-
32
-
33
-
34
-
35
-
36
-
37
-
38
-
39
-
40
-
41
-
42
-
43
-
44
-
45
-
46
-
47
-
48
-
49
-
50
-
51
-
52
-
53
-
54
-
55
-
56
 |
 |
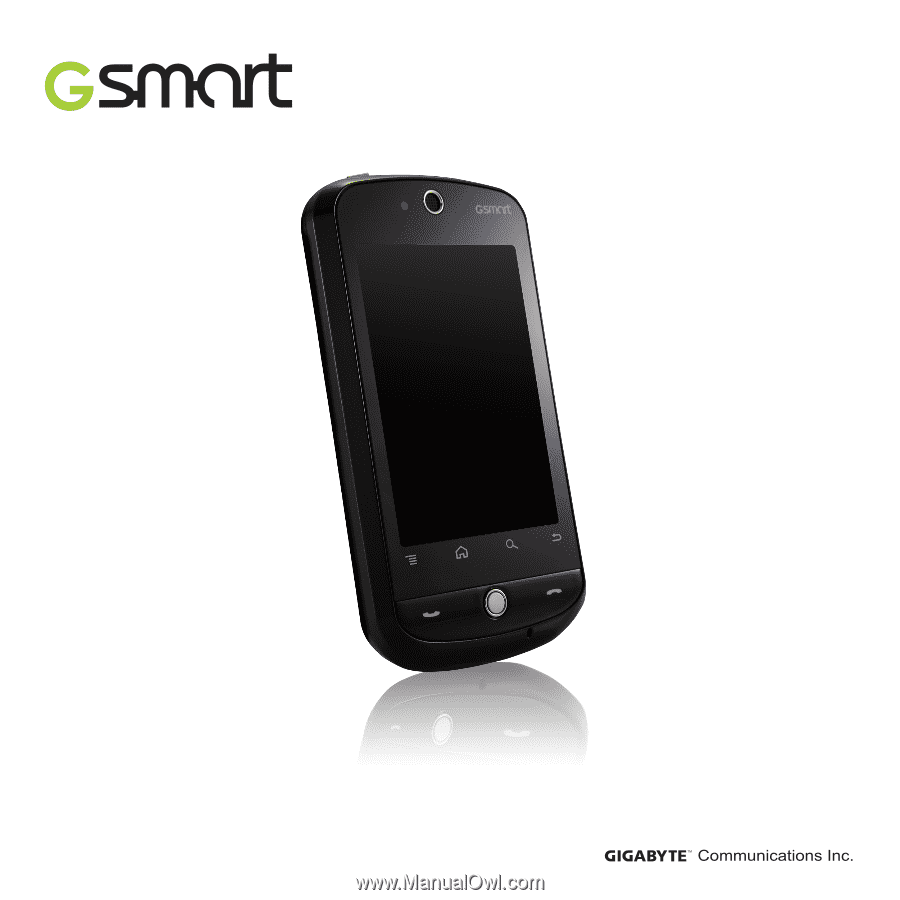
G1310