Hayward OmniLogic Installation Manual - Page 36
Minimum Allowed Pump Speed % / Maximum Allowed Pump Speed
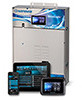 |
View all Hayward OmniLogic manuals
Add to My Manuals
Save this manual to your list of manuals |
Page 36 highlights
information. Minimum Allowed Pump Speed % / Maximum Allowed Pump Speed % - The OmniLogic will automatically calculate these values based on the minimum and maximum RPM that were previously entered. They can be changed as desired. Speed Presets - Set the Low Pump Speed %, Medium Pump Speed %, and High Pump Speed %, presets. These presets will be used when setting schedules for your pump. Accessory Wired to Relay? Select whether the accessory requires the use of a high voltage relay. If Yes is selected: Select Relay - Touching the box will bring you to a table showing all detected relays. Select the relay that is connected to the accessory and touch the Save button to save. The relay should now be shown in the box and you can advance to the next screen to continue the accessory configuration. Does Accessory have a Valve? Select whether the accessory requires a valve to change position when in use. If Yes is selected: How Many? Select how many valves are used for the accessory. Where is the Valve(s) Wired? Selecting the box will bring you to a table showing all detected low voltage relays. Select the relay(s) that is wired to the accessory valve(s), then advance. The valve(s) should now be shown in the box. Advance to the next screen to continue accessory configuration. Would you like your valve(s) to cycle On and Off at a set interval? If you would like the accessory valve(s) to cycle to a set interval while cleaning, select Yes. Set the interval on the next screen. Freeze Protection Enabled? Freeze protection is used to protect the pool and plumbed equipment against freeze damage during cold temperatures. If freeze protection is enabled AND the air temperature sensor falls below the freeze threshold (refer to pump configuration), the OmniLogic will turn on the accessory pump to circulate the water. NOTE: The remaining configuration settings are not specific to a BOW. Do You Have an Air Temperature Sensor? Select whether there is an air temperature sensor wired to the OmniLogic. If Yes is selected: Where is the Sensor Wired? Touching the box will bring you to a table showing all detected sensors connections. Select the sensor connection used for the air sensor (typically SENS2) and touch the Save button to save. The sensor connection should now be shown in the box and you can advance to the next screen to continue configuration. Do You Have a Pool Temperature Sensor? Select whether there is a pool temperature sensor wired to the OmniLogic. If Yes is selected: Where is the Sensor Wired? Touching the box will bring you to a table showing all detected sensors connections. Select the sensor connection used for the pool sensor (typically SENS1) and touch the Save button to save. The sensor connection should now be shown in the box and you can advance to the next screen to continue configuration. Do You Have a Flow Switch? Select whether there is a flow switch wired to the OmniLogic. If Yes is selected: Where is the Sensor Wired? Touching the box will bring you to a table showing all detected sensors connections. Select the sensor connection used for the flow switch (typically FLOW SWITCH 1) and touch the Save button to save. The sensor connection should now be shown in the box and you can advance to the next screen to continue configuration. Do You Have an External Interlock Sensor? Select whether there is an external interlock sensor wired to the OmniLogic. To learn more about interlocks, refer to the interlock section on the following page. If Yes is selected: Where is the Sensor Wired? Touching the box will bring you to a table showing all detected sensors connections. Select the sensor connection used for the external interlock switch (typically ExtSensor) and touch the Save button to save. The sensor connection should now be shown in the box and you can advance to the next screen to continue configuration. Select and Configure Sensors At this screen you can add, delete and configure your sensors. Select the desired sensor, then touch the Advance 32 USE ONLY HAYWARD GENUINE REPLACEMENT PARTS
-
 1
1 -
2
-
3
-
4
-
5
-
6
-
7
-
8
-
9
-
10
-
11
-
12
-
13
-
14
-
15
-
16
-
17
-
18
-
19
-
20
-
21
-
22
-
23
-
24
-
25
-
26
-
27
-
28
-
29
-
30
-
 31
31 -
 32
32 -
 33
33 -
 34
34 -
 35
35 -
 36
36 -
 37
37 -
 38
38 -
 39
39 -
 40
40 -
 41
41 -
42
-
43
-
44
 |
 |
