HP 2140 HP MINI User Guide - Windows Vista - Page 49
CD-R discs, Playing music
 |
UPC - 884420854753
View all HP 2140 manuals
Add to My Manuals
Save this manual to your list of manuals |
Page 49 highlights
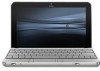
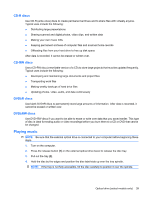
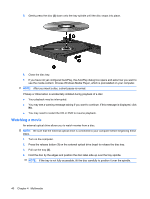
CD-R discs Use CD-R (write-once) discs to create permanent archives and to share files with virtually anyone. Typical uses include the following: ● Distributing large presentations ● Sharing scanned and digital photos, video clips, and written data ● Making your own music CDs ● Keeping permanent archives of computer files and scanned home records ● Offloading files from your hard drive to free up disk space After data is recorded, it cannot be erased or written over. CD-RW discs Use a CD-RW disc (a rewritable version of a CD) to store large projects that must be updated frequently. Typical uses include the following: ● Developing and maintaining large documents and project files ● Transporting work files ● Making weekly backups of hard drive files ● Updating photos, video, audio, and data continuously DVD±R discs Use blank DVD±R discs to permanently store large amounts of information. After data is recorded, it cannot be erased or written over. DVD±RW discs Use DVD+RW discs if you want to be able to erase or write over data that you saved earlier. This type of disc is ideal for testing audio or video recordings before you burn them to a CD or DVD that cannot be changed. Playing music NOTE: Be sure that the external optical drive is connected to your computer before beginning these steps. 1. Turn on the computer. 2. Press the release button (1) on the external optical drive bezel to release the disc tray. 3. Pull out the tray (2). 4. Hold the disc by the edges and position the disc label-side up over the tray spindle. NOTE: If the tray is not fully accessible, tilt the disc carefully to position it over the spindle. Optical drive (select models only) 39
-
 1
1 -
2
-
3
-
4
-
5
-
6
-
7
-
8
-
9
-
10
-
11
-
12
-
13
-
14
-
15
-
16
-
17
-
18
-
19
-
20
-
21
-
22
-
23
-
24
-
25
-
26
-
27
-
28
-
29
-
30
-
31
-
32
-
33
-
34
-
35
-
36
-
37
-
38
-
39
-
40
-
41
-
42
-
43
-
 44
44 -
 45
45 -
 46
46 -
 47
47 -
 48
48 -
 49
49 -
 50
50 -
 51
51 -
 52
52 -
 53
53 -
 54
54 -
55
-
56
-
57
-
58
-
59
-
60
-
61
-
62
-
63
-
64
-
65
-
66
-
67
-
68
-
69
-
70
-
71
-
72
-
73
-
74
-
75
-
76
-
77
-
78
-
79
-
80
-
81
-
82
-
83
-
84
-
85
-
86
-
87
-
88
-
89
-
90
-
91
-
92
-
93
-
94
-
95
-
96
-
97
-
98
-
99
-
100
-
101
-
102
-
103
-
104
-
105
-
106
-
107
-
108
-
109
-
110
-
111
-
112
-
113
-
114
 |
 |
