HP 418800-B21 HP StorageWorks 70 Modular Smart Array Enclosure User Guide (434 - Page 24
Connecting SAS cables to additional disk enclosures, Connecting power cords, IMPORTANT, WARNING
 |
UPC - 882780564640
View all HP 418800-B21 manuals
Add to My Manuals
Save this manual to your list of manuals |
Page 24 highlights
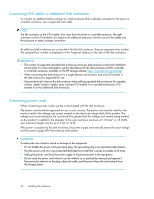
Connecting SAS cables to additional disk enclosures To connect an additional disk enclosure to a disk enclosure that is already connected to the server or controller enclosure, use a supported SAS cable. NOTE: The left connector on the I/O module is for input from the server or controller enclosure. The right connector on the I/O module is for output to an additional enclosure. See the icons on the cables and the enclosure to assist in proper connection. As additional disk enclosures are connected to the first disk enclosure, they are assigned a box number. The assigned box number is displayed on the 7-segment display on the rear of the disk enclosure. IMPORTANT: • The number of supported cascaded disk enclosures varies per disk enclosure model and installation environment. For more information, see the QuickSpecs for the disk enclosure and the controller or controller enclosure, available on the HP storage website: http://www.hp.com/go/storage. • When connecting this disk enclosure in a single-domain environment, only one I/O module in the disk enclosure is supported for use. • Use provided color clues on the disk enclosure when cabling cascaded disk enclosures; for example, connect "green" ports to "green" ports (connect I/O module A on one disk enclosure to I/O module A on the additional disk enclosure). Connecting power cords When connecting power cords, use the cords shipped with the disk enclosure. The power cord should be approved for use in your country. The power cord must be rated for the product and for the voltage and current marked on the electrical ratings label of the product. The voltage and current rating for the cord should be greater than the voltage and current rating marked on the product. In addition, the diameter of the wire must be a minimum of 1.00 mm2 or 18 AWG, your maximum length may be up to 3.66 m (12 ft). After power is supplied to the disk enclosure, the power supply automatically senses the input voltage and the power supply LED illuminates as solid amber. WARNING! To reduce the risk of electric shock or damage to the equipment: • Do not disable the power cord grounding plug. The grounding plug is an important safety feature. • Plug the power cord into a grounded (earthed) electrical outlet that is easily accessible at all times. • Unplug the power cord from the power supply to disconnect power to the equipment. • Do not route the power cord where it can be walked on or pinched by items placed against it. Pay particular attention to the plug, electrical outlet, and the point where the cord extends from the storage system. 24 Installing the enclosure
-
 1
1 -
2
-
3
-
4
-
5
-
6
-
7
-
8
-
9
-
10
-
11
-
12
-
13
-
14
-
15
-
16
-
17
-
18
-
 19
19 -
 20
20 -
 21
21 -
 22
22 -
 23
23 -
 24
24 -
 25
25 -
 26
26 -
 27
27 -
 28
28 -
 29
29 -
30
-
31
-
32
-
33
-
34
-
35
-
36
-
37
-
38
-
39
-
40
-
41
-
42
-
43
-
44
-
45
-
46
-
47
-
48
-
49
-
50
-
51
-
52
-
53
-
54
-
55
-
56
-
57
-
58
-
59
-
60
 |
 |
