HP 418800-B21 HP StorageWorks 70 Modular Smart Array Enclosure User Guide (434 - Page 31
Powering on disk enclosures, 5 Operation and management
 |
UPC - 882780564640
View all HP 418800-B21 manuals
Add to My Manuals
Save this manual to your list of manuals |
Page 31 highlights
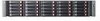
5 Operation and management Included topics: • Powering on disk enclosures, page 31 • Powering off disk enclosures, page 32 • Updating disk enclosure firmware, page 32 Powering on disk enclosures IMPORTANT: Always power on disk enclosures before controller enclosures and servers. This ensures that servers, during the discovery process, identify the enclosures and installed disk drives as operational devices. 1. Apply power to each uninterruptible power supply (UPS). For more information, see the UPS documentation. 2. Apply power to the disk enclosures. Press and hold the power on/standby button on the disk enclosures until the system power LED illuminates solid green. The LED on the power on/standby button changes from amber to solid green, indicating that the disk enclosure has transitioned from a standby state to fully powered. 3. Wait a few minutes for the disk enclosures to complete their startup routines. IMPORTANT: If power is applied to the server before disk enclosures complete their startup routine, the server might not properly discover the storage and may erroneously mark the drives as failed when the server is powered on. 4. Apply power to the controller enclosure (if included in the configuration). For more information, see the controller enclosure documentation. 5. Power on (or restart) the server with access to the disk enclosures, start the operating system, and log on as administrator. For more information, see the server documentation. IMPORTANT: When you power on the server, the monitor might display a "New Hardware Found" message. Cancel out of this window to prevent the installation of unsupported software. 6. Verify that each component is operating properly. 70 Modular Smart Array User Guide 31
-
 1
1 -
2
-
3
-
4
-
5
-
6
-
7
-
8
-
9
-
10
-
11
-
12
-
13
-
14
-
15
-
16
-
17
-
18
-
19
-
20
-
21
-
22
-
23
-
24
-
25
-
 26
26 -
 27
27 -
 28
28 -
 29
29 -
 30
30 -
 31
31 -
 32
32 -
 33
33 -
 34
34 -
 35
35 -
 36
36 -
37
-
38
-
39
-
40
-
41
-
42
-
43
-
44
-
45
-
46
-
47
-
48
-
49
-
50
-
51
-
52
-
53
-
54
-
55
-
56
-
57
-
58
-
59
-
60
 |
 |
