HP 9040n HP LaserJet 9040/9050 - Getting Started Guide - Page 21
Step 9. Connect power cord, To connect the power cord
 |
UPC - 829160954967
View all HP 9040n manuals
Add to My Manuals
Save this manual to your list of manuals |
Page 21 highlights
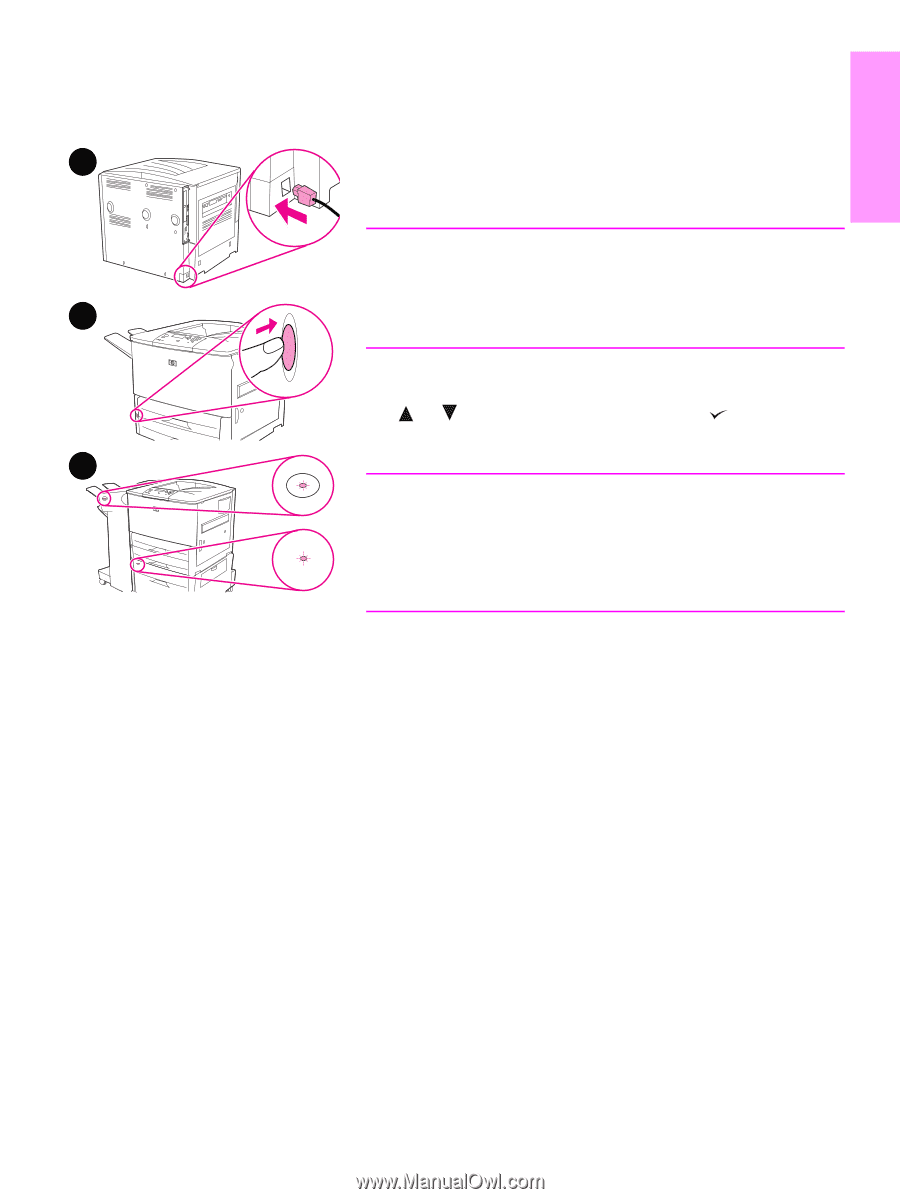
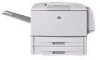
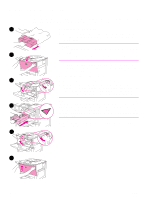
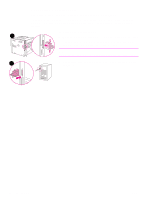
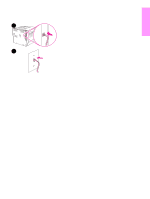
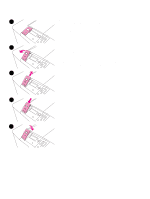
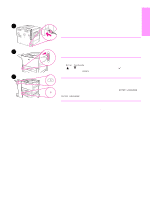
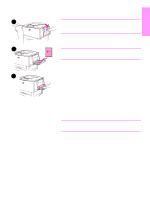
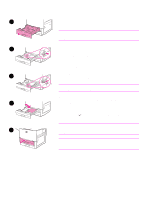
English Step 9. Connect power cord This section describes how to connect the power cord. 1 To connect the power cord 1 Connect the power cord to the printer and an alternating current (AC) outlet. CAUTION HP recommends using a dedicated AC outlet of 15 amps for 110 V models (15 amps for 220 V models). Do not plug other devices into the same outlet. 2 To prevent damage to the printer, use only the power cord that came with the printer. 2 Press the power switch to turn the printer on (in position). If the Enter language message appears on the printer control panel, use or to scroll to your language and press . After the printer warms up, the READY message should appear on the control panel display. 3 Note When the power to the printer is turned on for the first time, you have the option to set the language to display messages in your own language. If no language is selected within 60 seconds of when ENTER LANGUAGE appears on the graphical display, English is set as the language, and ENTER LANGUAGE appears on the graphical display each time the product is turned on until a language is selected. 3 If you have the optional 3,000-sheet stacker/stapler (or stacker or multifunction finisher), optional Tray 4, or both installed, check that the light on each of them is solid green. If a light is amber, flashing, or off, see the use guide. ENWW Connect power cord 19
-
 1
1 -
2
-
3
-
4
-
5
-
6
-
7
-
8
-
9
-
10
-
11
-
12
-
13
-
14
-
15
-
 16
16 -
 17
17 -
 18
18 -
 19
19 -
 20
20 -
 21
21 -
 22
22 -
 23
23 -
 24
24 -
 25
25 -
 26
26 -
27
-
28
-
29
-
30
-
31
-
32
-
33
-
34
-
35
-
36
-
37
-
38
-
39
-
40
-
41
-
42
-
43
-
44
-
45
-
46
-
47
-
48
-
49
-
50
-
51
-
52
-
53
-
54
-
55
-
56
-
57
-
58
-
59
-
60
-
61
-
62
-
63
-
64
-
65
-
66
-
67
-
68
-
69
-
70
-
71
-
72
-
73
-
74
-
75
-
76
-
77
-
78
-
79
-
80
-
81
-
82
-
83
-
84
-
85
-
86
-
87
-
88
-
89
-
90
-
91
-
92
-
93
-
94
-
95
-
96
-
97
-
98
-
99
-
100
-
101
-
102
-
103
-
104
-
105
-
106
-
107
-
108
-
109
-
110
-
111
-
112
-
113
-
114
-
115
-
116
-
117
-
118
-
119
-
120
-
121
-
122
-
123
-
124
-
125
-
126
-
127
-
128
-
129
-
130
-
131
-
132
-
133
-
134
-
135
-
136
-
137
-
138
-
139
-
140
-
141
-
142
-
143
-
144
-
145
-
146
-
147
-
148
-
149
-
150
-
151
-
152
-
153
-
154
-
155
-
156
-
157
-
158
-
159
-
160
-
161
-
162
-
163
-
164
-
165
-
166
-
167
-
168
-
169
-
170
-
171
-
172
-
173
-
174
-
175
-
176
-
177
-
178
-
179
-
180
-
181
-
182
-
183
-
184
-
185
-
186
-
187
-
188
-
189
-
190
-
191
-
192
-
193
-
194
-
195
-
196
-
197
-
198
-
199
-
200
-
201
-
202
-
203
-
204
-
205
-
206
-
207
-
208
-
209
-
210
-
211
-
212
-
213
-
214
-
215
-
216
-
217
-
218
-
219
-
220
-
221
-
222
-
223
-
224
-
225
-
226
-
227
-
228
-
229
-
230
-
231
-
232
-
233
-
234
-
235
-
236
-
237
-
238
-
239
-
240
-
241
-
242
-
243
-
244
-
245
-
246
-
247
-
248
-
249
-
250
-
251
-
252
-
253
-
254
-
255
-
256
 |
 |