HP Dc7700 Redundant Array of Independent Disks (RAID) on HP Compaq dc7700 and - Page 13
Configuring RAID on non-factory preinstalled configurations - drivers xp pro
 |
UPC - 882780715318
View all HP Dc7700 manuals
Add to My Manuals
Save this manual to your list of manuals |
Page 13 highlights
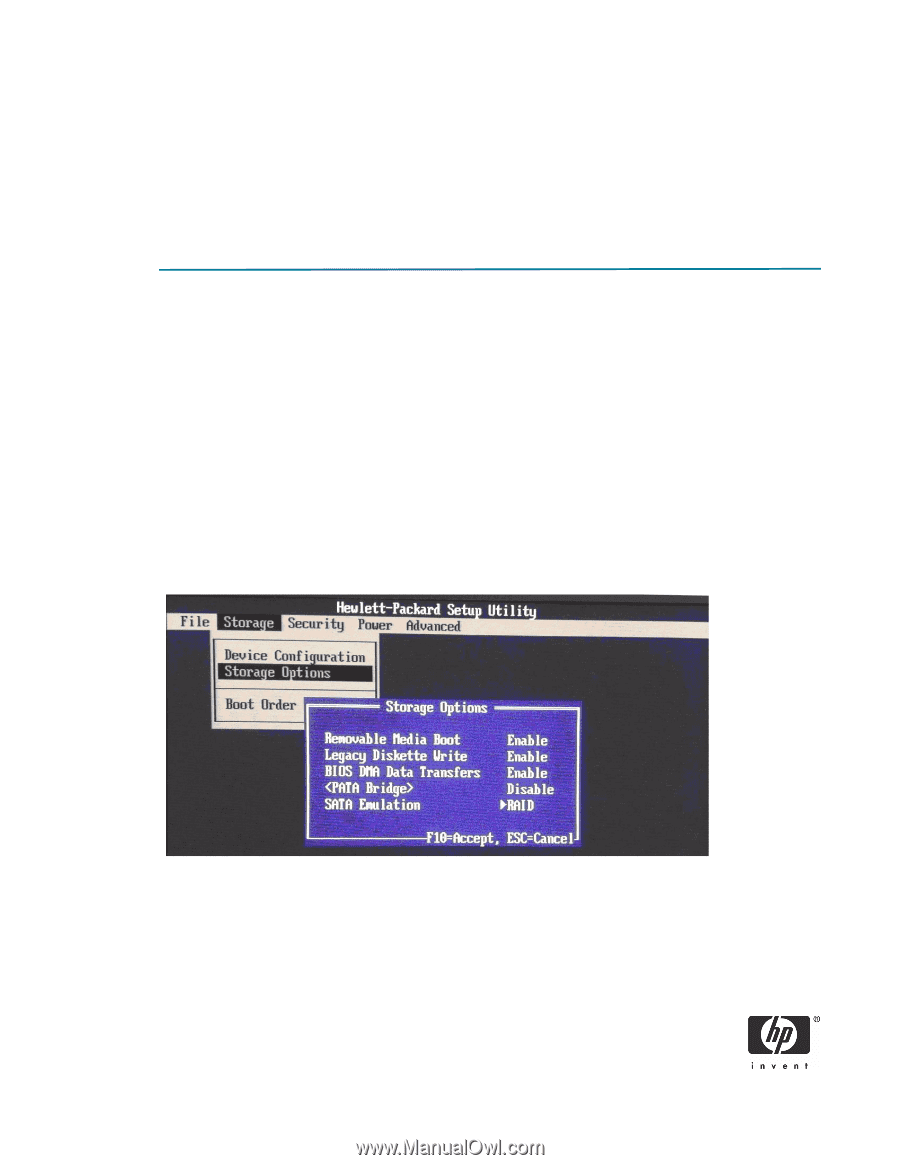
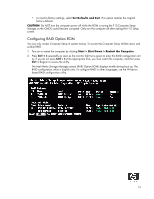
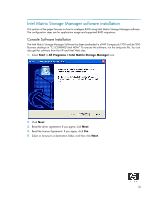
• Old and new technologies (SATA 1.5 GB and SATA 3.0 GB) • NCQ hard drives and non-NCQ drives. • Different cache size • RAID combinations of hard drives with any operating system other than Microsoft XP Pro (SP2) using Microsoft's IDE driver stack based on ATAPI.SYS Configuring RAID on non-factory preinstalled configurations The remaining sections of this white paper describe steps to set up supported RAID configurations where customers have not purchased factory preinstalled RAID configurations. Enabling RAID through F10 System BIOS 1. Turn on or restart the computer by clicking Start > Shut Down > Restart the Computer. 2. Press F10 as soon as the monitor light turns green. If you do not press F10 at the appropriate time, you must restart the computer, and then press F10 again to access the utility. 3. Select your language from the list, and then press Enter. 4. Use the arrow keys to select Storage. 5. Use the down arrow key to select Storage Options, and then press Enter. 6. On the Storage Options menu, use the down arrow key to select SATA Emulation. 7. Press the right arrow key until RAID displays, and then press Enter. 8. To apply and save changes, select File > Save Changes and Exit. • If you do not want to apply your changes, select Ignore Changes and Exit. 13
-
 1
1 -
2
-
3
-
4
-
5
-
6
-
7
-
 8
8 -
 9
9 -
 10
10 -
 11
11 -
 12
12 -
 13
13 -
 14
14 -
 15
15 -
 16
16 -
 17
17 -
 18
18 -
19
-
20
-
21
-
22
-
23
-
24
-
25
-
26
-
27
-
28
-
29
-
30
-
31
-
32
-
33
-
34
-
35
-
36
-
37
-
38
-
39
-
40
-
41
-
42
 |
 |