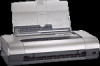
HP Deskjet 450 HP Deskjet 450 - Getting Started Guide - Page 13
Parallel, Other, Überspringen, Andere, Hinweis, Parallèle, Ignorer, Autres, Remarque
 |
UPC - 844844844303
View all HP Deskjet 450 manuals
Add to My Manuals
Save this manual to your list of manuals |
Page 13 highlights
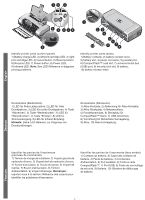
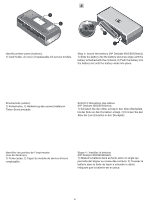
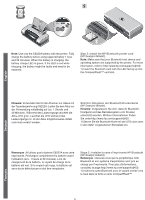
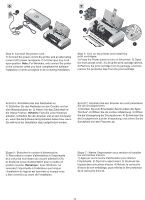
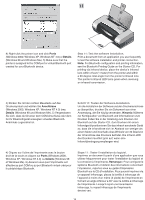
9 2 1 Step 9: Install the software and connect the printer. 1) Insert the Starter CD into the CD-ROM drive, and then follow the appropriate procedure for your operating system and connection. For Bluetooth connection, select either USB or Parallel and click Skip when prompted to connect the printer. For infrared (IR) connection, ensure the IR port of your device is enabled (see Infrared Reference to enable the IR port). Select Other in the Select Port dialog and then choose the port assigned to the IR device in your host machine. 2) For USB or parallel connection, connect the USB or parallel cable. Note: Only connect the printer to the computer when you have completed the software installation or when prompted to do so during installation. If you have connected the printer to the computer before you install the software, refer to the Readme file in the Starter CD to complete the printer installation. 3) Follow the onscreen instructions to complete the printer installation. Schritt 9: Installieren Sie die Software, und schließen Sie den Drucker an. 1) Legen Sie die Starter-CD in das CD-Laufwerk ein, und folgen Sie der Anleitung für Ihr Betriebssystem und den jeweiligen Anschluss. Für eine Bluetooth-Verbindung wählen Sie entweder USB oder Parallel und klicken Sie auf Überspringen, wenn Sie dazu aufgefordert werden, den Drucker anzuschließen. Für eine Infrarot-Verbindung vergewissern Sie sich, dass der Infrarotanschluss Ihres Geräts aktiviert ist (siehe Infrarot-Referenz zum Aktivieren des Infrarotanschlusses). Wählen Sie Andere im Dialogfeld zur Anschlussauswahl und wählen Sie den Anschluss, der dem Infrarotgerät ihres Hostgerätes zugeordnet ist. 2) Für eine USB- oder Parallel-Verbindung schließen Sie das USB- oder Parallelkabel an. Hinweis: Schließen Sie den Drucker erst an den Computer an, wenn Sie die Software fertig installiert haben bzw. wenn Sie während der Installation dazu aufgefordert werden. Falls Sie den Drucker an den Computer angeschlossen haben, ohne vorher die Software zu installieren, lesen Sie die ReadmeDatei auf der Starter-CD, um die Druckerinstallation abzuschließen. 3) Folgen Sie zum Abschließen der Druckerinstallation den Anweisungen auf dem Bildschirm. Etape 9 : Installer le logiciel et raccorder l'imprimante. 1) Insérez le CD d'installation dans le lecteur de CD-ROM, puis suivez la procédure correspondant à votre système d'exploitation et à votre connexion. En cas de connexion Bluetooth, sélectionnez USB ou Parallèle et cliquez sur Ignorer lorsque vous êtes invité(e) à raccorder l'imprimante. En cas de connexion infrarouge (IR), assurez-vous que le port IR de votre périphérique est activé (reportez-vous à la section Référence sur l'infrarouge pour activer le port IR). Sélectionnez Autres dans la boîte de dialogue de sélection du port et choisissez le port affecté au périphérique IR dans l'appareil hôte. 2) Pour les connexions USB ou parallèles, branchez le câble USB ou parallèle. Remarque : Ne raccordez l'imprimante à l'ordinateur que lorsque l'installation du logiciel est terminée ou lorsque vous y êtes convié(e) au cours de l'installation. Si vous avez raccordé l'imprimante à l'ordinateur avant d'installer le logiciel, reportez-vous au fichier Lisez-moi présent sur le CD d'installation pour terminer l'installation. 3) Suivez les instructions en ligne pour terminer l'installation de l'imprimante.
-
 1
1 -
2
-
3
-
4
-
5
-
6
-
7
-
 8
8 -
 9
9 -
 10
10 -
 11
11 -
 12
12 -
 13
13 -
 14
14 -
 15
15 -
 16
16 -
 17
17 -
 18
18 -
19
-
20
-
21
-
22
-
23
-
24
-
25
-
26
-
27
-
28
-
29
-
30
-
31
-
32
-
33
-
34
-
35
-
36
-
37
-
38
-
39
-
40
-
41
-
42
-
43
-
44
-
45
-
46
-
47
-
48
-
49
-
50
-
51
-
52
-
53
-
54
-
55
-
56
-
57
-
58
-
59
-
60
-
61
-
62
-
63
-
64
-
65
-
66
-
67
-
68
-
69
-
70
-
71
-
72
-
73
-
74
-
75
-
76
-
77
-
78
-
79
-
80
 |
 |
