HP J4865A User Manual - Page 29
(Optional) Install Second Power Supply, Caution
 |
View all HP J4865A manuals
Add to My Manuals
Save this manual to your list of manuals |
Page 29 highlights
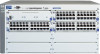
Installing the Series 4100gl Switches Caution Installing the Series 4100gl Switches Installation Procedures 3. (Optional) Install Second Power Supply A second, load-sharing redundant power supply (HP ProCurve Switch gl/xl RPS, HP J4839A) can be installed in the back of the switch. To provide true redundancy, this second power supply should be connected to a different AC power source from the other supply. Then, if one AC power source fails, the switch will continue to run. Each supply provides enough power to operate a fully loaded switch, so even if one fails, the switch will continue to operate normally. Install the second power supply into power slot number 2 as shown in the illustration on the next page. The slot cover can be removed with either a flat-bladed or Torx T-10 screwdriver. Retain the slot cover for future use. The switch power supplies are hot swappable; they can be installed while the switch is receiving power from the supply in the other slot. But, as indicated by the caution statement on the power supply, the supply must not be connected to AC power before being installed. For safety and proper switch cooling, if either of the power supply slots are not being used, make sure to attach the cover plate over the slot. Please see the Installation Precautions on page 2-3 for more information. For installation details, see the instructions in the manual that comes with the power supply. 2-9
-
 1
1 -
2
-
3
-
4
-
5
-
6
-
7
-
8
-
9
-
10
-
11
-
12
-
13
-
14
-
15
-
16
-
17
-
18
-
19
-
20
-
21
-
22
-
23
-
 24
24 -
 25
25 -
 26
26 -
 27
27 -
 28
28 -
 29
29 -
 30
30 -
 31
31 -
 32
32 -
 33
33 -
 34
34 -
35
-
36
-
37
-
38
-
39
-
40
-
41
-
42
-
43
-
44
-
45
-
46
-
47
-
48
-
49
-
50
-
51
-
52
-
53
-
54
-
55
-
56
-
57
-
58
-
59
-
60
-
61
-
62
-
63
-
64
-
65
-
66
-
67
-
68
-
69
-
70
-
71
-
72
-
73
-
74
-
75
-
76
-
77
-
78
-
79
-
80
-
81
-
82
-
83
-
84
-
85
-
86
-
87
-
88
-
89
-
90
-
91
-
92
-
93
-
94
 |
 |
