HP J4865A User Manual - Page 30
Once the power supply is installed, make sure you tighten the four retaining
 |
View all HP J4865A manuals
Add to My Manuals
Save this manual to your list of manuals |
Page 30 highlights
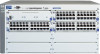
Installing the Series 4100gl Switches Installing the Series 4100gl Switches Installation Procedures Insert the power supply into the opening, then slide it all the way in until it connects to the switch. The power supply face plate will be flush with the back face of the switch. Once the power supply is installed, make sure you tighten the four retaining screws that hold it in place. The screws can be tightened with either a flatbladed or Torx T-10 screwdriver. Be careful not to overtighten the screws. tighten the four screws 2-10
-
 1
1 -
2
-
3
-
4
-
5
-
6
-
7
-
8
-
9
-
10
-
11
-
12
-
13
-
14
-
15
-
16
-
17
-
18
-
19
-
20
-
21
-
22
-
23
-
24
-
 25
25 -
 26
26 -
 27
27 -
 28
28 -
 29
29 -
 30
30 -
 31
31 -
 32
32 -
 33
33 -
 34
34 -
 35
35 -
36
-
37
-
38
-
39
-
40
-
41
-
42
-
43
-
44
-
45
-
46
-
47
-
48
-
49
-
50
-
51
-
52
-
53
-
54
-
55
-
56
-
57
-
58
-
59
-
60
-
61
-
62
-
63
-
64
-
65
-
66
-
67
-
68
-
69
-
70
-
71
-
72
-
73
-
74
-
75
-
76
-
77
-
78
-
79
-
80
-
81
-
82
-
83
-
84
-
85
-
86
-
87
-
88
-
89
-
90
-
91
-
92
-
93
-
94
 |
 |

Installing the Series 4100gl Switches
Installation Procedures
Insert the power supply into the
opening, then slide it all the way in
until it connects to the switch. The
power supply face plate will be
flush with the back face of the
switch.
Installing the Series 4100gl
Switches
Once the power supply is installed, make sure you tighten the four retaining
screws that hold it in place. The screws can be tightened with either a flat-
bladed or Torx T-10 screwdriver.
Be careful not to overtighten the screws.
tighten the four screws
2-10