HP J4865A User Manual - Page 41
Hot Swapping Switch Modules, Adding or Replacing Modules, Changing the Module Type - reset
 |
View all HP J4865A manuals
Add to My Manuals
Save this manual to your list of manuals |
Page 41 highlights
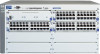
Installing the Series 4100gl Switches Installing the Series 4100gl Switches Hot Swapping Switch Modules If you want to continue with console management of the switch at this time through either a direct connection or a telnet session, see chapter 3, "Getting Started With Switch Configuration" for some basic configuration steps. For more detailed information, refer to the Management and Configuration Guide that is on the documentation CD-ROM that came with your switch. Hot Swapping Switch Modules The switch modules can be "hot swapped", that is installed or replaced while the switch is powered on. The procedures differ slightly, though between adding new modules to an empty slot or replacing modules with the same type, and exchanging the module with a different type. Adding or Replacing Modules If a module has to be replaced with one of the same type, or you are expanding the switch capability by adding a module in a slot where one was not previ ously installed (since the last switch reboot), the replaced or new module is immediately operational; there is no interruption to the switch operation. Changing the Module Type If you exchange a module with a different type of module though, for example a 100/1000-T gl Module is installed in place of a 10/100-TX gl Module that was in the slot, the switch must be rebooted after the new module is installed so the switch processor can properly initialize and configure the new module type. You can reboot the switch by any of the following methods: ■ Pressing the Reset button on the front of the switch. ■ Unplugging and plugging in the power cord (power cycle). If two power supplies are installed, both power cords would have to be unplugged. ■ issuing the reboot system command from the switch console CLI, or selecting the Reset or Reboot option from the switch console menu, the web browser interface, or HP ProCurve Manager for Hubs & Switches Until the switch is rebooted, the module will not operate and the Module Status LED for the affected slot will continue to flash. 2-21
-
 1
1 -
2
-
3
-
4
-
5
-
6
-
7
-
8
-
9
-
10
-
11
-
12
-
13
-
14
-
15
-
16
-
17
-
18
-
19
-
20
-
21
-
22
-
23
-
24
-
25
-
26
-
27
-
28
-
29
-
30
-
31
-
32
-
33
-
34
-
35
-
 36
36 -
 37
37 -
 38
38 -
 39
39 -
 40
40 -
 41
41 -
 42
42 -
 43
43 -
 44
44 -
 45
45 -
 46
46 -
47
-
48
-
49
-
50
-
51
-
52
-
53
-
54
-
55
-
56
-
57
-
58
-
59
-
60
-
61
-
62
-
63
-
64
-
65
-
66
-
67
-
68
-
69
-
70
-
71
-
72
-
73
-
74
-
75
-
76
-
77
-
78
-
79
-
80
-
81
-
82
-
83
-
84
-
85
-
86
-
87
-
88
-
89
-
90
-
91
-
92
-
93
-
94
 |
 |
