HP L7580 User Guide
HP L7580 - Officejet Pro All-in-One Color Inkjet Manual
 |
UPC - 882780620650
View all HP L7580 manuals
Add to My Manuals
Save this manual to your list of manuals |
HP L7580 manual content summary:
- HP L7580 | User Guide - Page 1
HP Officejet Pro L7300/L7500/L7600/L7700 User Guide - HP L7580 | User Guide - Page 2
- HP L7580 | User Guide - Page 3
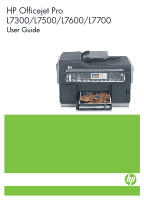
HP Officejet Pro L7300/L7500/ L7600/L7700 All-in-One series User Guide - HP L7580 | User Guide - Page 4
. 7. Install the product in a protected location where no one can step on or trip over the line cord, and the line cord cannot be damaged. 8. If the product does not operate normally, see Maintain and troubleshoot. 9. There are no user-serviceable parts inside. Refer servicing to qualified service - HP L7580 | User Guide - Page 5
the accessories Install the duplexer ...21 Install Tray 2 ...21 Turn on accessories in the print driver 22 To turn on accessories on Windows computers 23 To turn on accessories on Macintosh computers 23 3 Use the all-in-one Use control panel menus ...24 Control-panel message types 25 Status - HP L7580 | User Guide - Page 6
specifications for supported media 33 Understand supported sizes 33 Understand supported (Windows 48 Scan Scan an original ...52 Set up Direct Digital Filing (some models only 52 Scan an original to a network folder 53 Scan an original to a program on a computer (direct connection 54 Scan - HP L7580 | User Guide - Page 7
scanned original ...56 Edit a scanned photo or graphic 56 Edit a scanned document using optical character recognition (OCR) software 56 Change scan settings ...57 Cancel a scan Send a fax ...70 Send a basic fax ...70 Send a fax manually from a phone 71 Send a fax using monitor dialing 72 Send a - HP L7580 | User Guide - Page 8
Web server pages 91 Toolbox (Windows) ...91 To open the Toolbox 91 Toolbox tabs ...92 HP Printer Utility (Mac OS 93 To open the HP Printer Utility 93 HP Printer Utility panels 93 Network Printer Setup Utility (Mac OS 94 HP Web Jetadmin software 94 HP Instant Support ...94 Security and privacy - HP L7580 | User Guide - Page 9
D: Fax with a distinctive ring service on the same line 108 Case install the device on a network 127 To install the device software on client computers 127 To install the printer driver using Add Printer 128 Configure the device (Mac OS 128 To install the software the installer (Windows 132 - HP L7580 | User Guide - Page 10
10 Maintain and troubleshoot Supported ink cartridges ...143 Replace the ink cartridges ...144 Maintain the printheads ...145 To check printhead health 145 To print the print quality diagnostic page 145 To align the printheads 146 To calibrate - HP L7580 | User Guide - Page 11
wireless problems 191 Clear jams ...192 Clear a jam in the device 193 Clear jams in the ADF ...195 Tips for avoiding jams ...197 A HP supplies and accessories Order printing supplies online 198 Accessories ...198 Supplies ...198 Ink cartridges ...198 Printheads ...199 HP media ...199 B Support - HP L7580 | User Guide - Page 12
200 Telephone support numbers 201 Hewlett-Packard limited warranty statement 203 Prepare the device for shipment 204 Remove the ink cartridges and printheads before shipment 204 Remove the control-panel faceplate 205 Pack the device ...206 C Device specifications Physical specifications ...208 - HP L7580 | User Guide - Page 13
elimination 228 Power consumption ...228 Battery information ...228 Material safety data sheets 229 Recycling ...229 Product packaging ...229 Plastics ...229 Disposal of waste equipment by users in private households in the European Union ...229 HP products and supplies 229 Index...230 9 - HP L7580 | User Guide - Page 14
®) Provides information about printhead health and access to maintenance services. For more information, see Toolbox (Windows). The Toolbox is typically installed with the device software as an available installation option. HP Printer Utility (Mac OS) Contains tools to configure print settings - HP L7580 | User Guide - Page 15
page HP Web sites HP telephone support HP photo and imaging software help Description Location Helps you quickly identify, diagnose, and resolve printing problems. For more information, see HP Instant Support. Available through any standard Web browser or through the Toolbox (Windows). Provides - HP L7580 | User Guide - Page 16
software also supports Windows accessibility options such as StickyKeys, ToggleKeys, FilterKeys, and MouseKeys. The device doors, buttons, paper trays, and paper guides can be operated by users with limited strength and reach. Support For more details about the accessibility of this product and HP - HP L7580 | User Guide - Page 17
document feeder (ADF) 2 Scanner glass 3 Control panel (differs based on the HP All-in-One model that you have) 4 Display (differs based on the model that you have) 5 Output tray 6 Output tray extension 7 Length/width guides 8 Tray 1 9 Tray 2 (available with some models) 10 Front universal serial bus - HP L7580 | User Guide - Page 18
area 1 Ink cartridge door 2 Ink cartridges 3 Print-carriage access door 4 Printheads 5 Printhead latch Memory card slots 1 CompactFlash (types I and II) 2 Secure Digital, MultimediaCard (MMC), Secure MMC 3 xD 4 Memory Stick, Magic Gate Memory Stick, Memory Stick Duo, Memory Stick Pro 5 Front - HP L7580 | User Guide - Page 19
that you have. The following sections describe control panel buttons, lights, and displays. Your model might not have all of the features described. Understand the HP All-in-One parts 15 - HP L7580 | User Guide - Page 20
One-touch speed-dial buttons: Access the first five speed-dial numbers. Speed Dial: Selects a speed-dial number. Scan Menu: Presents the Scan To menu for selecting a scan destination. Digital Filing: Scans You are required to subscribe to a caller ID service to use this feature. Keypad: Enters fax - HP L7580 | User Guide - Page 21
menu. The topic that you select from the Help menu opens a help window on your computer screen. Auto Answer: When this button is lit, pause in a fax number. START SCAN: Starts a scan job and sends it to the destination you selected using the Scan To button. Understand the HP All-in-One parts 17 - HP L7580 | User Guide - Page 22
the ink cartridge. Shows that an unknown ink cartridge is inserted. This icon might appear if an ink cartridge contains non-HP ink. Shows supported on some models.) For more information, see Set up the device for wireless communication (some models only). Shows that a Bluetooth adapter is installed - HP L7580 | User Guide - Page 23
information Description USB connection Ethernet (wired) connection Printer sharing 802.11 wireless HP bt300, Printer and PC Adapter with Recommended number of connected computers for best performance Supported software features Setup instructions One computer connected with a USB cable to the - HP L7580 | User Guide - Page 24
Chapter 1 Description Bluetooth® Wireless Technology Recommended number of connected computers for best performance Supported software features as a PDA, camera phone, or Bluetoothenabled computer. Setup instructions Bluetooth communication. 20 Get started - HP L7580 | User Guide - Page 25
the accessories This section contains the following topics: • Install the duplexer • Install Tray 2 • Turn on accessories in the print driver Install the duplexer NOTE: This feature is available with some models of the device. You can print on both sides of a sheet of paper automatically when - HP L7580 | User Guide - Page 26
cord and turn on the device. 5. Enable Tray 2 in the print driver. For more information, see Turn on accessories in the print driver. Turn on accessories in the print driver • To turn on accessories on Windows computers • To turn on accessories on Macintosh computers 22 Install the accessories - HP L7580 | User Guide - Page 27
The Mac OS automatically turns on all accessories in the print driver when you install the device software. If you add a new accessory later, follow these steps: 1. Click the Printer Setup Utility icon in the Dock. 2. On the Printer List window, click once on the device you want to set up to - HP L7580 | User Guide - Page 28
3 Use the all-in-one This section contains the following topics: • Use control panel menus • Control-panel message types • Change device settings • Use the HP Solution Center (Windows) • Use the HP photo and imaging software • Text and symbols • Load the originals • Select print media • Load media • - HP L7580 | User Guide - Page 29
to turn off the device, and then turn it on again. In most situations, this action solves the problem. If the message persists, your device might need service. Write down the error code, and then go to HP Instant Support to learn more about possible causes for the message. For more information, see - HP L7580 | User Guide - Page 30
does not contain any icons, an error might have occurred during the software installation. To correct this, use the Control Panel in Windows to completely uninstall the HP Photosmart Software, and then reinstall the software. For more information, see the onscreen Help that came with the device - HP L7580 | User Guide - Page 31
drop-down menu. From here, you can scan, send faxes, import documents, and perform maintenance procedures such as checking the ink levels for the ink cartridges. NOTE: On a Macintosh computer, the features available in the HP Photosmart Studio software vary depending on the selected device. TIP - HP L7580 | User Guide - Page 32
multiple times to see the available characters. Depending on your language and country/region setting, other characters might be available in addition to the ones shown on the keypad. 2. After the correct letter appears, wait for the cursor to advance automatically to the right, or press the right - HP L7580 | User Guide - Page 33
Type text using the visual keyboard (some models only) You can enter text or symbols by using the visual keyboard that automatically appears on the color display when you must enter text. For example, the visual keyboard automatically appears when you are setting up a wired or wireless network, the - HP L7580 | User Guide - Page 34
loaded in the automatic document feeder are automatically fed into the device. Load an original in the automatic document feeder (ADF) You can copy, scan, or fax a one-sided or two-sided, single- or multiple-page, A4- or letter-size document by placing it in the document feeder tray. CAUTION: Do not - HP L7580 | User Guide - Page 35
to the diagram engraved in the document feeder tray. 2. Slide the width guides inward until they stop at the left and right edges of the media. scanner glass You can copy, scan, or fax up to letter- or A4-size originals by loading them on the glass. Some models support legal-size originals on the - HP L7580 | User Guide - Page 36
for more information about HP media. Tips for selecting and using print media For the best results, observe the following guidelines. • Always use media that conforms to the device specifications. For more information, see Understand specifications for supported media. • Load only one type of media - HP L7580 | User Guide - Page 37
provides longer drying time and ensures that the ink dries completely before the next page is driver. You might need to reformat existing documents to print them correctly on custom-sized media. Understand specifications for supported media Use the Understand supported sizes and Understand supported - HP L7580 | User Guide - Page 38
U.S. #10 Envelope (105 x 241 mm; 4.12 x 9.5 inches)* Monarch Envelope (98 x 191 mm; 3.88 x 7.5 inches)* HP Greeting Card Envelope (111 x 152 mm; 4.38 x 6 inches)* A2 Envelope (111 x 146 mm; 4.37 x 5.75 inches)* card (105 x 148.5 mm; 4.13 x 5.83 inches)* Tray 2 Duplexer 34 Use the all-in-one ADF - HP L7580 | User Guide - Page 39
(continued) Media size Borderless A6 card (105 x 148.5 mm; 4.13 x 5.83 inches)* Hagaki** (100 x 148 mm; 3.9 x 5.8 inches)* Photo media Photo media (76.2 x 127 mm; 3 x 5 inches)* Photo media (102 x 152 mm; 4 x 6 inches)* Photo media (5 x 7 inches)* Tray 1 Photo media (8 x 10 inches)* Photo media ( - HP L7580 | User Guide - Page 40
. Tray Tray 1 Type Paper Transparencies Photo media Labels Envelopes Tray 2 Cards Plain paper only Duplexer Paper Output-bin All supported media Weight 60 to 105 g/m2 (16 to 28 lb bond) 280 g/m2 (75 lb bond) 75 to 90 Up to 150 sheets of plain paper (text printing) 36 Use the all-in-one - HP L7580 | User Guide - Page 41
computer running Windows, click the Advanced tab in the print driver, and select Minimize Margins. NOTE: If you are using the duplexer (available with some models), the minimum top and bottom margins must match or exceed 12 mm (0.47 inch). Load media This section provides instructions - HP L7580 | User Guide - Page 42
the tray, and does not exceed the line marking in the tray. NOTE: Do not load paper while the device is printing. 3. Slide the media guides in the tray to adjust them for the media size that you have loaded, and then lower the output tray. 4. Pull out the extension on - HP L7580 | User Guide - Page 43
of the tray, and does not exceed the line marking in the tray. NOTE: Tray 2 can be loaded only with plain paper. 3. Slide the media guides in the tray to adjust them for the size that you have loaded. Load media 39 - HP L7580 | User Guide - Page 44
installed and software. If the device is on a network and you set a default tray, the setting will affect all users one is empty. Have both special media (such as transparencies or letterhead) and plain paper loaded in the trays. Load media in both trays but have the device pick media from a specific - HP L7580 | User Guide - Page 45
click Paper Handling in the left panel. • Print driver (Windows): Click the Printer services button on either the Features or Color tab, and then select Paper Handling. • Toolbox (Windows): Click the Services tab and click Paper Handling. • HP Printer Utility (Mac OS): Click Paper Handling from the - HP L7580 | User Guide - Page 46
NOTE: Open the file in a software application and assign the image size. . Open the printer driver, select the Printing Shortcuts Windows) 1. Load the appropriate media. For more information, see Load media. 2. Open the file that you want to print. 3. From the application, open the print driver one - HP L7580 | User Guide - Page 47
space (400 MB or more) and will print more slowly. 9. Select the media source. If you are printing on thick or photo media, select the manual feed option. 10. Change any other print settings, and then click Print. 11. If you printed on photo media with a tear-off tab, remove the - HP L7580 | User Guide - Page 48
HP Photosmart Software: Open the HP Photosmart Software and follow the instructions in the onscreen Help. • HP Device Manager (Mac OS): Launch HP a long-distance prefix. Type the name, and then press OK. • To delete one entry or all entries: Select Delete Speed Dial, press the arrow keys to highlight - HP L7580 | User Guide - Page 49
Manager (Mac OS): Launch HP Device Manager, click Information and Settings, and then select Fax Digital Filing Speed-dial allows you to create folders to scan and store digital documents for speed-dial sending. Use the Friendly Name, Network Path, User Name, Password and Optional PIN fields to add a - HP L7580 | User Guide - Page 50
Speed-dial in the left pane. • HP Device Manager (Mac OS): Launch HP Device Manager, click Information and Settings, and then select Fax Speed Dial Settings from the drop-down list. • HP Photosmart Software: Open the HP Photosmart Software and follow the instructions in the onscreen Help. 46 Use - HP L7580 | User Guide - Page 51
settings for all print jobs, make the changes in the printer driver. For more information about the features of the Windows printer driver, see the online help for the driver. For more information about printing from a specific application, see the documentation that came with the application. To - HP L7580 | User Guide - Page 52
specifications. For more information, see Understand specifications for supported media. • Specify duplex options in your application or in the printer driver when printing finishes on one side of the media, the device holds the media and pauses while the ink dries. Once the ink dries, the media is - HP L7580 | User Guide - Page 53
the duplexer is properly installed. For more information, see Install the duplexer. 3. On one of the following methods. Control panel: Press (Cancel button). This clears the job that the device is currently processing. It does not affect jobs waiting to be processed. Windows: Double-click the printer - HP L7580 | User Guide - Page 54
the scanner glass or the ADF. For more information, see Load the originals 3. Do one of the following: • Press START COPY Black to start a black-and-white copy Crop setting from the Copy Menu. Selecting the Crop setting starts a scan and shows a preview of the original on the color display. Cropping - HP L7580 | User Guide - Page 55
TIP: You can resize the cropped image by changing the Reduce/Enlarge setting. Use Fit to Page to make a copy with borders. Enlarging a cropped image might affect print quality depending on the resolution of the image. To crop an image from the control panel 1. In the Copy area, press Copy Menu and - HP L7580 | User Guide - Page 56
be installed and running on your computer prior to scanning. To verify that the printer software is running on a computer running Windows, look for the device icon in the system tray at the lower-right side of the screen, near the clock. To verify this on a computer using the Mac OS, open the HP - HP L7580 | User Guide - Page 57
users with some networking experience. To set up a network folder ▲ Create a folder on your network. This folder is used to store files that are scanned : The printer must be Scan an original to a network folder You can scan originals directly into a network folder without any computer-based software - HP L7580 | User Guide - Page 58
the Getting Started Guide that came with the device. To send a scan to a network HP photo and imaging software 1. At the computer, open the HP photo and imaging software. For more information, see Use the HP photo and imaging software. 2. See the onscreen Help for further instructions. To send a scan - HP L7580 | User Guide - Page 59
arrow keys to select the program that you want to use (such as the HP photo and imaging software). 6. Press OK or START SCAN. Scan an original to a memory device You can send the scanned image as a JPEG image or a PDF file to the memory card that is currently inserted, or to a storage device that - HP L7580 | User Guide - Page 60
installation. See the onscreen Help for the HP photo and imaging software for information about how to create a link to the word-processing program. The OCR software does not support scanning colored interaction with the device, it is sometimes preferable to scan to Wordpad (a Windows 56 Scan - HP L7580 | User Guide - Page 61
program. Change scan settings To change scan settings • HP Device Manager (Mac OS): Launch HP Device Manager, click Information and Settings, and then select Scan Preferences from the drop-down list. • Windows: Open the device software, select Settings, select Scan Settings and Preferences - HP L7580 | User Guide - Page 62
can safely remove a card only when the photo light is not blinking. Also, never insert more than one memory card at a time as this can also damage files on the memory cards. The device supports the memory cards described below. Each type of memory card can only be inserted in the appropriate - HP L7580 | User Guide - Page 63
(continued) 5 Front universal serial bus (USB) port (PictBridge-enabled) To insert a memory card 1. Turn the memory card so that the label faces left, and the contacts are facing the device. 2. Insert the memory card into the corresponding memory card slot. Connect a digital camera The PictBridge- - HP L7580 | User Guide - Page 64
supports two industry-standard formats, PictBridge and Digital Print Order Format (DPOF) file format 1.1, so you do not have to reselect the photos to print. • The PictBridge standard saves the print instructions slot on the device. 2. When prompted, do one of the following: • Press OK to print all - HP L7580 | User Guide - Page 65
, you will need to purchase a USB extension cable in order to use your device with this port. For more information on supported USB devices, see Supported devices. Check your camera documentation to verify how to change the USB mode to storage mode. Different cameras use different terms to - HP L7580 | User Guide - Page 66
more information, see the onscreen HP Photosmart Software Help. Print photos from the control panel The device enables you to print photos directly from your memory card or storage device without first transferring the files to a computer. You can print borderless photos (one per sheet of paper) or - HP L7580 | User Guide - Page 67
or storage device to your computer and use the HP Photosmart Software. Printing photos from a proof sheet requires three steps : • Print a proof sheet of the photos on your memory card or storage device • Complete the proof sheet • Scan - HP L7580 | User Guide - Page 68
the thumbnail images on the proof sheet. If you want to print more than one copy of a photo, fill in the second or third circle. You can print Date Stamp circle below the layout options in step 2 of the proof sheet. To scan a completed proof sheet 1. Load the proof sheet print-side down on the right- - HP L7580 | User Guide - Page 69
select Proof Sheet. c. Press the arrow keys to select Scan Proof Sheet, and then press OK. d. When prompted, you must use another software application, such as HP Photosmart software. To print a select additional photos to print. To print more than one copy of the selected photo a. Press OK to - HP L7580 | User Guide - Page 70
to highlight one of the following options, and then press OK. Print Options Enables you to manually specify the settings before printing and wasting paper and ink on potential mistakes. Print Now Prints for passport photos, contact a local passport service agency. To print passport photos 1. - HP L7580 | User Guide - Page 71
Press the arrow keys to highlight one of the following options, and then press OK. Print Options Enables you to manually specify the type of paper on enables you to verify your settings before printing and wasting paper and ink on potential mistakes. Print Now Prints your photos with the size - HP L7580 | User Guide - Page 72
Chapter 7 video on one sheet of paper in the order that they appear in the video. The video frames are automatically selected by your device. To create video action - HP L7580 | User Guide - Page 73
To save photos 1. Insert a memory card into the appropriate slot on the device, or connect a storage device to the front USB port. 2. Press Photo Menu. 3. Choose the appropriate display: For color display models a. Press the arrow keys and select Save. b. Press the arrow keys and select Transfer to - HP L7580 | User Guide - Page 74
For more information about using the HP photo and imaging software, see Use the HP photo and imaging software. NOTE: Before you begin faxing you can send a blackand-white or color fax. You can also send a fax manually from an attached phone. This allows you to speak with the recipient before sending - HP L7580 | User Guide - Page 75
2. Enter the fax number by using the keypad, press Speed Dial or a one-touch speed dial button to select a speed dial, or press Redial/Pause to redial send a fax manually from a phone 1. Load your originals. For additional information, see Load media. NOTE: This feature is not supported if you load - HP L7580 | User Guide - Page 76
card PIN fast enough, the device might start sending fax tones too soon and cause your PIN not to be recognized by the calling card service. If this is the case, you can create a speed dial entry to store the PIN for your calling card. NOTE: Make sure the volume is - HP L7580 | User Guide - Page 77
to enter your PIN, press Speed Dial or a one-touch speed dial button to select the speed dial entry automatically or manually. If you turn off the Auto Answer option, you must receive faxes manually. If prints the fax on two pages. Receive a fax manually When you are on the phone, the person you - HP L7580 | User Guide - Page 78
the same phone line, but not directly connected to the device To receive a fax manually 1. Make sure the device is turned on and you have paper loaded in the calls. 4. If you are currently on the phone with the sender, instruct the sender to press Start on their fax machine. 5. When you hear - HP L7580 | User Guide - Page 79
reprinting the faxes in memory, press Cancel. To delete all the faxes in memory from the control panel ▲ Depending on the model you have, do one of the following: • Two-line display: Turn off the device by pressing the Power button. All faxes stored in memory are deleted from memory when - HP L7580 | User Guide - Page 80
another number You can set up the device to forward your faxes to another fax number. A received color fax is forwarded in black and white. HP recommends that you verify the number you are forwarding to is a working fax line. Send a test fax to make sure the fax machine is able - HP L7580 | User Guide - Page 81
ID service through your phone provider, you can block specific fax NOTE: This feature is not supported in all countries/regions. If it is not supported in your country/region, Junk select it. 5. When the Select Another? prompt appears, do one of the following: • If you want to add another number - HP L7580 | User Guide - Page 82
these numbers can be different. 5. When the Enter Another? prompt appears, do one of the following: • If you want to add another number to the list of , press OK to select it. 5. When the Delete Another? prompt appears, do one of the following: • If you want to remove another number from the list of - HP L7580 | User Guide - Page 83
in the getting started guide that came with every fax you send. HP recommends that you set up the fax header by using the software that you installed with the device. You Turn off the Auto Answer setting if you want to receive faxes manually. You must be available to respond in person to the incoming - HP L7580 | User Guide - Page 84
. When you subscribe to this service, each number is assigned a different ring pattern. You can set up the device to answer incoming calls that have a specific ring pattern. If you connect the device to a line with distinctive ring, have your telephone company assign one ring pattern to voice calls - HP L7580 | User Guide - Page 85
of the fax be resent. Turn off error correction only if you are having trouble sending or receiving a fax, and you want to accept the errors in the to send a fax because the receiving fax machine did not answer or was busy, the device attempts to redial based on the settings for the busyredial and - HP L7580 | User Guide - Page 86
Setup, and then use the Busy Redial or No Answer Redial one of the following, setting the fax speed to a slower speed might be required: • An Internet phone service • A PBX system • Fax over Internet Protocol (FoIP) • An integrated services digital network (ISDN) service If you experience problems - HP L7580 | User Guide - Page 87
Internet faxing service supports faxing. Test review the report for information on how to fix the problem and rerun the test. To test fax setup 1. Set up the device for faxing according to your particular home or office setup instructions. 2. Make sure the ink cartridges and printheads are installed - HP L7580 | User Guide - Page 88
were successfully sent, follow these instructions to enable fax confirmation before sending choose On Fax Send or Send & Receive, and scan your fax to send from memory, you can include Error Report. 3. Press the right arrow button to select one of the following, and then press OK. Send & Receive - HP L7580 | User Guide - Page 89
view the fax log from the HP photo and imaging software 1. At the computer, open the HP photo and imaging software. For more information, see Use the HP photo and imaging software. 2. See the onscreen Help for the HP photo and imaging software for further instructions. The log lists faxes that have - HP L7580 | User Guide - Page 90
Web server, and the HP Printer Utility. Windows users can use the control panel, the embedded Web server, the printer driver, the Toolbox, the HP Web Jetadmin, and myPrintMileage. For more information about the HP Web Jetadmin software, open the HP Web Jetadmin software and see its documentation - HP L7580 | User Guide - Page 91
provides instructions for monitoring the device. Use this tool... Control panel Embedded Web server Toolbox (Windows) to obtain the following information.... Obtain information about the status of jobs that are being processed, the operating status of the device, and the status of ink cartridges - HP L7580 | User Guide - Page 92
HP Printer Utility (Mac OS) to obtain the following information.... about replacement ink cartridges and expirations dates. NOTE: The ink levels shown are an estimate only. Actual ink volumes may vary. Ink cartridge information: Open the Information and Support then click Device Services in the left - HP L7580 | User Guide - Page 93
tray settings: Click Paper Handling on the Services tab. • Perform device maintenance tasks: Click the Services tab. • Change tray settings: Click Paper Handling from the Printer Settings panel. • Perform device maintenance tasks: Open the Information and Support panel, and then click the option for - HP L7580 | User Guide - Page 94
Windows) • HP Printer Utility (Mac OS) • Network Printer Setup Utility (Mac OS) • HP Web Jetadmin software • HP Instant Support specifications. printer driver (Windows), or the HP Printer Utility (Mac OS), the device must be on a network and must have an IP address. • Web browser: In a supported - HP L7580 | User Guide - Page 95
e-services such as HP Instant Support, myPrintMileage. For more information, see HP Instant Support and myPrintMileage. Order Supplies connects you to online ordering of supplies. Toolbox (Windows) The Toolbox provides maintenance information about the device. NOTE: The Toolbox can be installed - HP L7580 | User Guide - Page 96
dates of the installed ink cartridges. Printer Information: Provides a link to myPrintMileage and shows the device hardware and printhead health information. Information tab options include: • Hardware information • myPrintmileage (if installed) • HP Instant Support • HP printhead health • Print - HP L7580 | User Guide - Page 97
hp, select Utilities, and then select HP Printer Selector. 4. Select the device and click Launch Utility. HP Printer Utility panels Information and Support panel • Supplies Status: Shows the information about currently installed printheads and ink cartridges. • Supply Info: Shows the ink cartridge - HP L7580 | User Guide - Page 98
After the software is installed, you can gain access to it from anywhere within your intranet by using a standard Web browser. To get more information or to download the software, go to www.hp.com/go/webjetadmin. HP Instant Support HP Instant Support is a suite of Web-based troubleshooting tools. It - HP L7580 | User Guide - Page 99
the View menu in your Web browser. To gain access to HP Instant Support • Toolbox (Windows): Click the Information tab, and then click HP Instant Support. • Embedded Web server: Click the Support button, then click HP Instant Support. NOTE: The Support button is available in all pages. NOTE: Do not - HP L7580 | User Guide - Page 100
self-test diagnostic page Use the self-test diagnostic page to: • View current device information, ink cartridge status, and printhead health status • Help troubleshoot problems • Verify installation of optional accessories, such as the duplexer The self-test diagnostic page also contains a log of - HP L7580 | User Guide - Page 101
select Self-Test Report, and then press OK. • Toolbox (Windows): Click the Services tab, and then click Print Self-test Diagnostic Page. • HP Printer Utility (Mac OS): Click Device Information from the Information and Support panel, and then click Print Configuration Page. Understand the self-test - HP L7580 | User Guide - Page 102
page to view the network settings for the device. You can use the network configuration page to help troubleshoot network connectivity problems. If you need to call HP, it is often useful to print this page before calling. Network Configuration Page 1. General Information: Shows information about - HP L7580 | User Guide - Page 103
To print the network configuration page from the control panel • If the device has a two-line display: Press the Setup button, select Network Setup, select Print Network Settings, and then press OK. • If the device has a color display: Press the Setup button, select Network, select View Network - HP L7580 | User Guide - Page 104
the arrow keys until Network is highlighted, and then press OK. 3. Do one of the following: • To display wired (Ethernet) network settings, select View are provided for your convenience. However, unless you are an advanced user, you should not change any of these settings. The advanced settings - HP L7580 | User Guide - Page 105
answer mode and fax header information. You can access the Fax Setup Wizard (Windows) or HP Fax Setup Utility (Mac OS) through the software you installed with the device. After you run the Fax Setup Wizard (Windows) or HP Fax Setup Utility (Mac OS), follow the procedures in this section to complete - HP L7580 | User Guide - Page 106
of phone system your country/region uses. The instructions for fax setup differ depending on whether you have NOTE: If you have a parallel-type phone system, HP recommends you use the 2-wire phone cord supplied with the types of equipment and services (if any) share the same phone line with - HP L7580 | User Guide - Page 107
allows you to have several phone numbers on one phone line. When you subscribe to this service, each phone number will have a different ring modem: • Do you send and receive faxes directly to and from your computer software applications through a dial-up connection? • Do you send and receive e-mail - HP L7580 | User Guide - Page 108
your phone system. Step-by-step instructions are included for each case in the phone cord supplied in the box to connect one end to your telephone wall jack and problems sending and receiving faxes. Other equipment/services sharing your fax line None (You answered No to all questions.) DSL service - HP L7580 | User Guide - Page 109
6 only.) Case J: Shared voice/fax line with computer modem and answering machine Not applicable. Voice calls, computer dial-up modem, and voice mail service (You answered Yes to questions 4, 5, and 7 only.) Case K: Shared voice/fax line with computer dial-up modem and voice mail Not applicable - HP L7580 | User Guide - Page 110
1. Using the phone cord supplied in the box with the device, connect one end to your telephone wall jack, then connect the other end to the DSL If you have a DSL service through your telephone company, and do not connect any equipment to the device, use the instructions in this section to connect a - HP L7580 | User Guide - Page 111
specific phone equipment. For example, you might have assigned one port for telephone and Group 3 fax and another port for multiple purposes. If you have problems . Refer to the documentation that came with your PBX phone system for instructions on how to turn off the call-waiting tone. • If you are - HP L7580 | User Guide - Page 112
the box with the device to connect to the 1-LINE port To set up the device with a distinctive ring service 1. Using the phone cord supplied in the box with the device, connect one end to your telephone wall jack, then connect the other end to the port labeled 1-LINE on the back - HP L7580 | User Guide - Page 113
line 1. Using the phone cord supplied in the box with the device, connect one end to your telephone wall jack, then connect the other end to the port the phone cords you might already have in your home or office. 2. Do one of the following: • If you have a parallel-type phone system, remove the - HP L7580 | User Guide - Page 114
the device as described in this section. NOTE: You cannot receive faxes automatically if you have a voice mail service at the same phone number you use for fax calls. You must receive faxes manually; this means you must be available to respond in person to incoming fax calls. If you want to - HP L7580 | User Guide - Page 115
To set up the device with voice mail 1. Using the phone cord supplied in the box with the device, connect one end to your telephone wall jack, then connect the other end to the port labeled 1-LINE on the back of the device. NOTE: If you - HP L7580 | User Guide - Page 116
the phone cord supplied in the box with the device, connect one end to your telephone wall jack, then connect the other end have in your home or office. 4. If your modem software is set to receive faxes to your computer automatically, turn instructions to set up your fax. 112 Configure and manage - HP L7580 | User Guide - Page 117
will need to purchase a parallel splitter (also called a coupler). A parallel splitter has one RJ-11 port on the front and two RJ-11 ports on the back. Do . 2. Using the phone cord provided in the box with the device, connect one end to the DSL filter, and then connect the other end to the port - HP L7580 | User Guide - Page 118
use your phone line for both fax and telephone calls, use these instructions to set up your fax. There are two different ways to set plug on the back.) Figure 9-7 Example of a parallel splitter • If your computer has one phone port, set up the device as described below. Figure 9-8 Back view of the - HP L7580 | User Guide - Page 119
phone cord supplied in the box with the device, connect one end to your telephone wall jack, then connect the your home or office. 6. If your modem software is set to receive faxes to your computer you set up the device to answer faxes manually, you must be available to respond in person - HP L7580 | User Guide - Page 120
9 Shared voice/fax with computer DSL/ADSL modem Use these instructions if your computer has a DSL/ADSL modem 1 Telephone wall : You will need to purchase a parallel splitter (also called a coupler). A parallel splitter has one RJ-11 port on the front and two RJ-11 ports on the back. Do not use - HP L7580 | User Guide - Page 121
in other parts of the home/office sharing the same phone number with DSL service will need to be connected to additional DSL filters, otherwise you will experience 2. Using the phone cord supplied in the box with the devices, connect one end to the DSL filter, then connect the other end to the port - HP L7580 | User Guide - Page 122
3. Using the phone cord supplied in the box with the device, connect one end to your telephone wall jack, then connect the other end to the the Rings to Answer setting on the device to the maximum number of rings supported by your device. (The maximum number of rings varies by country/ region.) - HP L7580 | User Guide - Page 123
splitter which has two RJ-11 ports on the front and a plug on the back.) Figure 9-10 Example of a parallel splitter • If your computer has one phone port, set up the device as described below. Figure 9-11 Back view of the device 1 Telephone wall jack 2 Telephone cord connected to the parallel - HP L7580 | User Guide - Page 124
in the box with the device, connect one end to your telephone wall jack, then connect cords for these connections. 6. If your modem software is set to receive faxes to your computer setting on the device to the maximum number of rings supported by your device. (The maximum number of rings varies - HP L7580 | User Guide - Page 125
5 DSL/ADSL modem 6 Computer 7 Answering machine 8 Telephone (optional) NOTE: You will need to purchase a parallel splitter (also called a coupler). A parallel splitter has one RJ-11 port on the front and two RJ-11 ports on the back. Do not use a 2-line phone splitter, a serial splitter, or - HP L7580 | User Guide - Page 126
same phone number with DSL/ADSL service will need to be connected to in the box with the device, connect one end to the DSL/ADSL filter, device to the maximum number of rings supported by the device. NOTE: The maximum have a computer DSL modem, follow these instructions to set up your fax. Case K: - HP L7580 | User Guide - Page 127
if you have a voice mail service at the same phone number you use for fax calls. You must receive faxes manually; this means you must be available you begin, check your computer to see if it has one or two phone ports. • If your computer has only one phone port, you will need to purchase a parallel - HP L7580 | User Guide - Page 128
device, connect one end to modem software is set hp.com/de/faxconfig www.hp.com/ch/fr/faxconfig www.hp.com/ch/de/faxconfig www.hp.com/uk/faxconfig www.hp.fi/faxconfig www.hp.dk/faxconfig www.hp.se/faxconfig www.hp.no/faxconfig www.hp.nl/faxconfig www.hp.be/nl/faxconfig www.hp.be/fr/faxconfig www.hp - HP L7580 | User Guide - Page 129
install a printer driver on Windows 2000, Windows XP, or Windows Server 2003. When setting up the device, HP recommends that you connect it after you install the software because the installation .. 3. On the CD menu, click Install and follow the onscreen instructions. 4. When prompted, turn on the - HP L7580 | User Guide - Page 130
users print to the device. Only the printing function is shared. Scan, Copy, and Fax functions are not shared. 1. Click Start, point to Settings, and then click Printers or Printers other versions of Windows, click Additional Drivers to install those drivers as a convenience to the users. You must - HP L7580 | User Guide - Page 131
instructions to complete the installation. NOTE: To share the device with Windows client computers, see To install the device software on client computers and To share the device on a locally shared network. To install the device software on client computers After printer drivers are installed - HP L7580 | User Guide - Page 132
double-click the Add Printer icon and follow the instructions for a network installation. For more information, see To install the printer driver using Add Printer. • On the network, browse to the device and drag it to your Printers folder. • Add the device and install the software from the INF file - HP L7580 | User Guide - Page 133
device must have device sharing software installed, and the driver or PPD for the device that is installed. (You can run the installation program to install the device sharing software and associated Help files.) For more information about USB device sharing, see the support information on the Apple - HP L7580 | User Guide - Page 134
be on the same subnet. Before installing the device software, you may wish to find out the settings of your network. Obtain the information from your system administrators, or complete the following tasks: • Obtain your network's network name or Service Set Identifier (SSID) and communication mode - HP L7580 | User Guide - Page 135
pdf/ whitepaper_wi-fi_security4-29-03.pdf users can access their wireless networks. • Data encryption: • Wired Equivalent Privacy (WEP) provides security by encrypting data sent over radio waves from one supports the Independent Basic Service (see the getting started guide or the setup poster that - HP L7580 | User Guide - Page 136
the display instructions to complete the setup. To set up wireless communication using the installer (Windows) For this method, you will need to have a network set up and running. 1. Set up the device hardware (see the getting started guide connect the printer to your network - HP L7580 | User Guide - Page 137
and repeat the steps. For more information, see Solve wireless problems. 4. Close any applications that are running on your computer instructions. To set up the device on a wireless network (Mac OS) 1. Set up the device hardware (see the getting started guide). 2. Ensure an AirPort card is installed - HP L7580 | User Guide - Page 138
Install Software and follow the onscreen instructions. 8. On the Connection Type screen, select the wireless network option, and then click Done. 9. Follow the onscreen instructions in the Network Printer Setup Utility, which starts running automatically, to install the printer driver of one another - HP L7580 | User Guide - Page 139
off the setting to automatically connect to non-preferred networks. This is disabled by default in Windows XP. Set up the device for Bluetooth communication The HP Bluetooth Wireless Printer Adapter allows you to print documents from Bluetooth devices without a cable connection. Simply insert the - HP L7580 | User Guide - Page 140
ink cartridges. NOTE: The only software functionality available with a Bluetooth connection is printing. Scanning and software-based faxing cannot be done over a Bluetooth connection. However, stand-alone copy and fax functions are still available. Connecting the device with Bluetooth on Windows - HP L7580 | User Guide - Page 141
then select A Bluetooth Printer. 6. Follow the onscreen instructions to finish the installation. 7. Print as you would to any printer. To install and print using the Widcomm/Broadcom stack 1. Make sure that you have installed the device software on the computer. 2. Attach an HP Bluetooth adapter to - HP L7580 | User Guide - Page 142
, click on Network, select Network Port Configurations, and then assure that Bluetooth is checked. 1. Make sure that you have installed the device software on the computer. 2. Attach an HP Bluetooth Adapter to the front USB port of the device. 3. Press the Power button on the control panel to turn - HP L7580 | User Guide - Page 143
: Any Bluetooth device within range can print to the device. • Not visible: Only Bluetooth devices that have stored the device address of the all- in-one can print to it. NOTE: The device ships with a default accessibility level of Visible. To set the device to be not visible from the control - HP L7580 | User Guide - Page 144
after you have reinstalled the software. 2. Press the Power button to turn off the device. 3. On the Windows taskbar, click Start, select Programs or All Programs, select HP, select Officejet Pro L7XXX Series, and then click Uninstall. 4. Follow the onscreen instructions. 5. If you are asked whether - HP L7580 | User Guide - Page 145
. 2. Select HP Officejet Pro All-in-One Series, and then click Change/Remove or Uninstall/Change. Follow the onscreen instructions. 3. Disconnect the onscreen instructions and also see To install the software before connecting the device (recommended). To uninstall from a Windows computer, method - HP L7580 | User Guide - Page 146
Chapter 9 6. On the desktop, open the CD-ROM, and then double-click HP All-in-One Installer. 7. Follow the onscreen instructions and also see To install the software before connecting the device (recommended). 142 Configure and manage - HP L7580 | User Guide - Page 147
problems • Solve copy problems • Solve scan problems • Solve fax problems • Solve photo (memory card) problems • Solve device management problems • Troubleshoot installation issues • Clear jams Supported ink cartridges The availability of ink cartridges varies by country/region. The ink cartridges - HP L7580 | User Guide - Page 148
Chapter 10 Replace the ink cartridges You can check the estimated ink levels from the Toolbox (Windows), the HP Printer Utility (Mac OS), or the embedded Web server. For information about using these tools, see Use device management tools. You can also print the self- - HP L7580 | User Guide - Page 149
and then click Run Diagnostic. • Toolbox (Windows): Click the Services tab, and then click Print PQ (print quality) diagnostic page and follow the onscreen instructions. • HP Printer Utility (Mac OS): Click Print Quality Diagnostics from the Information and Support panel. Maintain the printheads 145 - HP L7580 | User Guide - Page 150
-down list in the Print Quality section, and then click Run Diagnostic. • Toolbox (Windows): Click the Services tab, and then click Align Printheads and follow the onscreen instructions. • HP Printer Utility (Mac OS): Click Align from the Information and Support panel. 146 Maintain and troubleshoot - HP L7580 | User Guide - Page 151
Diagnostic. • Toolbox (Windows): Click the Services tab, and then click Clean Printheads and follow the onscreen instructions. • HP Printer Utility (Mac OS): Click Clean from the Information and Support panel. To clean the printhead contacts manually After the printheads are installed, you might get - HP L7580 | User Guide - Page 152
, soft and lint-free cleaning material. Suitable materials include paper coffee filters and eyeglass lens cleaning paper. CAUTION: Do not use water. 148 Maintain and troubleshoot - HP L7580 | User Guide - Page 153
printhead but do not touch the nozzles. NOTE: The electrical contacts are small copper-color squares, grouped on one face of the printhead. The nozzles are on a different face of the printhead. Ink will be visible on the nozzles. CAUTION: Touching the nozzles can cause permanent nozzle damage. Also - HP L7580 | User Guide - Page 154
pages. If the device does not print the pages, start the alignment process manually. For more information, see To align the printheads. To replace the printheads NOTE: To find out which printheads work with your printer, see Supplies. 1. Open the top cover. 2. If the carriage does not move to - HP L7580 | User Guide - Page 155
3. Lift the printhead latch. 4. Lift the handle of a printhead and use it to pull the printhead out of its slot. 5. Before installing a printhead, shake the printhead up and down at least six times while the printhead is still in its packaging. Maintain the printheads 151 - HP L7580 | User Guide - Page 156
manually. For more information, see To align the printheads. Store printing supplies This section covers the following topics: • Store ink cartridges • Store printheads Store ink cartridges Ink cartridges Clean the device This section provides instructions for keeping the device in top working condition. - HP L7580 | User Guide - Page 157
ADF lid backing, or ADF frame can slow down performance, degrade the quality of scans, and affect the accuracy of special features such as fitting copies to a certain page for the device. If streaks exist on scanned documents, cleaning the ADF frame might solve the problem. Clean the device 153 - HP L7580 | User Guide - Page 158
Chapter 10 To clean the ADF 1. Turn off the device. 2. Lift the ADF. 3. Locate the ADF frame on the underside of the ADF. 4. Press the ADF frame release. 154 Maintain and troubleshoot - HP L7580 | User Guide - Page 159
5. Unhook and remove the ADF frame. 6. Clean the ADF frame by using a soft, lint-free cloth that has been sprayed with a mild glass cleaner. Clean both sides of the transparent film, including the white strip on the inside of the ADF frame. CAUTION: Use only glass cleaner. Avoid cleaners that - HP L7580 | User Guide - Page 160
residual alcohol, and then dry the backing with a dry, soft, lint-free cloth. 6. Close the ADF and then turn on the device. 156 Maintain and troubleshoot - HP L7580 | User Guide - Page 161
on. For voltage requirements, see Electrical specifications. • Media is loaded correctly in the tray and is not jammed in the device. • Printheads and ink cartridges are properly installed in their correct color-coded slots. Press down firmly on each one to ensure proper contact. Ensure you have - HP L7580 | User Guide - Page 162
2. Select Manual IP, and then type the static IP address in the Manual IP Address box. 3. Enter the Manual Subnet Mask and the Manual Default Gateway, the cables. If the problem persists, visit the HP Web site (www.hp.com/support) for the latest troubleshooting information, or product fixes and - HP L7580 | User Guide - Page 163
the correct device driver and printer driver port are being used. For more information about network connections, see Configure the device (Windows), Configure the device (Mac OS), or the documentation provided by your network vendors. Check any personal firewall software installed on the computer - HP L7580 | User Guide - Page 164
on again without the printhead installed. After the device has . Check the device software settings Print speed is settings in the device driver. For more information, ink cartridges Check the control panel to see which cartridge is low or empty. The Toolbox (Windows), HP Printer troubleshoot - HP L7580 | User Guide - Page 165
and turn it on again without the printhead installed. After it has restarted, reinsert the printhead is loaded Make sure the media width and length guides fit snugly against the edges of the stack of media printer driver. For more information, see Change print settings. Solve printing problems 161 - HP L7580 | User Guide - Page 166
application's documentation, or contact the software manufacturer for specific help. The device prints half a page, then ejects the paper Check the ink cartridges The ink cartridges may have run out of ink, and the print job was cancelled. Replace the ink cartridges, and then resend the print job - HP L7580 | User Guide - Page 167
the printouts. This is especially true for transparencies. In the printer driver, select the Best print quality, and also increase the ink drying time and reduce the ink saturation using the ink volume under the advanced features (Windows) or ink features (Mac OS). However, note that decreasing - HP L7580 | User Guide - Page 168
is not selected in the printer driver. Check the printheads Print the print quality diagnostic page on a clean sheet of white paper. Evaluate any problem areas, and perform the recommended actions. For more information, see To print the print quality diagnostic page. 164 Maintain and troubleshoot - HP L7580 | User Guide - Page 169
to the device or printhead. HP does not guarantee or support refilled ink cartridges. For ordering information, see HP supplies and accessories. Check the printheads Print the print quality diagnostic page on a clean sheet of white paper. Evaluate any problem areas, and perform the recommended - HP L7580 | User Guide - Page 170
needed, pull out the trays from the device and reload the media properly, making sure that the paper guides are properly aligned. • Make sure the rear access panel or duplexer is properly installed. • Load media into the device only when it is not printing. Multiple pages are being picked up • Fan - HP L7580 | User Guide - Page 171
one time. • Use HP media for optimum performance and efficiency. Solve copy problems If the following topics do not help, see Support and warranty for information about HP support the media The media might not meet Hewlett-Packard media specifications (for example, the media is too moist or too - HP L7580 | User Guide - Page 172
HP photo and imaging software settings might be set to reduce the scanned image. Change the settings, if needed. See the onscreen Help for the HP photo and imaging software lid backing, or ADF window might need cleaning. See meet Hewlett-Packard media specifications (for example, the troubleshoot - HP L7580 | User Guide - Page 173
For more information, see Replace the ink cartridges. Solve scan problems If the following topics do not help, see Support and warranty for information about HP support. NOTE: If you are starting the scan from a computer, see the software Help for troubleshooting information. Solve scan problems 169 - HP L7580 | User Guide - Page 174
, the default settings in the HP photo and imaging software might be set to automatically perform a specific task other than the one that you are attempting. See the onscreen Help for the HP photo and imaging software for instructions about changing the properties. 170 Maintain and troubleshoot - HP L7580 | User Guide - Page 175
selected. In the software, check the TWAIN ink that make an interpretation of the original photograph, which degrades the quality. Often, the ink dots form unwanted patterns that can be detected when the image is scanned or printed or when the image appears on a screen. If the Solve scan problems - HP L7580 | User Guide - Page 176
Windows control panel. • Try adjusting the resolution and color settings. • The scanned image is skewed (crooked) The original might have been loaded incorrectly. Be sure to use the media guides cleaning instructions. • The defects might be on the original and not a result of the scanning process. - HP L7580 | User Guide - Page 177
streaks • Ink, glue, the problem, the HP software settings might be set to reduce the scanned image. See the product software Help for more information about changing the settings. Unable to scan to network folder (Direct Digital Filing) NOTE: The Direct Digital Filing feature does not support Windows - HP L7580 | User Guide - Page 178
users and suffix. If you have scanned many files to a folder marks are also supported. However, setup cannot be resolved to specific IP addresses. When setting -one. Solve fax problems This section contains fax setup troubleshooting test failed, and then review the appropriate topic in this - HP L7580 | User Guide - Page 179
the test fails again, continue reviewing the troubleshooting information in this section. • Try to send or receive a test fax. If you can send or receive a fax successfully, there might not be a problem. • If you are running the test from the Fax Setup Wizard (Windows) or HP Fax Setup Utility (Mac - HP L7580 | User Guide - Page 180
problems found, run the fax test again to make sure it passes and the device is ready for faxing. The "Phone Cord Connected to Correct Port on Fax" test failed Solution: Plug the phone cord into the correct port. 1. Using the phone cord supplied in the box with the device, connect one troubleshoot - HP L7580 | User Guide - Page 181
test again. • If you are using a phone splitter, this can cause faxing problems. (A splitter is a two-cord connector that plugs into a telephone wall jack.) in the box with the device to connect to the telephone wall jack. One end of the phone cord should be connected to the port labeled 1-LINE on - HP L7580 | User Guide - Page 182
problems. problem, disconnect everything one or more pieces of the equipment is causing problems; try adding them back one at a time and rerunning the test each time, until you identify which piece of equipment is causing the problem one problems. problem problems problems - HP L7580 | User Guide - Page 183
them back one at a time and rerunning the test each time, until you identify which piece of equipment is causing the problem. • If the Fax Line Condition Test fails without the other equipment, connect the device to a working phone line and continue reviewing the troubleshooting information in - HP L7580 | User Guide - Page 184
or access the Internet. The device is having problems sending and receiving faxes Solution: Make sure the the device. After turning on the device, HP recommends you wait five minutes before sending or to connect to the telephone wall jack. One end of the phone cord should be connected troubleshoot - HP L7580 | User Guide - Page 185
the onscreen Help. If the problem persists, contact your telephone company. • If you are using a digital subscriber line (DSL) service, make sure that you have off, contact your DSL provider for support. • If you are using a phone splitter, this can cause faxing problems. (A splitter is a two-cord - HP L7580 | User Guide - Page 186
problems sending a manual Solution: • If you are not using a distinctive ring service, check to make sure that the Distinctive Ring feature manually; otherwise, the device will not receive the fax. For information on receiving faxes manually, see Receive a fax manually. 182 Maintain and troubleshoot - HP L7580 | User Guide - Page 187
a voice mail service, see Case F: Shared voice/fax line with voice mail. For information on receiving faxes manually, see Receive a fax manually. • If on the same phone line with the device, you might have one of the following problems: • Your answering machine might not be set up properly with - HP L7580 | User Guide - Page 188
the other equipment, one or more pieces of the other equipment is causing problems; try adding them back one at a time and service could be interfering with the recipient's phone line. You can also ask the recipient to check the receiving fax machine for any problems. 184 Maintain and troubleshoot - HP L7580 | User Guide - Page 189
cord 1. Using the phone cord supplied in the box with the device, connect one end to the coupler, then connect the other end to the port labeled 1-LINE (memory card) problems If the following topics do not help, see Support and warranty for information about HP support. Solve photo (memory card - HP L7580 | User Guide - Page 190
software Help for troubleshooting information. The device cannot read the memory card • Check the memory card • Make sure that the memory card is one of the supported reader or have the device serviced. For more information, see Support and warranty. • Make sure that only one memory card has been - HP L7580 | User Guide - Page 191
ink cartridges The ink cartridges may have run out of ink, and the print job was cancelled. Replace the ink cartridges, and then resend the print job to the device. For more information, see Replace the ink cartridges. Solve device management problems Configure the device (Windows) or Configure user - HP L7580 | User Guide - Page 192
Chapter 10 Troubleshoot installation issues If the following topics do not help, see Support and warranty for information about HP support. • Hardware installation suggestions • Software installation suggestions • Solve alignment page problems • Solve software installation problems • Solve network - HP L7580 | User Guide - Page 193
removed from each printhead. • Printheads and ink cartridges are properly installed in their correct color-coded slots. Press down firmly on each one to ensure proper contact. • Printhead latch and all covers are closed. Solve software installation problems Check or perform the following: • Make - HP L7580 | User Guide - Page 194
Chapter 10 Solve network problems NOTE: After correcting any of the following, run the installation program again. General network troubleshooting • If you are unable to install the device software, verify that: • All cable connections to the computer and the device are secure. • The network is - HP L7580 | User Guide - Page 195
Solve wireless problems If the device is unable to communicate with the network after completing the wireless setup and software installation, perform one or more of from the device. 6. Uninstall the device software completely, and then reinstall the software. Troubleshoot installation issues 191 - HP L7580 | User Guide - Page 196
remedies before you attempt to clear the jam. • Make sure that you are printing with media that meets specifications. For more information, see Select print media. • Make sure that you are printing with media that is too full. For more information, see Load media. 192 Maintain and troubleshoot - HP L7580 | User Guide - Page 197
Clear a jam in the device To clear a jam 1. Remove all media from the output tray. 2. Check the rear access panel or the duplexer. a. Push the button on either side of the rear access panel or the duplexer, and then remove the panel or unit. b. Locate any jammed media inside the device, grasp it - HP L7580 | User Guide - Page 198
Pull the paper towards you. c. Lower the output tray. 4. If you have not found the jam and have Tray 2 installed, pull out the tray and remove the jammed media, if possible. If not, do the following: a. Ensure the device (if you turned it off) and resend the print job. 194 Maintain and troubleshoot - HP L7580 | User Guide - Page 199
Clear jams in the ADF If media is jammed in the ADF, use the following instructions below to clear the jam. For information about how to avoid jams, see Tips for avoiding jams. To clear a jam in the ADF 1. If a page - HP L7580 | User Guide - Page 200
the two tabs until the part snaps into place. NOTE: If the cleanout part is not replaced correctly, future jamming might occur. 196 Maintain and troubleshoot - HP L7580 | User Guide - Page 201
Do not overload the trays. For more information, see Understand specifications for supported media. • Load paper properly and when the device is pick multiple sheets at one time. • Do not use media that is curled or crumpled. • Always use media that conforms with specifications. For more information, - HP L7580 | User Guide - Page 202
button from any page in the embedded Web server. • Toolbox (Windows): On the Estimated Ink Level tab, click Shop Online. • HP Printer Utility (Mac OS): Click Supplies Status from the Information and Support panel, click the Shop for HP Supplies drop-down menu, and then choose Online. Accessories - HP L7580 | User Guide - Page 203
tab, and then click Ink Supplies in the left pane. • Toolbox (Windows): Click the Estimated Ink Level tab, and then click the Cartridge Details button to view information about replacement ink cartridges. • HP Printer Utility (Mac OS): Open the Information and Support panel, and then click - HP L7580 | User Guide - Page 204
and warranty The information in Maintain and troubleshoot suggests solutions to common problems. If your device is not operating correctly and those suggestions did not solve your problem, try using one of the following support services to obtain assistance. This section contains the following - HP L7580 | User Guide - Page 205
the version number of the printer software, such as HP Officejet Pro L7500 Series Version: 60.52.213.0. (To find the version number of the printer driver, open the printer settings or properties dialog box, and click the About tab.) 6. If you have a problem printing from a particular application - HP L7580 | User Guide - Page 206
Appendix B 202 Support and warranty - HP L7580 | User Guide - Page 207
Hewlett-Packard limited warranty statement Hewlett-Packard limited warranty statement 203 - HP L7580 | User Guide - Page 208
device for shipment If after contacting HP Customer Support or returning to the point of purchase, you are requested to send the device in for service, make sure you remove and keep the following items before returning your device: • The ink cartridges and printheads • The control-panel faceplate - HP L7580 | User Guide - Page 209
plastic container so they will not dry out, and put them aside. Do not send them with the device unless the HP customer support call agent instructs you to. 5. Close the ink cartridge door and wait a few minutes for the print carriage to move back to its home position (on the left side). 6. After - HP L7580 | User Guide - Page 210
control-panel faceplate. Do not return the control-panel faceplate with the HP Allin-One. CAUTION: The replacement device might not come with a control-panel the device for instructions on how to attach your control-panel faceplate. The replacement device might come with instructions for setting up - HP L7580 | User Guide - Page 211
shipping label on the outside of the box. 3. Include the following items in the box: • A complete description of symptoms for service personnel (samples of print quality problems are helpful). • A copy of the sales slip or other proof of purchase to establish the warranty coverage period. • Your - HP L7580 | User Guide - Page 212
inches) to the height of the device. Device weight (does not include printheads or ink cartridges) • Device with A4/Letter-size scanner glass (L7300, L7500): 14.2 kg (31.3 lb) • Device with Legal-size scanner glass (L7600, L7700): 14.76 kg (32.5 lb) • With Duplexer: Adds 0.95 kg (2.0 lb) • With Tray - HP L7580 | User Guide - Page 213
operating systems and system requirements, visit http://www.hp.com/support/ Operating system compatibility • Windows 2000, Windows XP, Windows XP x64* (Professional and Home Editions) • Mac OS X (10.3, 10.4) • Linux NOTE: Printer and scanner drivers for Windows Server 2003 (both 32-bit and 64-bit - HP L7580 | User Guide - Page 214
Internet Explorer 6.0 or later Network protocol specifications Network operating system compatibility • Windows 2000, Windows XP (32-bit), Windows XP x64 (Professional and Home Editions) • Mac OS X (10.3, 10.4) • Microsoft Windows 2000 Server Terminal Services with Citrix Metaframe XP with Feature - HP L7580 | User Guide - Page 215
with Vivera inks (up to 4800 by 1200 dpi Optimized on HP Premium Plus photo papers with 1200 by 1200 input dpi) Copy specifications • Digital image processing • Up to 100 copies from original (varies by model) • Digital zoom: from 25 to 400% (varies by model) • Fit to page, pre-scan • Copy speed - HP L7580 | User Guide - Page 216
600 dpi • Supported file formats: PDF, JPG • Supported network configuration: TCP/IP network Environmental specifications Operating environment L7300/L7500: 32 watts printing; 35 watts faxing or copying • L7600/L7700: 33 watts printing; 37 watts faxing or copying Acoustic emission specifications - HP L7580 | User Guide - Page 217
• Memory Stick Duo • Memory Stick Pro • Secure Digital • MultiMediaCard (MMC) • xD-Picture Card Other memory cards, including Memory Stick Magic Gate Duo, Memory Stick Duo, and Secure Multimedia Card, are supported with the use of an adapter. See the instructions that came with your memory card for - HP L7580 | User Guide - Page 218
will not occur in a particular installation. If this equipment does cause harmful interference to radio or television reception, which can be determined by turning the equipment off and on, the user is encouraged to try to correct the interference by one or more of the following measures - HP L7580 | User Guide - Page 219
Exposure to radio frequency radiation (wireless products only) FCC statement 215 - HP L7580 | User Guide - Page 220
Appendix D Notice to users of the U.S. telephone network 216 Regulatory information - HP L7580 | User Guide - Page 221
Notice to users of the Canadian telephone network Notice to users of the Canadian telephone network 217 - HP L7580 | User Guide - Page 222
Appendix D Notice to users in the European Economic Area Other regulatory information • EMI statement (Korea) • VCCI statement (Japan) • Regulatory model number • Power cord statement • LED classification EMI statement (Korea) 218 Regulatory information - HP L7580 | User Guide - Page 223
regulatory number should not be confused with the marketing name (HP Officejet Pro L7300/ L7500/L7600/L7700) or product number (CB778A, C8157A, C8158A, C8159A). Power wireless products • Notice to users in Canada/Note à l'attention des utilisateurs Canadien • Notice to users in Brazil/Notificação de - HP L7580 | User Guide - Page 224
Appendix D Notice to users in Canada/Note à l'attention des utilisateurs Canadien Notice to users in Brazil/Notificação de Normas de Uso de Dispositivos Sem Fio do Brasil 220 Regulatory information - HP L7580 | User Guide - Page 225
Notice to users in the European Union (English) Regulatory information for wireless products 221 - HP L7580 | User Guide - Page 226
Appendix D Notice to users in France 222 Regulatory information - HP L7580 | User Guide - Page 227
Notice to users in Germany Regulatory information for wireless products 223 - HP L7580 | User Guide - Page 228
Appendix D Notice to users in Italy 224 Regulatory information - HP L7580 | User Guide - Page 229
Notice to users in Spain Regulatory information for wireless products 225 - HP L7580 | User Guide - Page 230
Appendix D Declaration of conformity HP Officejet Pro L7500/L7600 226 Regulatory information - HP L7580 | User Guide - Page 231
HP Officejet Pro L7700 Declaration of conformity 227 - HP L7580 | User Guide - Page 232
used. HP has one sheet of paper) can reduce paper usage and the resulting demands on natural resources. See this guide for more information about using these features. Ink use This product's draft mode uses less ink, which might extend the life of the cartridges. See the print driver Specification - HP L7580 | User Guide - Page 233
the end of the product's life. Disposal of waste equipment by users in private households in the European Union This symbol on the product household waste disposal service or the shop where you purchased the product. HP products and supplies HP's Planet Partners™ recycling service provides an easy - HP L7580 | User Guide - Page 234
32 sizes supported 34 tray supporting 36 cartridges. See ink cartridges chlorofluorocarbons (CFCs) 228 clean ADF 153 exterior 157 printheads 147 scanner glass 152 color copy 50 colored text, and OCR 56 colors bleeding 165 faded or dull 164 print black and white, troubleshoot 164 specifications 210 - HP L7580 | User Guide - Page 235
33 print on 41 sizes supported 35 customer support electronic 200 HP Instant Support 94 phone support 200 cut-off pages, troubleshoot 161 D dark images, troubleshoot copies 168 scans 173 Declaration of Conformity (DOC) 226 default settings control panel 25 copy 50 driver 47 print 47 deleting faxes - HP L7580 | User Guide - Page 236
FoIP 82 fonts supported 208 forwarding faxes 76 G getting started guide 10 glass, scanner clean 152 load originals 31 locating 13 grainy or white bands on copies, troubleshoot 169 graphics incompletely filled on copies 169 ink not filling in 164 look different from original scan 172 missing lines - HP L7580 | User Guide - Page 237
87, 97 supported 143, 208 warranty 203 yields 208 ink level icons 18 ink smearing, troubleshoot 163 installation accessories 21 Add Printer, Windows 128 duplexer 21 ink cartridges 144 software for Mac OS 128 software for Windows 125 tray 2 21 troubleshoot 188 Windows network software 127 Internet - HP L7580 | User Guide - Page 238
Copies button 16 O OCR edit scanned documents 56 troubleshoot 171 OK button 16 On button 17 one-touch speed dial buttons 16 operating environment specifications 212 operating systems supported 209 originals crop 50 edit scans 56 load ADF (automatic document feeder) 30 scan 52 output tray locating 13 - HP L7580 | User Guide - Page 239
photos 67 print cartridges. See ink cartridges print driver accessories settings 22 settings 47 version 201 warranty 203 print quality diagnostic page 145 troubleshoot 162 Print quality diagnostic page 145 print-carriage access door, locating 14 printer driver accessories settings 22 settings - HP L7580 | User Guide - Page 240
shipping the device 204 size scans, troubleshoot 173 troubleshoot copy 168 skew, troubleshoot copy 169 print 166 scan 172 slow print, troubleshoot 160 software accessories settings 22 connection types 19 HP Photosmart 26 installation on Mac OS 128 installation on Windows 125 management tools 86 OCR - HP L7580 | User Guide - Page 241
on copies, troubleshoot 169 unclear scans 173 tone dialing 81 Toolbox (Windows) about 91 administrator settings 89 Estimated Ink Level tab 92 features 86 Information tab 92 opening 91 Services tab 92 transparencies 33 tray 1 capacity 36 load media 38 locating 13 media sizes supported 33 media types - HP L7580 | User Guide - Page 242
55 white bands or stripes, troubleshoot copies 168, 169 scans 172 WIA (Windows Image Application), scan from 55 Windows Add Printer installation 128 Bluetooth 136 borderless printing 42 duplexing 48 HP Photosmart Software 26 HP Solution Center 26 install software 125 network setup 127 print on - HP L7580 | User Guide - Page 243
- HP L7580 | User Guide - Page 244
- HP L7580 | User Guide - Page 245
© 2007 Hewlett-Packard Development Company, L.P. www.hp.com
-
 1
1 -
 2
2 -
 3
3 -
 4
4 -
 5
5 -
 6
6 -
 7
7 -
8
-
9
-
10
-
11
-
12
-
13
-
14
-
15
-
16
-
17
-
18
-
19
-
20
-
21
-
22
-
23
-
24
-
25
-
26
-
27
-
28
-
29
-
30
-
31
-
32
-
33
-
34
-
35
-
36
-
37
-
38
-
39
-
40
-
41
-
42
-
43
-
44
-
45
-
46
-
47
-
48
-
49
-
50
-
51
-
52
-
53
-
54
-
55
-
56
-
57
-
58
-
59
-
60
-
61
-
62
-
63
-
64
-
65
-
66
-
67
-
68
-
69
-
70
-
71
-
72
-
73
-
74
-
75
-
76
-
77
-
78
-
79
-
80
-
81
-
82
-
83
-
84
-
85
-
86
-
87
-
88
-
89
-
90
-
91
-
92
-
93
-
94
-
95
-
96
-
97
-
98
-
99
-
100
-
101
-
102
-
103
-
104
-
105
-
106
-
107
-
108
-
109
-
110
-
111
-
112
-
113
-
114
-
115
-
116
-
117
-
118
-
119
-
120
-
121
-
122
-
123
-
124
-
125
-
126
-
127
-
128
-
129
-
130
-
131
-
132
-
133
-
134
-
135
-
136
-
137
-
138
-
139
-
140
-
141
-
142
-
143
-
144
-
145
-
146
-
147
-
148
-
149
-
150
-
151
-
152
-
153
-
154
-
155
-
156
-
157
-
158
-
159
-
160
-
161
-
162
-
163
-
164
-
165
-
166
-
167
-
168
-
169
-
170
-
171
-
172
-
173
-
174
-
175
-
176
-
177
-
178
-
179
-
180
-
181
-
182
-
183
-
184
-
185
-
186
-
187
-
188
-
189
-
190
-
191
-
192
-
193
-
194
-
195
-
196
-
197
-
198
-
199
-
200
-
201
-
202
-
203
-
204
-
205
-
206
-
207
-
208
-
209
-
210
-
211
-
212
-
213
-
214
-
215
-
216
-
217
-
218
-
219
-
220
-
221
-
222
-
223
-
224
-
225
-
226
-
227
-
228
-
229
-
230
-
231
-
232
-
233
-
234
-
235
-
236
-
237
-
238
-
239
-
240
-
241
-
242
-
243
-
244
-
245
 |
 |
HP Officejet Pro
L7300/L7500/L7600/L7700
User Guide