HP LH3000r HP Netserver LH 3/3r User Guide - Page 67
See
 |
View all HP LH3000r manuals
Add to My Manuals
Save this manual to your list of manuals |
Page 67 highlights
Chapter 8 Mounting the NetServer in a Rack 7. Remove two screws from each handle and take them off the server. See Figure 8-15. HP recommends that you retain these handles and the associated screws in case of removal and reshipping of the server. Figure 8-15. Remove Mounting Handles 8. The HP NetServer LH 3r is fastened to the front of the rack by screws which are placed through sheet metal brackets that are also used for the mounting of the front bezel hinge and latch. 9. Attach the bezel hinge to the server by inserting three screws through the right edge of the bezel hinge bracket and into the left front of the server. See Figure 8-16. 10. Attach the bezel latch to the right side of the server using screws provided. 59
-
 1
1 -
2
-
3
-
4
-
5
-
6
-
7
-
8
-
9
-
10
-
11
-
12
-
13
-
14
-
15
-
16
-
17
-
18
-
19
-
20
-
21
-
22
-
23
-
24
-
25
-
26
-
27
-
28
-
29
-
30
-
31
-
32
-
33
-
34
-
35
-
36
-
37
-
38
-
39
-
40
-
41
-
42
-
43
-
44
-
45
-
46
-
47
-
48
-
49
-
50
-
51
-
52
-
53
-
54
-
55
-
56
-
57
-
58
-
59
-
60
-
61
-
 62
62 -
 63
63 -
 64
64 -
 65
65 -
 66
66 -
 67
67 -
 68
68 -
 69
69 -
 70
70 -
 71
71 -
 72
72 -
73
-
74
-
75
-
76
-
77
-
78
-
79
-
80
-
81
-
82
-
83
-
84
-
85
-
86
-
87
-
88
-
89
-
90
-
91
-
92
-
93
-
94
-
95
-
96
-
97
-
98
-
99
-
100
-
101
-
102
-
103
-
104
-
105
-
106
-
107
-
108
-
109
-
110
-
111
-
112
-
113
-
114
-
115
-
116
-
117
-
118
-
119
-
120
-
121
-
122
-
123
-
124
-
125
-
126
-
127
-
128
-
129
-
130
-
131
-
132
-
133
-
134
-
135
-
136
-
137
-
138
-
139
-
140
-
141
-
142
-
143
-
144
-
145
-
146
-
147
-
148
-
149
-
150
-
151
-
152
-
153
-
154
 |
 |

Chapter 8
Mounting the NetServer in a Rack
59
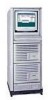
7.
Remove two screws from each handle and take them off the server. See
Figure 8-15. HP recommends that you retain these handles and the
associated screws in case of removal and reshipping of the server.
Figure 8-15.
Remove Mounting Handles
8.
The HP NetServer LH 3r is fastened to the front of the rack by screws
which are placed through sheet metal brackets that are also used for the
mounting of the front bezel hinge and latch.
9.
Attach the bezel hinge to the server by inserting three screws through the
right edge of the bezel hinge bracket and into the left front of the server.
See Figure 8-16.
10.
Attach the bezel latch to the right side of the server using screws
provided.