HP ProLiant SL390s HP ProLiant SL390s G7 1U half width Server Maintenance and - Page 35
CAUTION, To install hard drive, Lock the HDD carrier latches.
 |
View all HP ProLiant SL390s manuals
Add to My Manuals
Save this manual to your list of manuals |
Page 35 highlights
CAUTION: HP ProLiant SL390s G7 1U half width Server supports disk drive hot-swapping. To avoid hand contact with an electrical hazard, do not remove more than one drive carrier a time. 1. Slide the HDD carrier latches to unlock the HDD handle. 2. Raise the HDD handle. 3. Lift the HDD assembly out of the tray. 4. Rotate the HDD carrier handle down. 5. Lock the HDD carrier latches. Figure 7 Removing the hard drive To install hard drive: 1. Unlock the HDD carrier latch. 2. Rotate the HDD carrier handle up. 3. Insert the HDD carrier and align the four pins. 4. Rotate the HDD carrier handle down. 5. Lock the HDD carrier latches. Removal and Replacement Procedures 35
-
 1
1 -
2
-
3
-
4
-
5
-
6
-
7
-
8
-
9
-
10
-
11
-
12
-
13
-
14
-
15
-
16
-
17
-
18
-
19
-
20
-
21
-
22
-
23
-
24
-
25
-
26
-
27
-
28
-
29
-
 30
30 -
 31
31 -
 32
32 -
 33
33 -
 34
34 -
 35
35 -
 36
36 -
 37
37 -
 38
38 -
 39
39 -
 40
40 -
41
-
42
-
43
-
44
-
45
-
46
-
47
-
48
-
49
-
50
-
51
-
52
-
53
-
54
-
55
-
56
-
57
-
58
-
59
-
60
-
61
-
62
-
63
-
64
-
65
-
66
-
67
-
68
-
69
-
70
-
71
-
72
-
73
-
74
-
75
-
76
-
77
-
78
 |
 |

Removal and Replacement Procedures 35
CAUTION:
HP ProLiant SL390s G7 1U half width Server supports disk drive hot-swapping. To avoid
hand contact with an electrical hazard, do not remove more than one drive carrier a time.
1.
Slide the HDD carrier latches to unlock the HDD handle.
2.
Raise the HDD handle.
3.
Lift the HDD assembly out of the tray.
4.
Rotate the HDD carrier handle down.
5.
Lock the HDD carrier latches.
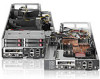
Figure 7
Removing the hard drive
To install hard drive:
1.
Unlock the HDD carrier latch.
2.
Rotate the HDD carrier handle up.
3.
Insert the HDD carrier and align the four pins.
4.
Rotate the HDD carrier handle down.
5.
Lock the HDD carrier latches.