HP ProLiant SL390s HP ProLiant SL390s G7 1U half width Server Maintenance and - Page 43
CAUTION, To install the heat sink
 |
View all HP ProLiant SL390s manuals
Add to My Manuals
Save this manual to your list of manuals |
Page 43 highlights
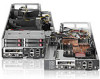
Figure 19 Processor bottom CAUTION: Never touch the bottom of the processor; any contaminant could prevent the mounting pads from making contact with the socket. CAUTION: Applying too much grease creates a gap between the contact surfaces, significantly reducing the ability of the heat sink to draw out heat. Installing the heat sink with excessive grease can also cause the grease to spread over the processor pins or the system board base, which can cause electrical shorts that damage the system. To install the heat sink: CAUTION: To prevent overheating or a possible system crash, use only a heat sink model specified for the HP ProLiant SL390s G7 1U half width server. 1. Properly align the heat sink mounting pins to the system board mounting holes. 2. Tighten the mounting pins clockwise to secure the heat sink connection to the system board. CAUTION: To prevent the heat sink from tilting to one side during installation and removal procedures, use a diagonally opposite pattern (an "X" pattern) when loosening and tightening the two spring-loaded screws. Do not over tighten the heat sink's spring-loaded screws to prevent them from breaking off. A maximum torque of 4 in-Ib is set for the system. Removal and Replacement Procedures 43
-
 1
1 -
2
-
3
-
4
-
5
-
6
-
7
-
8
-
9
-
10
-
11
-
12
-
13
-
14
-
15
-
16
-
17
-
18
-
19
-
20
-
21
-
22
-
23
-
24
-
25
-
26
-
27
-
28
-
29
-
30
-
31
-
32
-
33
-
34
-
35
-
36
-
37
-
 38
38 -
 39
39 -
 40
40 -
 41
41 -
 42
42 -
 43
43 -
 44
44 -
 45
45 -
 46
46 -
 47
47 -
 48
48 -
49
-
50
-
51
-
52
-
53
-
54
-
55
-
56
-
57
-
58
-
59
-
60
-
61
-
62
-
63
-
64
-
65
-
66
-
67
-
68
-
69
-
70
-
71
-
72
-
73
-
74
-
75
-
76
-
77
-
78
 |
 |
