HP ProLiant SL390s HP ProLiant SL390s G7 1U half width Server Maintenance and - Page 41
and then remove the processor installation tool.
 |
View all HP ProLiant SL390s manuals
Add to My Manuals
Save this manual to your list of manuals |
Page 41 highlights
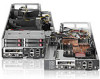
Figure 15 Installing the processor in the installation tool 3. Align the processor installation tool with the socket and install the processor. Figure 16 Installing the processor 4. Press down firmly until the processor installation tool clicks and separates from the processor, and then remove the processor installation tool. Removal and Replacement Procedures 41
-
 1
1 -
2
-
3
-
4
-
5
-
6
-
7
-
8
-
9
-
10
-
11
-
12
-
13
-
14
-
15
-
16
-
17
-
18
-
19
-
20
-
21
-
22
-
23
-
24
-
25
-
26
-
27
-
28
-
29
-
30
-
31
-
32
-
33
-
34
-
35
-
 36
36 -
 37
37 -
 38
38 -
 39
39 -
 40
40 -
 41
41 -
 42
42 -
 43
43 -
 44
44 -
 45
45 -
 46
46 -
47
-
48
-
49
-
50
-
51
-
52
-
53
-
54
-
55
-
56
-
57
-
58
-
59
-
60
-
61
-
62
-
63
-
64
-
65
-
66
-
67
-
68
-
69
-
70
-
71
-
72
-
73
-
74
-
75
-
76
-
77
-
78
 |
 |

Removal and Replacement Procedures 41
Figure 15
Installing the processor in the installation tool
3.
Align the processor installation tool with the socket and install the processor.
Figure 16
Installing the processor
4.
Press down firmly until the processor installation tool clicks and separates from the processor,
and then remove the processor installation tool.