HP Tc2100 hp server tc2100 NOS installation guide (English) - Page 17
Perform Hardware Status Check, Attach Clients to Network and Test Network Link - server service manual
 |
View all HP Tc2100 manuals
Add to My Manuals
Save this manual to your list of manuals |
Page 17 highlights
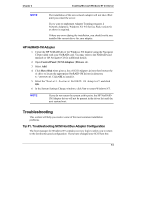
Chapter 2 Installing Microsoft Windows NT 4.0 Server Section 5. Perform Hardware Status Check This section will provide a simple way to verify your installation of Windows NT. Note that Windows NT Resource Guide CD-ROM (available from Microsoft) provide utilities to generate activities to stress the system. The following steps use standard tools provided with the Windows NT Server installation. 1. Inspect the error log in the event viewer (Start | Programs | Administrative Tools | Event Viewer) to verify that no errors were detected. If any errors are found please refer to the troubleshooting section of this document and Windows NT Reference Manual for help. NOTE Windows NT Event Viewer may have recorded network errors if your HP server was not connected prior to your login. If you can not resolve the problem please contact your HP service representative or use HP website for additional troubleshooting resources. 2. Run the "Windows NT Diagnostic Tool" (Start | Programs | Administrative Tools | Windows NT Diagnostic) to gather information about system BIOS, resources, physical memory and video. 3. Check that your different adapters are correctly installed: a. Open the control panel (Start | Settings | Control Panel) b. Check the status of the Network adapter by selecting "Intel® PROSet II". You may perform the diagnostics by selecting the Diagnostics tab then click on Run Tests. Upon completion, close the "Intel PROSet II" window (if you performed the diagnostics, Windows will recommend that you reboot the system). c. Check the status of your SCSI adapter by selecting SCSI Adapters in the Control Panel and click Properties for each device. Section 6. Attach Clients to Network and Test Network Link 1. Create shares: create a folder on your hard drive then share it (right click on folder and the select Sharing). 2. Create users using Windows NT utility: Start | Programs | Administrative Tools | User Manager - DOMAIN 11
-
 1
1 -
2
-
3
-
4
-
5
-
6
-
7
-
8
-
9
-
10
-
11
-
 12
12 -
 13
13 -
 14
14 -
 15
15 -
 16
16 -
 17
17 -
 18
18 -
 19
19 -
 20
20 -
 21
21 -
 22
22 -
23
-
24
-
25
-
26
-
27
-
28
-
29
-
30
-
31
-
32
-
33
-
34
-
35
-
36
-
37
-
38
-
39
-
40
-
41
-
42
-
43
-
44
-
45
-
46
-
47
-
48
-
49
-
50
-
51
-
52
 |
 |
