HP Tc2100 hp server tc2100 NOS installation guide (English) - Page 27
PHASE 3 - Initialize Hard Disk Drive, Start | Programs | Administrative Tools | Computer Management
 |
View all HP Tc2100 manuals
Add to My Manuals
Save this manual to your list of manuals |
Page 27 highlights
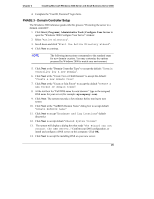
Chapter 3 Installing Microsoft Windows 2000 Server and Small Business Server 2000 NOTE Windows 2000 Event Viewer may have recorded network errors because your network is not configured yet. Please discard these errors. 6. Exit event viewer. PHASE 3 - Initialize Hard Disk Drive To manage your different drives and partitions: 1. Click Start | Programs | Administrative Tools | Disk Administrator. 2. Click OK to proceed when notified you have a new hard disk to configure. 3. Select available hard disk space on the graphic and use menus to create additional partitions. 4. Exit the Disk Administrator. 5. To complete formatting of new partitions, open My Computer, then right click on the new unformatted partition(s) and select format. To start the disk administrator use the following procedure. 1. Click Start | Programs | Administrative Tools | Computer Management. 2. Double click Storage | Disk Management in the tree. 3. The "Write signature and Upgrade" wizard will start if you have new hard drives with no signatures on them. Follow the on-screen instructions to create this signature. 4. Select available hard disk space on the graphic and use menus to create additional partitions. 5. Format all partitions that are not formatted yet. 6. Exit the "Computer Management" tool. NOTE There are two types of hard drive configuration: Dynamic and Basic. You can select the appropriate type by right clicking on the disk drive icon. Dynamic drives are used to create volumes which can contain more than one physical hard drive. Basic drives are used to create primary or local partitioned drives. 21
-
 1
1 -
2
-
3
-
4
-
5
-
6
-
7
-
8
-
9
-
10
-
11
-
12
-
13
-
14
-
15
-
16
-
17
-
18
-
19
-
20
-
21
-
 22
22 -
 23
23 -
 24
24 -
 25
25 -
 26
26 -
 27
27 -
 28
28 -
 29
29 -
 30
30 -
 31
31 -
 32
32 -
33
-
34
-
35
-
36
-
37
-
38
-
39
-
40
-
41
-
42
-
43
-
44
-
45
-
46
-
47
-
48
-
49
-
50
-
51
-
52
 |
 |
