HP rp5800 Hardware Reference Guide HP rp5800 - Page 16
Installing an Optical Drive Bezel
 |
View all HP rp5800 manuals
Add to My Manuals
Save this manual to your list of manuals |
Page 16 highlights
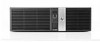
Installing an Optical Drive Bezel On some models there is a driveless bezel in place of the optical drive bezel that must be replaced with an optical drive bezel if you are installing an optical drive. To install an optical drive bezel: 1. Remove the access panel and front bezel. 2. Press each of the clips that secure the driveless section of the bezel to the front bezel in the direction shown below to remove the driveless bezel. Figure 2-4 Removing the Driveless Bezel 3. Insert the clips on the optical drive bezel into the slots on the front bezel ensuring that the optical drive bezel snaps securely in place. Figure 2-5 Installing the Optical Drive Bezel 10 Chapter 2 Hardware Upgrades ENWW
-
 1
1 -
2
-
3
-
4
-
5
-
6
-
7
-
8
-
9
-
10
-
 11
11 -
 12
12 -
 13
13 -
 14
14 -
 15
15 -
 16
16 -
 17
17 -
 18
18 -
 19
19 -
 20
20 -
 21
21 -
22
-
23
-
24
-
25
-
26
-
27
-
28
-
29
-
30
-
31
-
32
-
33
-
34
-
35
-
36
-
37
-
38
-
39
-
40
-
41
-
42
-
43
-
44
-
45
-
46
-
47
-
48
-
49
-
50
-
51
-
52
-
53
-
54
-
55
-
56
-
57
-
58
-
59
-
60
-
61
-
62
-
63
-
64
-
65
-
66
-
67
-
68
-
69
-
70
-
71
-
72
-
73
-
74
 |
 |

Installing an Optical Drive Bezel
On some models there is a driveless bezel in place of the optical drive bezel that must be replaced
with an optical drive bezel if you are installing an optical drive. To install an optical drive bezel:
1.
Remove the access panel and front bezel.
2.
Press each of the clips that secure the driveless section of the bezel to the front bezel in the
direction shown below to remove the driveless bezel.
Figure 2-4
Removing the Driveless Bezel
3.
Insert the clips on the optical drive bezel into the slots on the front bezel ensuring that the optical
drive bezel snaps securely in place.
Figure 2-5
Installing the Optical Drive Bezel
10
Chapter 2
Hardware Upgrades
ENWW