Hitachi 42PD8800 Owners Guide - Page 18
Information, How to secure the cables.
 |
View all Hitachi 42PD8800 manuals
Add to My Manuals
Save this manual to your list of manuals |
Page 18 highlights
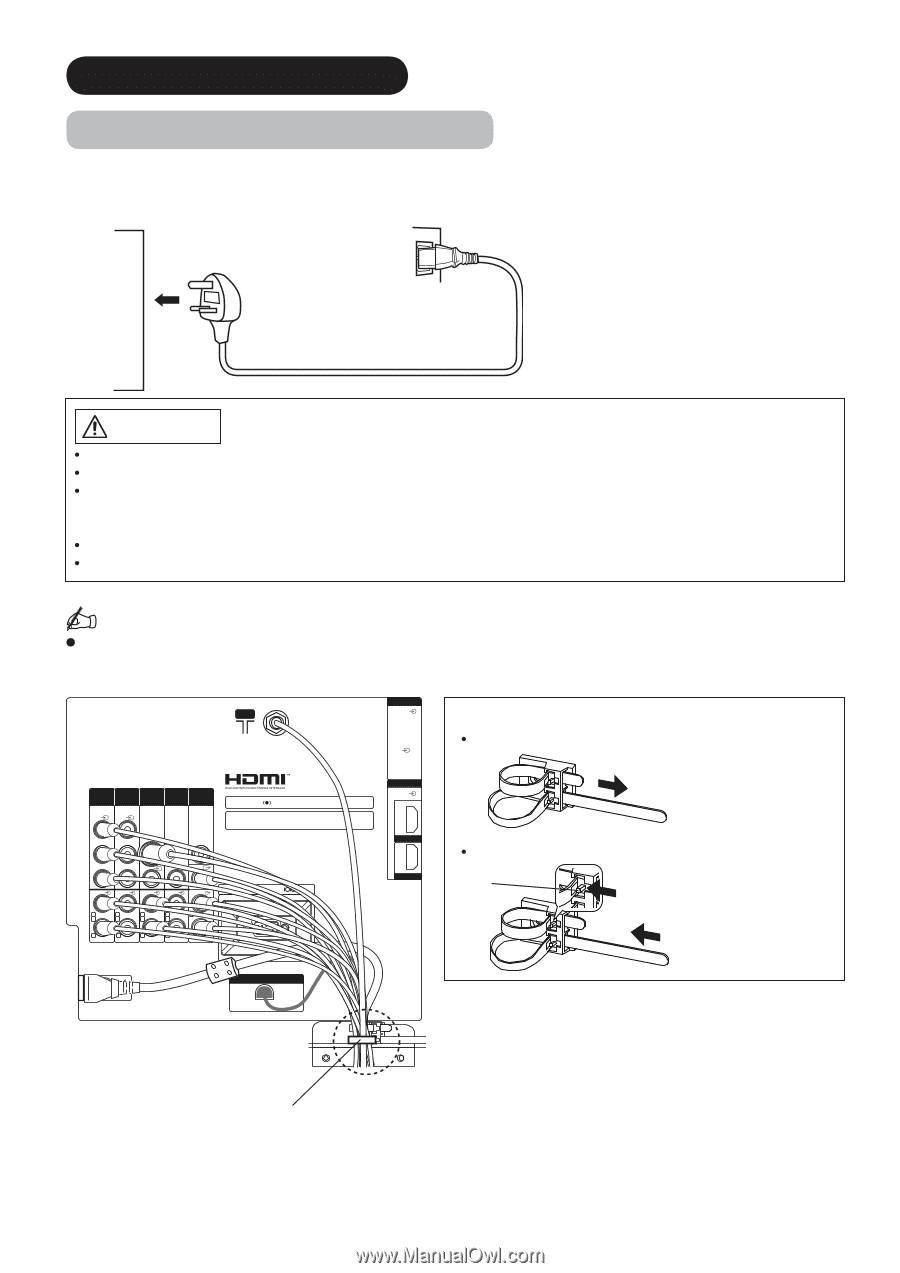
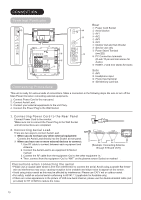
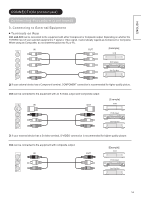
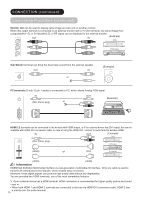
CONNECTION (continued) Connecting Procedure (continued) 4. Connecting the plug into the wall socket Connect the Power Cord after completing all other connections. (The type of plug is different from this drawing for some countries.) CAUTION Use only the Power Cord provided. Do not use a power supply voltage other than that indicated(AC100-240V, 50/60Hz). It may cause fire or electric shock. For the plasma display, a three-core power cord with a ground terminal is used for efficiency protection. Always be sure to connect the Power Cord to a three-pronged grounded outlet and make sure that the cord is properly grounded. If you use a power source converter plug, use an outlet with a ground terminal and screw down the ground line. Ensure that both ends of power cord are easily accessible. If you have to change the power cord, please use the certified power cord that meets your region's safety standard. Information How to secure the cables. After connecting all of the cables to the terminals, secure them with the band. When you secure the cables, please be careful not to tighten too much. ANT INPUT(RGB) AUDIO PC ANALOG RGB INPUT (AV1) INPUT (AV2) INPUT (AV3) INPUT (AV4) OUTPUT Y/VIDEO Y/VIDEO S-VIDEO PB PB SUB WOOFER WOW, SRS and symbol are trademarks of SRS Labs, Inc. Licensed by BBE Sound, Inc. under USP5510752 and 5736897. BBE and BBE symbol are registered trademarks of BBE Sound, Inc. INPUT(HDMI) AUDIO HDMI2 PR PR VIDEO VIDEO VIDEO AUDIO AUDIO AUDIO AUDIO AUDIO L MONO L MONO L MONO L MONO L C C C C R R R R R SERVICE USE ONLY HDMI1 How to fasten the band: To tighten Pull the band in the direction of the arrow. To loosen Knob Loosen the band by pushing the knob in the direction of the arrow. A C POWER SWIVEL With long band 17
-
 1
1 -
2
-
3
-
4
-
5
-
6
-
7
-
8
-
9
-
10
-
11
-
12
-
 13
13 -
 14
14 -
 15
15 -
 16
16 -
 17
17 -
 18
18 -
 19
19 -
 20
20 -
 21
21 -
 22
22 -
 23
23 -
24
-
25
-
26
-
27
-
28
-
29
-
30
-
31
-
32
-
33
-
34
-
35
-
36
-
37
-
38
-
39
-
40
-
41
-
42
-
43
-
44
-
45
-
46
-
47
-
48
-
49
-
50
-
51
-
52
-
53
-
54
-
55
-
56
-
57
-
58
-
59
-
60
-
61
-
62
 |
 |