Hitachi 42PD8800 Owners Guide - Page 26
MENU OPERATION continued, Setup Menu RGB mode
 |
View all Hitachi 42PD8800 manuals
Add to My Manuals
Save this manual to your list of manuals |
Page 26 highlights
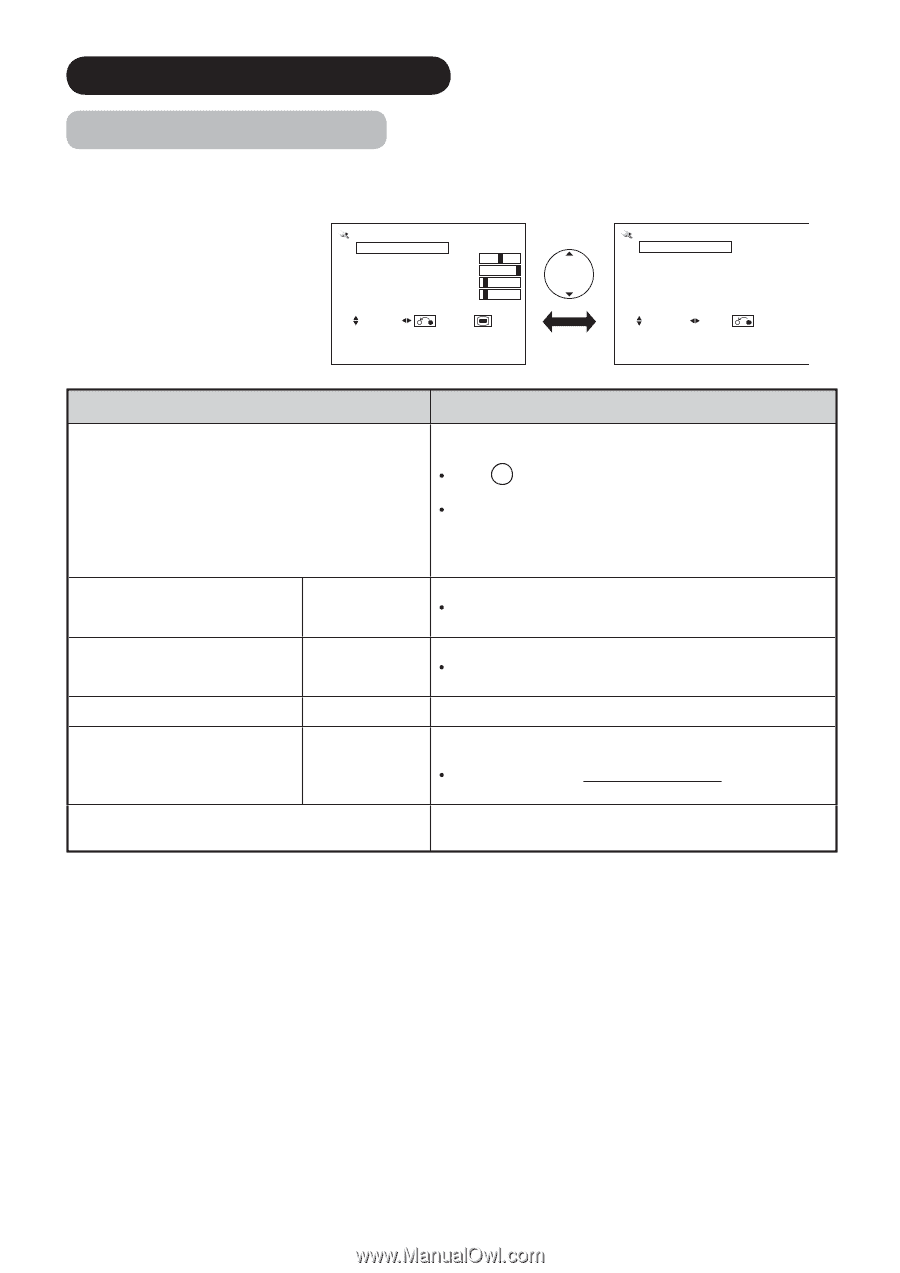
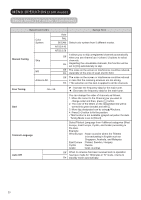
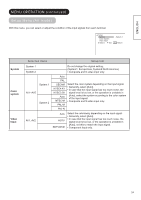
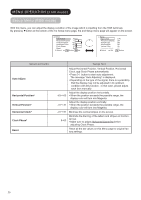
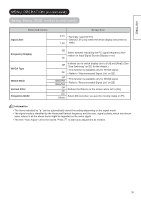
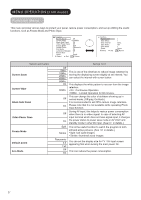
MENU OPERATION (continued) Setup Menu (RGB mode) With this menu, you can adjust the display condition of the image which is inputting from the RGB terminals. By pressing ▼button at the bottom of the 1st Setup menu page, the 2nd Setup menu page will appear on the screen. Setup Auto Adjust Adjust Horizontal Position 0 Vertical Position +31 Horizontal Clock -20 Clock Phase 10 Reset Reset Select Return Exit Setup Input Level Frequency Display WVGA Type WXGA Mode Vertical Filter Frequency Mode Select Set 0.7V Off Off Off On PC Return Selected Items Auto Adjust Horizontal Position* Vertical Position* Horizontal Clock* Clock Phase* Reset Setup hint -63~+63 -31~+31 -31~+31 0~63 Adjust Horizontal Position, Vertical Position, Horizontal Clock, and Clock Phase automatically. Press OK button to start auto adjustment. The message "Auto Adjusting" is displayed. Depending on the type of the signal, there is a possibility that the display may not be adjusted in its optimum condition with this function. In that case, please adjust each item manually. Adjust the display position horizontally. When the position exceeds the possible range, the display color will turn into Magenta. Adjust the display position vertically. When the position exceeds the possible range, the display color will turn into Magenta. Minimize the vertical stripes on the screen. Minimize the blurring of the letters and stripes on horizontal row. Make sure to adjust Horizontal Clock first before adjusting Clock Phase. Reset all the set values on this Menu page to original factory settings. 25
-
 1
1 -
2
-
3
-
4
-
5
-
6
-
7
-
8
-
9
-
10
-
11
-
12
-
13
-
14
-
15
-
16
-
17
-
18
-
19
-
20
-
 21
21 -
 22
22 -
 23
23 -
 24
24 -
 25
25 -
 26
26 -
 27
27 -
 28
28 -
 29
29 -
 30
30 -
 31
31 -
32
-
33
-
34
-
35
-
36
-
37
-
38
-
39
-
40
-
41
-
42
-
43
-
44
-
45
-
46
-
47
-
48
-
49
-
50
-
51
-
52
-
53
-
54
-
55
-
56
-
57
-
58
-
59
-
60
-
61
-
62
 |
 |