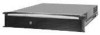
Intel ISP2150 Quick Start Guide - Page 14
Installing a Slim-Line CD-ROM Drive
 |
UPC - 735858134668
View all Intel ISP2150 manuals
Add to My Manuals
Save this manual to your list of manuals |
Page 14 highlights
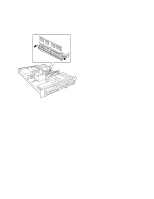
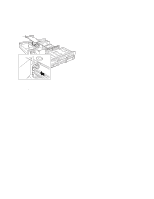
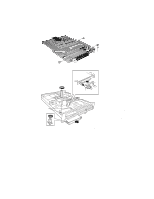
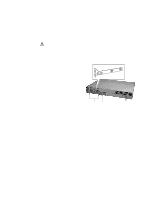
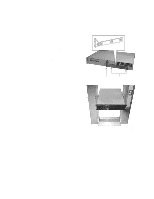
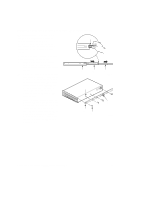
Installing a Slim-Line CD-ROM Drive C D Your server does not come with an integrated slim-line CD-ROM drive. You must purchase one separately and install it. 1. Remove the drive from its protective wrapper, and place A it on an anti-static surface. 2. Set any jumpers and/or switches on the drive according to the drive OM09348 manufacturer's instructions. 3. Attach the CD-ROM drive to the CD tray using the mounting screws (A) supplied with the system. 4. Remove the screws that hold A the filler panel to the front of the chassis and slide out the panel. B 5. Slide the slim-line CD tray into the CD-ROM bay. It is recommended that you first remove the diskette drive in the section "Removing the Diskette Drive". 6. Connect the CD-ROM IDE cable (A) and power (B) cables to the connector at the back of the CD tray. 7. Reinstall the diskette drive in the section "Re-Installing the OM09319 Diskette Drive". 8. Insert the recessed retention screws (C) through the access holes in the top of the drive bay housing. 9. Insert the retention screw (D) on the front of the chassis. 16 ISP2150 2U Rack Server Platform Quick Start Guide
-
 1
1 -
2
-
3
-
4
-
5
-
6
-
7
-
8
-
 9
9 -
 10
10 -
 11
11 -
 12
12 -
 13
13 -
 14
14 -
 15
15 -
 16
16 -
 17
17 -
 18
18 -
 19
19 -
20
-
21
-
22
-
23
-
24
-
25
-
26
-
27
-
28
 |
 |
