Intel ISP2150 Quick Start Guide - Page 7
Installation
 |
UPC - 735858134668
View all Intel ISP2150 manuals
Add to My Manuals
Save this manual to your list of manuals |
Page 7 highlights
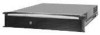
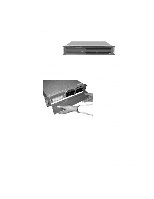
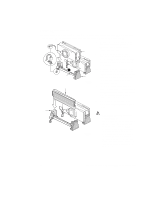
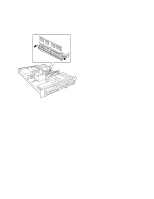
Locking and Unlocking the Front Bezel The bezel can be locked and unlocked to prevent unwanted access to the system. To lock the bezel: 1. Remove the keys from inside the bezel (they should be taped to the inside). 2. Close the bezel and insert the key into the lock. Turn the lock counterclockwise until it stops (about a quarter turn). The bezel is now locked and cannot be opened. To unlock the bezel, insert the key into the lock and turn the lock clockwise until it stops (about a quarter turn). The bezel is now unlocked and can be opened again. Attaching and Removing the Front Bezel The front bezel can be installed or removed from the system. To attach the bezel: 1. With the LED light tunnels located at the top of the bezel, push in the arms on either side of the bezel far enough so that the tabs on the ends of the arms can be inserted into the holes in the chassis. 2. Insert the tabs into the holes in the handles on the chassis. Make sure the tabs on each side of the bezel are completely in the holes in the handles. To remove the bezel: 1. With the bezel opened, gently push the metal hinge arms located on each side of the bezel in towards the middle of the unit. 2. Push the arms far enough in so that the tabs on the end of the arms are completely out of the holes in the handles on the chassis. The bezel should now be able to be removed. 3. The bezel should now be able to open and close easily and completely. Installation Follow these instructions to get your sever to the point where you can load an operating system on it. Open the Cover 1. Loosen the three screws on the rear of the system. 2. Pull the cover back and remove it from the chassis. ISP2150 2U Rack Server Platform Quick Start Guide 9
-
 1
1 -
 2
2 -
 3
3 -
 4
4 -
 5
5 -
 6
6 -
 7
7 -
 8
8 -
 9
9 -
 10
10 -
 11
11 -
 12
12 -
13
-
14
-
15
-
16
-
17
-
18
-
19
-
20
-
21
-
22
-
23
-
24
-
25
-
26
-
27
-
28
 |
 |
