Intel ISP2150 Quick Start Guide - Page 22
piece as you slide the chassis back.
 |
UPC - 735858134668
View all Intel ISP2150 manuals
Add to My Manuals
Save this manual to your list of manuals |
Page 22 highlights
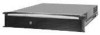
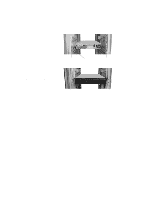
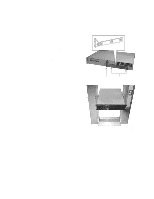
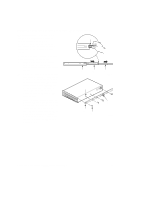
9. Extend the right and left rails (A) so they fully extend in front of the cabinet rack. The rail system is A A now ready to receive the chassis. 10. Lift the chassis with its front facing you and carefully guide the inner rail (A), which is mounted to the chassis system, into the outer pieces (B) you attached in previous steps. Gently move the system evenly towards the rear of the cabinet. Be sure to depress the brass colored finger tabs located in the center of each inner side rail piece as you slide the chassis back. 11. With the chassis fully inserted into the cabinet rack, you can easily access both the front and rear of the system. The photo to the right shows the system from the rear fully inserted into the cabinet. OM09141 A B OM09143 24 ISP2150 2U Rack Server Platform Quick Start Guide
-
 1
1 -
2
-
3
-
4
-
5
-
6
-
7
-
8
-
9
-
10
-
11
-
12
-
13
-
14
-
15
-
16
-
 17
17 -
 18
18 -
 19
19 -
 20
20 -
 21
21 -
 22
22 -
 23
23 -
 24
24 -
 25
25 -
 26
26 -
 27
27 -
28
 |
 |
