KitchenAid KHWS02RWH Use and Care Guide - Page 7
Installation Instructions - washer
 |
View all KitchenAid KHWS02RWH manuals
Add to My Manuals
Save this manual to your list of manuals |
Page 7 highlights
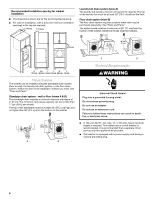
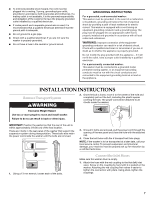
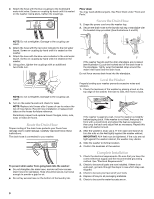
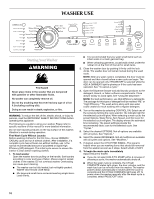
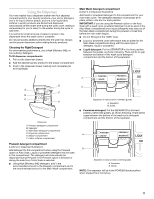
s To minimize possible shock hazard, the cord must be plugged into a mating, 3 prong, grounding-type outlet, grounded in accordance with local codes and ordinances. If a mating outlet is not available, it is the personal responsibility and obligation of the customer to have the properly grounded outlet installed by a qualified electrician. s If codes permit and a separate ground wire is used, it is recommended that a qualified electrician determine that the ground path is adequate. s Do not ground to a gas pipe. s Check with a qualified electrician if you are not sure the washer is properly grounded. s Do not have a fuse in the neutral or ground circuit. GROUNDING INSTRUCTIONS For a grounded, cord-connected washer: This washer must be grounded. In the event of a malfunction or breakdown, grounding will reduce the risk of electrical shock by providing a path of least resistance for electric current. This washer is equipped with a cord having an equipment-grounding conductor and a grounding plug. The plug must be plugged into an appropriate outlet that is properly installed and grounded in accordance with all local codes and ordinances. WARNING: Improper connection of the equipment- grounding conductor can result in a risk of electric shock. Check with a qualified electrician or serviceman if you are in doubt as to whether the appliance is properly grounded. Do not modify the plug provided with the appliance - if it will not fit the outlet, have a proper outlet installed by a qualified electrician. For a permanently connected washer: This washer must be connected to a grounded metal, permanent wiring system, or an equipment grounding conductor must be run with the circuit conductors and connected to the equipment-grounding terminal or lead on the appliance. INSTALLATION INSTRUCTIONS Remove Transport System WARNING 2. Once the bolt is loose, move it to the center of the hole and completely pull out the bolt, including the plastic spacer covering the bolt. The power cord will be attached to all 4 bolts inside the washer. Excessive Weight Hazard Use two or more people to move and install washer. Failure to do so can result in back or other injury. IMPORTANT: Position the washer so that the rear of the unit is within approximately 3 ft (90 cm) of the final location. There are 4 bolts in the rear panel of the washer that support the suspension system during transportation. These bolts also retain the power cord inside the washer until the bolts are removed. 3. Once all 4 bolts are removed, pull the power cord through the opening of the rear panel and close the hole with the attached cap. 4. Close the bolt holes with the 4 transport bolt hole plugs. NOTE: If the washer is to be transported at a later date, call your local service center. To prevent suspension and structural damage, your machine must be properly set up for relocation by a certified technician. 1. Using a 13 mm wrench, loosen each of the bolts. Connect the Inlet Hoses Make sure the washer drum is empty. 1. Attach the hose with the red coupling to the Hot (left) inlet valve. Screw on the coupling by hand until it is seated on the washer. Attaching the red coupling first makes it easier to tighten the connection with pilers. Using pliers, tighten the couplings. 7
-
 1
1 -
 2
2 -
 3
3 -
 4
4 -
 5
5 -
 6
6 -
 7
7 -
 8
8 -
 9
9 -
 10
10 -
 11
11 -
 12
12 -
13
-
14
-
15
-
16
-
17
-
18
-
19
-
20
-
21
-
22
-
23
-
24
-
25
-
26
-
27
-
28
-
29
-
30
-
31
-
32
-
33
-
34
-
35
-
36
-
37
-
38
-
39
-
40
-
41
-
42
-
43
-
44
-
45
-
46
-
47
-
48
-
49
-
50
-
51
-
52
-
53
-
54
-
55
-
56
-
57
-
58
-
59
-
60
-
61
-
62
-
63
-
64
 |
 |
