Kodak 1783794 User's Guide - Page 17
Running a slide show, Cropping your pictures, Press the Slide Show button.
 |
UPC - 041771783792
View all Kodak 1783794 manuals
Add to My Manuals
Save this manual to your list of manuals |
Page 17 highlights
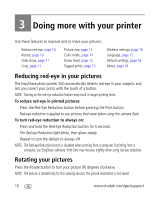
Doing more with your printer Running a slide show Use the Slide Show feature to display your pictures on the photo printer LCD. 1 Insert a card in the card slot (or connect a USB device to your photo printer). 2 Press the Slide Show button. The slide show begins in 10 seconds. 3 If you want to change slide show settings, press press the Print button. to highlight a feature. Then ■ Interval-Choose how long a picture is displayed. ■ Loop-Choose if the slide show plays once, or repeats. 4 To stop the slide show at any time, press the Cancel button. Cropping your pictures Use the Crop feature to print the best part of a picture. NOTE: The cropped picture is saved long enough to print; it then reverts to the original picture. 1 With a card inserted in the card slot (or USB device connected to your photo printer), press to locate the desired picture. 2 Press the Crop button. A crop box appears over your picture. ■ To view other crop box sizes, press the Crop button. ■ To orient the crop box as landscape or portrait, press the Rotate button. 3 Press to move the crop box to the desired position. 4 Press the Print button to crop the picture. You can print the picture or adjust the cropping. The picture then reverts to the original. www.kodak.com/go/support 11
-
 1
1 -
2
-
3
-
4
-
5
-
6
-
7
-
8
-
9
-
10
-
11
-
 12
12 -
 13
13 -
 14
14 -
 15
15 -
 16
16 -
 17
17 -
 18
18 -
 19
19 -
 20
20 -
 21
21 -
 22
22 -
23
-
24
-
25
-
26
-
27
-
28
-
29
-
30
-
31
-
32
-
33
-
34
-
35
-
36
-
37
-
38
-
39
-
40
-
41
-
42
-
43
-
44
-
45
-
46
-
47
-
48
-
49
-
50
-
51
-
52
-
53
-
54
-
55
-
56
-
57
-
58
-
59
-
60
-
61
-
62
-
63
-
64
-
65
-
66
-
67
-
68
-
69
-
70
-
71
 |
 |
