Kodak 1783794 User's Guide - Page 36
Adding your printer to a Wi-Fi wireless network, Windows OS-Con the printer Wi-Fi settings
 |
UPC - 041771783792
View all Kodak 1783794 manuals
Add to My Manuals
Save this manual to your list of manuals |
Page 36 highlights
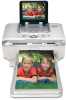
Using the wireless features of your photo printer Adding your printer to a Wi-Fi wireless network 1 If a USB device is connected to the photo printer, disconnect it. IMPORTANT: Insert card only as shown. Do not force the card into the card slot. 2 Push the Kodak Wi-Fi card into the card slot to seat the connector. The card slot light blinks as the photo printer scans for available networks. Once connected, the card slot light glows steady. NOTE: When properly inserted, the card sticks out slightly, serving as an antenna for receiving Wi-Fi signals. If the Kodak Wi-Fi card is already inserted but the connection is no longer available, remove then reinsert the card to re-establish the connection. ■ To remove the card, push in and release it. When the card is ejected, pull it out. 3 Make sure the printer driver from the included Kodak EasyShare software CD is installed on your computer. Then connect the printer to your computer with the USB cable (see page 19). 4 Configure the printer Wi-Fi settings (such as SSID and security) and add the printer as a wireless printer on your Wi-Fi wireless network: Windows OS-Configure the printer Wi-Fi settings: a From the Start menu, select Programs (or All Programs). b Open the Kodak folder, then open the EasyShare printer folder. c Select Kodak wireless printer configuration utility. The configuration utility opens on your computer. d Next to Show, select Wi-Fi Primary. e Change settings as necessary to match the settings of your Wi-Fi wireless network. Click Wizard to guide you through the wireless setup process. See the wireless configuration utility Help for details. 30 www.kodak.com/go/support
-
 1
1 -
2
-
3
-
4
-
5
-
6
-
7
-
8
-
9
-
10
-
11
-
12
-
13
-
14
-
15
-
16
-
17
-
18
-
19
-
20
-
21
-
22
-
23
-
24
-
25
-
26
-
27
-
28
-
29
-
30
-
 31
31 -
 32
32 -
 33
33 -
 34
34 -
 35
35 -
 36
36 -
 37
37 -
 38
38 -
 39
39 -
 40
40 -
 41
41 -
42
-
43
-
44
-
45
-
46
-
47
-
48
-
49
-
50
-
51
-
52
-
53
-
54
-
55
-
56
-
57
-
58
-
59
-
60
-
61
-
62
-
63
-
64
-
65
-
66
-
67
-
68
-
69
-
70
-
71
 |
 |
