Konica Minolta bizhub 42 bizhub 36/42 Print Operations User Guide
Konica Minolta bizhub 42 Manual
 |
View all Konica Minolta bizhub 42 manuals
Add to My Manuals
Save this manual to your list of manuals |
Konica Minolta bizhub 42 manual content summary:
- Konica Minolta bizhub 42 | bizhub 36/42 Print Operations User Guide - Page 1
User's Guide [Print Operations] - Konica Minolta bizhub 42 | bizhub 36/42 Print Operations User Guide - Page 2
Installer ...4-2 Operating environment of the installer 4-2 Easy installation procedure using the installer 4-3 Settings of this machine ...4-3 TCP/IP settings for the machine ...4-3 RAW port number/IPP setting for the machine 4-3 Installing the printer driver ...4-3 bizhub 42/36 Contents-1 - Konica Minolta bizhub 42 | bizhub 36/42 Print Operations User Guide - Page 3
Installing the printer driver using the Add Printer Wizard 5-7 For network connection (Web service print 5-9 Settings for the machine ...5-9 Making the printer driver known from the Network window 5-9 Installing the printer driver by specifying the IP address using the Add Printer Wizard 5-10 - Konica Minolta bizhub 42 | bizhub 36/42 Print Operations User Guide - Page 4
of PCL/PS/XPS drivers for Windows 10.1 10.2 10.2.1 10.2.2 10.2.3 10.2.4 10.3 10.4 10.4.1 10.4.2 10.4.3 10.4.4 10.4.5 10.4.6 10.4.7 10.4.8 10.4.9 Print operations...10-2 Default settings of the printer driver 10-3 Displaying the Properties window 10-3 [Configure] tab ...10-4 [Settings] tab ...10 - Konica Minolta bizhub 42 | bizhub 36/42 Print Operations User Guide - Page 5
on the machine for which user authentication is specified 13-10 Setting the printer driver ...13-10 For Windows ...13-10 For Mac OS X...13-12 Printing a document on the machine for which Account Track function is enabled 13-13 Setting the printer driver ...13-13 For Windows ...13-13 For Mac OS - Konica Minolta bizhub 42 | bizhub 36/42 Print Operations User Guide - Page 6
...15-7 User Mode Overview ...15-8 System ...15-8 Job ...15-9 Print...15-10 Storage...15-11 Administrator mode ...15-12 16 Troubleshooting 16.1 16.2 16.2.1 16.2.2 16.2.3 Cannot print...16-2 Cannot configure the settings/Cannot print according to the settings 16-4 The printer driver settings have - Konica Minolta bizhub 42 | bizhub 36/42 Print Operations User Guide - Page 7
1 Introduction - Konica Minolta bizhub 42 | bizhub 36/42 Print Operations User Guide - Page 8
[User's Guide Print Operations] [User's Guide Scan Operations] [User's Guide Fax Operations] [User's Guide Administrator Operations] [Trademarks/Copyrights] Overview This manual describes details on copy mode operations and the settings of this machine. • Specifications of originals and copy paper - Konica Minolta bizhub 42 | bizhub 36/42 Print Operations User Guide - Page 9
steps. % This symbol indicates a supplementary explanation of a procedural instruction. The operation procedures are described using illustrations. % This symbol indicates transition of the control panel to access a desired menu item. This symbol indicates a desired page. bizhub 42/36 1-3 - Konica Minolta bizhub 42 | bizhub 36/42 Print Operations User Guide - Page 10
the original or paper size, the Y side represents the width and the X side the length. Original and paper indications w indicates the paper size with the length (X) being longer than the width (Y). v indicates the paper size with the length (X) being shorter than the width (Y). bizhub 42/36 1-4 - Konica Minolta bizhub 42 | bizhub 36/42 Print Operations User Guide - Page 11
2 Overview - Konica Minolta bizhub 42 | bizhub 36/42 Print Operations User Guide - Page 12
from a printer driver on a computer - Support of network protocols including TCP/IP (IPv4/IPv6), IPX/SPX, and AppleTalk - Printing via a network using Web service (Windows Vista/7/Server 2008/Server 2008 R2), LPR or IPP printing - Configuring settings for this machine and the printer controller from - Konica Minolta bizhub 42 | bizhub 36/42 Print Operations User Guide - Page 13
printer controller. The printer controller rasterizes images (expands output target characters and images to bitmap data). This data is printed from this machine. Print When using USB connection Application Computer When using network connection Application Printer driver Printer driver USB - Konica Minolta bizhub 42 | bizhub 36/42 Print Operations User Guide - Page 14
2 Power Save 3 Fax 4 E-mail 5 Folder 6 Copy 7 Reset 8 Interrupt 9 Stop 10 Start bizhub 42/36 1716 15 14 13 12 11 Description Various screens and messages are displayed. You can configure various settings by directly pressing the Touch Panel. Press to enter Sleep Mode. While the - Konica Minolta bizhub 42 | bizhub 36/42 Print Operations User Guide - Page 15
and password (for account track) in order to use this machine. While logged on, press the Access key to log off. Reference - The default print settings can be changed in the [Utility] mode. - You can use this machine as a printer in either of Home, Copy, Folder, E-mail, and Fax modes. bizhub 42/36 - Konica Minolta bizhub 42 | bizhub 36/42 Print Operations User Guide - Page 16
to be connected meets the following conditions. Windows Operating system CPU Memory Drive The supported OS varies depending on the type of printer driver. For details, refer to page 3-3. Any processor of the same or higher specifications as recommended for your operating system Memory capacity - Konica Minolta bizhub 42 | bizhub 36/42 Print Operations User Guide - Page 17
Use this interface to use this printing system via a network connection. It supports 1000Base-T, 100Base-TX, and 10Base-T standards. In addition, TCP/IP (LPD/LPR, IPP, SMB), Web services, IPX/SPX (NetWare), AppleTalk (EtherTalk) protocols are supported. USB interface Use this interface to use - Konica Minolta bizhub 42 | bizhub 36/42 Print Operations User Guide - Page 18
details, refer to page 9-2. Configure the interface timeout settings in the PageScope Web Connection if necessary. For details, refer to the [User's Guide Administrator Operations]. 2.3.2 For local connection 1 Connect this machine to the computer. 2 Install the printer driver. bizhub 42/36 2-8 - Konica Minolta bizhub 42 | bizhub 36/42 Print Operations User Guide - Page 19
3 Precautions for Installation - Konica Minolta bizhub 42 | bizhub 36/42 Print Operations User Guide - Page 20
, and type of the printer driver to be installed. To determine the printer driver to be installed and connection method, check the operating system of the computer and connection environment. Select the installation method according to the printer driver and connection method. bizhub 42/36 3-2 - Konica Minolta bizhub 42 | bizhub 36/42 Print Operations User Guide - Page 21
required printer driver. Printer driver KONICA MINOLTA PCL Driver (PCL driver) PostScript KONICA MINOLTA driver (PS driver) PostScript PPD driver (PS-PPD) Page description language PCL6 PostScript 3 Emulation Supported Operating Systems Windows XP Home Edition (Service Pack 3 or later) Windows XP - Konica Minolta bizhub 42 | bizhub 36/42 Print Operations User Guide - Page 22
language according to the application used for printing. - Either the installer or Add Printer Wizard can be used for installing the PCL driver, PS driver, and XPS driver for Windows. d Reference For details on the fax drivers, refer to the [User's Guide Fax Operations]. bizhub 42/36 3-4 - Konica Minolta bizhub 42 | bizhub 36/42 Print Operations User Guide - Page 23
the Port 9100 or USB connection method, or [Internet Printing] for the IPP connection method. p. 5-2 p. 5-12 Reference - To use Windows Vista/7/Server 2008/Server 2008 R2, log on to the computer using a user name with Administrator privileges, and then install the printer driver. bizhub 42/36 3-5 - Konica Minolta bizhub 42 | bizhub 36/42 Print Operations User Guide - Page 24
installer does not support installation in the IPv6 environment of Windows XP/Server 2003. d Reference Before you can use this machine in the network environment, you must configure network settings for this machine. For details, refer to [User's Guide Administrator Operations]. bizhub 42/36 3-6 - Konica Minolta bizhub 42 | bizhub 36/42 Print Operations User Guide - Page 25
using the IPP print service. USB A connection using a USB port. Reference page p. 7-2 d Reference Before you can use this machine in the network environment, you must configure network settings for this machine. For details, refer to [User's Guide Administrator Operations]. 3.3.5 NetWare - Konica Minolta bizhub 42 | bizhub 36/42 Print Operations User Guide - Page 26
4 Easy Installation Using the Installer (Windows) - Konica Minolta bizhub 42 | bizhub 36/42 Print Operations User Guide - Page 27
window for adding new hardware opens when using USB connection, click [Cancel]. - The installer supports installation in both IPv4/IPv6 environments of Windows Vista/7/Server 2008/Server 2008 R2 only. Note that it does not support [Internet Printing] (IPP) in the IPv6 environment. bizhub 42/36 - Konica Minolta bizhub 42 | bizhub 36/42 Print Operations User Guide - Page 28
the RAW port number ([9100] in the initial setting). - IPP: In [IPP Settings], enable IPP printing. d Reference For details on TCP/IP setting and IPP setting for this machine, refer to [User's Guide Administrator Operations]. 4.2.2 Installing the printer driver 1 Insert the Drivers CD-ROM into - Konica Minolta bizhub 42 | bizhub 36/42 Print Operations User Guide - Page 29
address is prioritized. % If no printer is detected, turn this machine off, then on again. In this case, turn off this machine, and then wait approximately 10 seconds before turning it on again. If you turn this machine on immediately after turning it off, it may not function correctly. bizhub 42 - Konica Minolta bizhub 42 | bizhub 36/42 Print Operations User Guide - Page 30
not support [Internet Printing] (IPP) in the IPv6 environment. 7 Select the components to be installed, and then click [Next]. % In [Driver Language], you can change the language used in the printer driver. % For details on the fax drivers, refer to the [User's Guide Fax Operations]. bizhub 42/36 - Konica Minolta bizhub 42 | bizhub 36/42 Print Operations User Guide - Page 31
of the printer driver is already installed, the [Update the printer driver] window appears. Select the printer driver to be updated, and click [Install]. % When you update the printer driver, the computer needs to be rebooted. The printer driver settings will be initialized. bizhub 42/36 4-6 - Konica Minolta bizhub 42 | bizhub 36/42 Print Operations User Guide - Page 32
the printer driver and to configure various function settings. For details, refer to page 10-8. Click this button to perform test print. 12 Click [Exit] to finish installation program. 13 Remove the Drivers CD-ROM from the CD-ROM drive. This completes the fax driver installation. bizhub 42/36 4-7 - Konica Minolta bizhub 42 | bizhub 36/42 Print Operations User Guide - Page 33
5 Manual Installation Using the Add Printer Wizard - Konica Minolta bizhub 42 | bizhub 36/42 Print Operations User Guide - Page 34
the machine, enable LPD printing. d Reference For details on the network settings for the machine, refer to the [User's Guide Administrator Operations]. Installing the printer driver by searching for the printer using the Add Printer Wizard. 0 Installing the driver to Windows Vista/7/Server 2008 - Konica Minolta bizhub 42 | bizhub 36/42 Print Operations User Guide - Page 35
2008, click [Add a printer] on the toolbar. In Windows Vista: In Windows Server 2008: % In Windows 7/Server 2008 R2, click [Add a printer] on the toolbar. The [Add Printer] Wizard appears. 5 Click [Add a network, wireless or Bluetooth printer]. Connected printers are detected. bizhub 42/36 5-3 - Konica Minolta bizhub 42 | bizhub 36/42 Print Operations User Guide - Page 36
a folder according to the printer driver, operating system, and language to be used. Selectable printer drivers: PCL driver, PS driver, XPS driver and fax driver 10 Click [OK]. The [Printers] list appears. 11 Click [Next]. 12 Follow the instructions on the pages that follow. % If the [User Account - Konica Minolta bizhub 42 | bizhub 36/42 Print Operations User Guide - Page 37
, double-click [Devices and Printers]. 4 On the toolbar, select the additional printer information. % In Windows Vista/Server 2008, click [Add a printer] on the toolbar. In Windows Vista: In Windows Server 2008: % In Windows 7/Server 2008 R2, click [Add a printer] on the toolbar. bizhub 42/36 5-5 - Konica Minolta bizhub 42 | bizhub 36/42 Print Operations User Guide - Page 38
desired printer driver folder in the CD-ROM, and then click [Open]. % Select a folder according to the printer driver, operating system, and language to be used. Selectable printer drivers: PCL driver, PS driver, XPS driver and fax driver 16 Click [OK]. The [Printer] list appears. bizhub 42/36 5-6 - Konica Minolta bizhub 42 | bizhub 36/42 Print Operations User Guide - Page 39
. Items to be configured IP address IPP Setting Description In [TCP/IP Settings] of the machine, specify the IP address. In [IPP Settings] for the machine, enable IPP printing. d Reference For details on the network settings for the machine, refer to the [User's Guide Administrator Operations - Konica Minolta bizhub 42 | bizhub 36/42 Print Operations User Guide - Page 40
system, and language to be used. Selectable printer drivers: PCL driver, PS driver, XPS driver and fax driver 11 Click [OK]. The [Printer] list appears. 12 Click [OK]. 13 Follow the instructions on the pages that follow. % If the [User Account Control] window appears, click [Continue] or [Yes]. % If - Konica Minolta bizhub 42 | bizhub 36/42 Print Operations User Guide - Page 41
address. In [Web Service Settings] for the machine, enable the [Print Function]. d Reference For details on the network settings for the machine, refer to the [User's Guide Administrator Operations]. Making the printer driver known from the Network window To use Web service print in Windows Vista - Konica Minolta bizhub 42 | bizhub 36/42 Print Operations User Guide - Page 42
Web service print, check that [Network discovery] is enabled in [Network and Sharing Cent- er] on the computer. 3 Insert the Drivers CD-ROM into the CD-ROM drive of the computer. 4 Click [Start], and then select [Control Panel]. 5 Click [Printers] under [Hardware and Sound]. The [Printers] window - Konica Minolta bizhub 42 | bizhub 36/42 Print Operations User Guide - Page 43
enter the IP address, and click [Next]. A printer of the entered IP address that is compatible with the Web service print function is located, and then the [Found New Hardware] dialog box appears. 11 Click [Locate and install driver software (recommended)]. 12 If a dialog box to confirm whether to - Konica Minolta bizhub 42 | bizhub 36/42 Print Operations User Guide - Page 44
]. % Select a folder according to the printer driver, operating system, and language to be used. Selectable printer drivers: PCL driver, PS driver, XPS driver and fax driver 16 Click [Next]. 17 Follow the instructions on the pages that follow. % If the [User Account Control] window appears, click - Konica Minolta bizhub 42 | bizhub 36/42 Print Operations User Guide - Page 45
of the software supported by this machine appears. 5 Select a desired printer driver name, and then click [Next]. % Selectable printer drivers: PCL driver, PS driver, XPS driver and fax driver 6 Follow the instructions on the pages that follow. % If the [User Account Control] window appears, click - Konica Minolta bizhub 42 | bizhub 36/42 Print Operations User Guide - Page 46
[OK]. % Select a folder according to the printer driver, operating system, and language to be used. Selectable printer drivers: PCL driver, PS driver, XPS driver and fax driver 9 Click [Next]. 10 Follow the instructions on the pages that follow. % If the [Windows Security] window for verifying the - Konica Minolta bizhub 42 | bizhub 36/42 Print Operations User Guide - Page 47
LPR printing: In [TCP/IP Settings] for the machine, enable LPD printing. d Reference For details on the network settings for the machine, refer to the [User's Guide Administrator Operations]. Installing the printer driver using the Add Printer Wizard 0 Installing the driver to Windows XP/Server - Konica Minolta bizhub 42 | bizhub 36/42 Print Operations User Guide - Page 48
[Printer Name or IP Address:] box, enter the IP address for the machine, and then click [Next >]. % If the [Additional Port Information Required ] dialog box appears, go to Step 10. % If the [Finish] screen appears, go to Step 13. 10 Select [Custom], and then click [Settings:]. bizhub 42/36 5-16 - Konica Minolta bizhub 42 | bizhub 36/42 Print Operations User Guide - Page 49
be used. Selectable printer drivers: PCL driver, PS driver and fax driver 17 Click [OK]. The [Printers] list appears. 18 Click [Next >]. 19 Follow the instructions on the pages that follow. % To use a network connection, perform a test print after the network settings have been configured. 20 Click - Konica Minolta bizhub 42 | bizhub 36/42 Print Operations User Guide - Page 50
[Open]. % Select a folder according to the printer driver, operating system, and language to be used. Selectable printer drivers: PCL driver, PS driver and fax driver 11 Click [OK]. The [Printers] list appears. 12 Click [OK]. 13 Follow the instructions on the pages that follow. bizhub 42/36 5-18 - Konica Minolta bizhub 42 | bizhub 36/42 Print Operations User Guide - Page 51
, click [Continue Anyway] or [Yes]. 9 After finishing the installation, make sure that the icon for the installed printer driver is displayed in the [Printers and Faxes] window. 10 Remove the Drivers CD-ROM from the CD-ROM drive. This completes the printer driver installation. bizhub 42/36 5-19 - Konica Minolta bizhub 42 | bizhub 36/42 Print Operations User Guide - Page 52
6 Installation on Macintosh Computers - Konica Minolta bizhub 42 | bizhub 36/42 Print Operations User Guide - Page 53
[Installation] page, click [Install]. The printer driver is installed in the computer. When the installation is completed, a message appears. % For OS X 10.2/10.3/10.4, when the printer driver is installed for the second and subsequent times, [Install] may change to [Upgrade]. bizhub 42/36 6-2 - Konica Minolta bizhub 42 | bizhub 36/42 Print Operations User Guide - Page 54
6.1 Installing the printer driver 6 8 Click [Close]. 9 Remove the Drivers CD-ROM from the CD-ROM drive. This completes the printer driver installation. Next, select a printer. bizhub 42/36 6-3 - Konica Minolta bizhub 42 | bizhub 36/42 Print Operations User Guide - Page 55
on the network settings for the machine, refer to the [User's Guide Administrator Operations]. Configuring the Bonjour settings Adding a printer 1 In the [Apple Menu], select [System Preferences...]. 2 Click the [Print & Fax] icon. % When OS X 10.7 is used, click the [Print & Scan] icon. 3 Click - Konica Minolta bizhub 42 | bizhub 36/42 Print Operations User Guide - Page 56
[KONICA MINOLTA] from the [Print Using:], and then select the printer driver of the desired model name from the list. 7 Click [Add]. When the selected printer is registered in the [Print & Fax] or the [Print & Scan], the setting procedure is completed. % If the [Installable Options] window appears - Konica Minolta bizhub 42 | bizhub 36/42 Print Operations User Guide - Page 57
name, select [Network] - [AppleTalk Settings] in Administrator mode of the Pa- geScope Web Connection. In the default setting, the contents enclosed in parentheses ( ) following [Printer Name] correspond to the low-order three bytes of the MAC address (HW Address). The following window shows an - Konica Minolta bizhub 42 | bizhub 36/42 Print Operations User Guide - Page 58
used, select [KONICA MINOLTA] from the [Print Using:], and then select the printer driver of the desired model name from the list. 7 Click [Add]. When the selected printer is registered in the [Print & Fax], the setting procedure is completed. % If the [Installable Options] window appears, proceed - Konica Minolta bizhub 42 | bizhub 36/42 Print Operations User Guide - Page 59
Scan] icon. 3 Click [+] on the [Print & Fax] or the [Print & Scan] window. % When OS X 10.7 is used, click [Add Other Printer or Scanner...]. 4 Click [IP] or [IP Printer]. 5 In [Protocol:], select [Line Printer Daemon - LPD]. 6 In [Address:], enter the IP address for the machine. The printer driver - Konica Minolta bizhub 42 | bizhub 36/42 Print Operations User Guide - Page 60
MINOLTA] from the [Print Using:], and then select the printer driver of the desired model name from the list. OS X 10.5: 8 Click [Add]. When the selected printer is registered in the [Print & Fax] or the [Print & Scan], the setting procedure is completed. % If the [Installable Options] window - Konica Minolta bizhub 42 | bizhub 36/42 Print Operations User Guide - Page 61
Click [+] on the [Print & Fax] or the [Print & Scan] window. % When OS X 10.7 is used, click [Add Other Printer or Scanner...]. [Printer Browser] appears. 4 Click [IP] or [IP Printer]. 5 In [Protocol:], select [Internet Printing Protocol - IPP]. 6 In [Address:], enter the IP address for the machine - Konica Minolta bizhub 42 | bizhub 36/42 Print Operations User Guide - Page 62
, enable AppleTalk and enter the printer name. In [TCP/IP Settings] for the machine, enable LPD printing. In [IPP Settings] for the machine, enable IPP printing. d Reference For details on the network settings for the machine, refer to the [User's Guide Administrator Operations]. bizhub 42/36 - Konica Minolta bizhub 42 | bizhub 36/42 Print Operations User Guide - Page 63
5. 5 Select the desired printer driver manually. % From [Printer Model], select [KONICA MINOLTA], and then select the desired model from the list of model names. 6 Click [Add]. When the selected printer is registered in the [Printer List], the setting procedure is completed. bizhub 42/36 6-12 - Konica Minolta bizhub 42 | bizhub 36/42 Print Operations User Guide - Page 64
to the low-order three bytes of the MAC address (HW Address). The following window shows an example where the printer name is changed to "Printer Name(AppleTalk)". % After the printer driver is selected, go to Step 6. % If an incorrect printer driver is selected, go to Step 5. bizhub 42/36 6-13 - Konica Minolta bizhub 42 | bizhub 36/42 Print Operations User Guide - Page 65
[IP Printing] for the connection method. 4 For OS X 10.3, select [LPD/LPR] for [Printer Type:]. 5 In [Printer Address:], enter the IP address for the machine. 6 From [Printer Model:], select [KONICA MINOLTA], select the desired model from the list of model names, and then click [Add]. bizhub 42/36 - Konica Minolta bizhub 42 | bizhub 36/42 Print Operations User Guide - Page 66
[Internet Printing Protocol - IPP] for [Printer Type:]. 5 In [Printer Address:], enter the IP address for the machine. % Leave [Queue Name:] blank. 6 From [Printer Model:], select [KONICA MINOLTA], select the desired model from the list of model names, and then click [Add]. bizhub 42/36 6-15 - Konica Minolta bizhub 42 | bizhub 36/42 Print Operations User Guide - Page 67
X 10.5/10.6/10.7) 1 Use a USB cable to connect the printer to your computer. 2 Select [System Preferences] from the Apple menu. 3 Click the [Print & Fax] icon. % When OS X 10.7 is used, click the [Print & Scan] icon. 4 In the [Print & Fax] or the [Print & Scan], click [+] button. bizhub 42/36 6-16 - Konica Minolta bizhub 42 | bizhub 36/42 Print Operations User Guide - Page 68
KONICA MINOLTA bizhub 42 PPD] or [KONICA MINOLTA bizhub 36 PPD] is selected in the [Print Using] list. % Check that the PPD having the name same as the one of the desired model is selected. 7 Click [Add]. When the selected printer is registered in the [Print & Fax] or the [Print & Scan], the setting - Konica Minolta bizhub 42 | bizhub 36/42 Print Operations User Guide - Page 69
printer appears in the [Printer Browser]. 4 Select [42 Series] in the [Printer Name]. % If the printer name does not appear, check that the machine is turned on and the USB cable is connected, and then restart the computer. 5 Check that [KONICA MINOLTA bizhub 42 PPD] or [KONICA MINOLTA bizhub 36 - Konica Minolta bizhub 42 | bizhub 36/42 Print Operations User Guide - Page 70
[USB] from the pop-up menu. 6 Select [42 Series] in the [Product] list. % If the printer name does not appear, check that the printer is turned on and the USB cable is connected, and then restart the computer. 7 Select [KONICA MINOLTA] from the [Printer Model] pop-up menu. bizhub 42/36 6-19 - Konica Minolta bizhub 42 | bizhub 36/42 Print Operations User Guide - Page 71
that [KONICA MINOLTA bizhub 42 PPD] or [KONICA MINOLTA bizhub 36 PPD] is selected in the [Printer Model] list. % Check that the PPD having the name same as the one of the desired model is selected. 9 Click [Add]. When the selected printer is registered in the [Printer List], the setting procedure - Konica Minolta bizhub 42 | bizhub 36/42 Print Operations User Guide - Page 72
7 Installation on Linux Computers - Konica Minolta bizhub 42 | bizhub 36/42 Print Operations User Guide - Page 73
language is available in the corresponding "Drivers/LinuxPPD/" folder on the Drivers CD-ROM. Use the appropriate ppd printer. 1 Connect the machine to a computer or the network. With a USB connection, the following dialog box appears. Click [Cancel] to close the dialog box. bizhub 42/36 - Konica Minolta bizhub 42 | bizhub 36/42 Print Operations User Guide - Page 74
of the computer. 3 From the [System] menu, select [Administration], then [Printing]. The [Printer configuration] dialog box appears. 4 Click [New Printer]. The [New Printer] dialog box appears. 5 Enter the [Printer name], [Description], and [Location], and then click [Forward]. bizhub 42/36 7-3 - Konica Minolta bizhub 42 | bizhub 36/42 Print Operations User Guide - Page 75
the dialog box, select the port for the machine to be installed. % For a USB connection, select [KONICA MINOLTA bizhub 42 USB #1]. % For a machine connected to the network, select [KONICA MINOLTA bizhub 42] . % If the desired machine is not listed, select a device port from the [Devices - Konica Minolta bizhub 42 | bizhub 36/42 Print Operations User Guide - Page 76
, be sure to exit all running applications. - Root privileges are required in order to add the printer. 1 Connect the machine to a computer or the network. With a USB connection, the following dialog box appears. Click [Cancel] to close the dialog box. 2 Start up the Web browser. bizhub 42/36 7-5 - Konica Minolta bizhub 42 | bizhub 36/42 Print Operations User Guide - Page 77
7.1 Installing the printer driver 7 3 Enter the URL "http://localhost:631". The CUPS Administration Web page appears. 4 Click [Add Printer]. 5 Enter the [Printer name], [Location], and [Description], and then click [Continue]. bizhub 42/36 7-6 - Konica Minolta bizhub 42 | bizhub 36/42 Print Operations User Guide - Page 78
9. Enter the device URI in the following form: socket://[:port] % Using Printer IP - socket://192.168.1.190:9100 % Using printer Hostname - socket://Hostname:9100 Hostname may be substituted by IP Address, and Port is optional. 8 Click [Continue]. bizhub 42/36 7-7 - Konica Minolta bizhub 42 | bizhub 36/42 Print Operations User Guide - Page 79
available in the corresponding "Drivers/LinuxPPD/" folder on the Drivers CD-ROM. Use the appropriate ppd file for the language. 10 Select [KONICA MINOLTA bizhub 42 PPD (en)], then click [Add Printer]. A pop-up window appears. 11 Enter the user name and password for using root privileges - Konica Minolta bizhub 42 | bizhub 36/42 Print Operations User Guide - Page 80
8 Installation when Using NetWare - Konica Minolta bizhub 42 | bizhub 36/42 Print Operations User Guide - Page 81
for installing printer drivers for the Windows client. 8.1 NetWare 8.1.1 Network Settings In the [NetWare Settings] screen for the machine, specify [IPX/SPX Setting] and [NetWare Print Mode]. d Reference For details on the NetWare settings for the machine, refer to the [User's Guide Administrator - Konica Minolta bizhub 42 | bizhub 36/42 Print Operations User Guide - Page 82
9 Uninstalling the Printer Driver - Konica Minolta bizhub 42 | bizhub 36/42 Print Operations User Guide - Page 83
menu to setup appears, select [Uninstall Printer Driver], and then click [Next]. 5 Select the components to be removed, and then click [Uninstall]. % From then on, follow the instructions on the pages that follow. 6 If the dialog box prompting to restart the computer, click [OK]. bizhub 42/36 9-2 - Konica Minolta bizhub 42 | bizhub 36/42 Print Operations User Guide - Page 84
]) - [KONICA MINOLTA] - [42Series] - [Uninstall Printer Driver]. 2 Select the components to be removed, and then click [Uninstall]. % From then on, follow the instructions on the pages that follow. 3 If the dialog box prompting to restart the computer, click [OK]. 9.1.3 Manual uninstallation If - Konica Minolta bizhub 42 | bizhub 36/42 Print Operations User Guide - Page 85
driver, PostScript KONICA MINOLTA driver and fax driver, the model information of all drivers is deleted. To leave drivers other than the fax driver, do not remove the folder. - From the "C:\WINDOWS\inf" folder, remove "oem*.inf" and "oem*.PNF" ("*" included in the file name indicates a number - Konica Minolta bizhub 42 | bizhub 36/42 Print Operations User Guide - Page 86
upper-left corner of [Print & Fax] or [Print & Scan]. 6 Drag the [KONICA MINOLTA bizhub 42.gz] file and [KONICA MINOLTA bizhub 36.gz] file, which is lo- cated in [Library] - [Printers] - [PPDs] - [Contents] - [Resources] on the hard disk, to the [Trash] icon. 7 Drag the [42] folder, which is located - Konica Minolta bizhub 42 | bizhub 36/42 Print Operations User Guide - Page 87
. [KONICA MINOLTA bizhub 42.gz] and [KONICA MINOLTA bizhub 36.gz] 5 Delete the unnecessary files from [Library] - [Printers]. % Drag the [KONICA MINOLTA bizhub 42 Color.plugin] file, which is located in [Library] - [Printers] [PPD Plugins], to the [Trash] icon. % Drag the [KONICA MINOLTA bizhub 42 - Konica Minolta bizhub 42 | bizhub 36/42 Print Operations User Guide - Page 88
10 Print function of PCL/PS/XPS drivers for Windows - Konica Minolta bizhub 42 | bizhub 36/42 Print Operations User Guide - Page 89
For details, refer to page 10-8. % [Printing Preferences] of the printer driver changed in the [Print] window are not saved, and the original settings are restored when you exit the application. 5 Click [Print]. Printing is executed and the data indicator of the machine flashes. bizhub 42/36 10-2 - Konica Minolta bizhub 42 | bizhub 36/42 Print Operations User Guide - Page 90
10.2 Default settings of the printer driver When you have installed the printer driver, you need to change the initialization conditions such as options, user authentication and account track functions and enable functions of the machine from the [Printing Preferences] window of the printer driver - Konica Minolta bizhub 42 | bizhub 36/42 Print Operations User Guide - Page 91
10.2 Default settings of the printer driver 10 10.2.2 [Configure] tab Specify the model name used and presence or absence of the installed options, user authentication and account track functions, and then allow the printer driver to use the functions of the machine. Item Name [Device Option] [ - Konica Minolta bizhub 42 | bizhub 36/42 Print Operations User Guide - Page 92
settings of the printer driver 10 10.2.3 [Settings] tab The Settings tab allows you to change the default settings for displaying the confirmation messages or the window for entering the authentication settings. Item Name [EMF Spool] [Display Constraint Message] [Display paper set in Print - Konica Minolta bizhub 42 | bizhub 36/42 Print Operations User Guide - Page 93
printing can only be applied while using the application. When you exit the application, the settings return to their default settings. To register the settings, change the printer driver basic settings (default settings). 1 Open the [Printers], [Devices and Printers], or [Printers and Faxes] window - Konica Minolta bizhub 42 | bizhub 36/42 Print Operations User Guide - Page 94
to return to the default settings. Selecting [Paper View] displays the sample page layout based on current settings for checking the output result image. Selecting [Printer View] displays a printer figure showing the options installed in the machine such as the paper tray. Paper: Printer: Sub view - Konica Minolta bizhub 42 | bizhub 36/42 Print Operations User Guide - Page 95
the printer driver. Reference - [Advanced Printing Features] is the Properties window that you can display by right-clicking the printer icon and selecting Properties. The window is displayed if the [Enable advanced printing features] check box in the [Advanced] tab is selected. bizhub 42/36 10 - Konica Minolta bizhub 42 | bizhub 36/42 Print Operations User Guide - Page 96
. By registering frequently used setting functions to My Tab, the printer driver can be easier to use, and you can modify various settings from a single window. Function Name [More Details My Tab...], and the specific display contents vary depending on the registered contents. bizhub 42/36 10-9 - Konica Minolta bizhub 42 | bizhub 36/42 Print Operations User Guide - Page 97
the LEFT] or [to the RIGHT]. % Select the desired function from those indicated in the respective tabs in [Setting Item List]. % Clicking [to the LEFT] places the selected function on the left side of [My Tab] be added to [My Tab] by right-clicking them on their original tabs. bizhub 42/36 10-10 - Konica Minolta bizhub 42 | bizhub 36/42 Print Operations User Guide - Page 98
password. When [Secured Job] are printed, they are deleted from the HDD. Select this option to print only one set and store the job in the HDD. Select this option to store print jobs with added user authentication information in the HDD. After user authentication, the jobs are output. bizhub 42/36 - Konica Minolta bizhub 42 | bizhub 36/42 Print Operations User Guide - Page 99
has been printed on with this printer. In addition, the page printed with this setting is not guaranteed. d Reference For details on the paper sizes loadable in the paper trays, refer to the [User's Guide Copy Operations]. For details on the [Job Retention], refer to page 13-2. bizhub 42/36 10-12 - Konica Minolta bizhub 42 | bizhub 36/42 Print Operations User Guide - Page 100
you to specify different values for the front and back sides. Select a unit to be used for specifying the size. Select this check box to print by shifting the entire print image. Click [Image Shift Settings...] to specify the image shift values. bizhub 42/36 10-13 - Konica Minolta bizhub 42 | bizhub 36/42 Print Operations User Guide - Page 101
], which are for printing a sheet of original onto multiple sheets of paper, are available only for the PCL driver. - The [Skip Blank Pages] function is available for the PCL/XPS drivers. - The positions of binding margins vary according to the [Binding Position] setting. 10.4.5 [Finish] tab - Konica Minolta bizhub 42 | bizhub 36/42 Print Operations User Guide - Page 102
status. Select this check box to insert a separation sheet between each print job or each print set of paper. Select a tray from which sheets used as separator page are fed. The available trays are different depending on the installed options. 10.4.7 [Stamp/Composition] tab bizhub 42/36 10-15 - Konica Minolta bizhub 42 | bizhub 36/42 Print Operations User Guide - Page 103
for the PCL/XPS driver. Editing watermark Function Name [Watermark Name] [Watermark Text] [Add] [Delete] [Up]/[Down] [Position] [Center] [Angle] [Font Name] bizhub 42/36 Description Enter the name of the watermark. You can enter up to 30 characters. Enter the text to be printed as the watermark - Konica Minolta bizhub 42 | bizhub 36/42 Print Operations User Guide - Page 104
box to register the watermark for sharing it with other users or clear this check box to register it for private use. Reference - If [Print Type] is set to [Booklet] in the [Layout] tab of the PS driver, watermark cannot be printed. - If the printer driver is installed in a 64 bit OS via point and - Konica Minolta bizhub 42 | bizhub 36/42 Print Operations User Guide - Page 105
. Click this button to download overlay files to the printer. This button is enabled if the download manager is installed. Specify the pages to be printed. Reference - To print a form using the PostScript driver, overlay files need to be downloaded to the machine in ad- vance. bizhub 42/36 10-18 - Konica Minolta bizhub 42 | bizhub 36/42 Print Operations User Guide - Page 106
10.4 Parameter details 10 10.4.8 [Quality] tab The functions displayed vary depending on which of the PCL/PS/XPS drivers is used. PCL driver PS driver XPS driver bizhub 42/36 10-19 - Konica Minolta bizhub 42 | bizhub 36/42 Print Operations User Guide - Page 107
, set download fonts to bitmap fonts, and set printer fonts to OFF. Reference - The [Pattern] function is available for the PCL/XPS drivers. - The [Font Settings] function is available for the PCL/PS drivers. Quick Setting-Details of the [Custom] setting In the [Details] setting, you can configure - Konica Minolta bizhub 42 | bizhub 36/42 Print Operations User Guide - Page 108
2008 e64, or Windows Server 2008 R2. - You can change the [Excel Job Control] setting only when the printer driver setting dialog is displayed from the [Printers] ([Devices and Printers] in Windows 7/Server 2008 R2 and [Printers and Faxes] in Windows XP/Server 2003) window. bizhub 42/36 10-21 - Konica Minolta bizhub 42 | bizhub 36/42 Print Operations User Guide - Page 109
11 Print Functions of Mac OS X - Konica Minolta bizhub 42 | bizhub 36/42 Print Operations User Guide - Page 110
functions. For details, refer to page 11-6. % The printer driver settings changed in the [Print] window are not saved, and the original settings are restored when you exit the application. 5 Click [Print]. Printing is executed and the data indicator of the machine flashes. bizhub 42/36 11-2 - Konica Minolta bizhub 42 | bizhub 36/42 Print Operations User Guide - Page 111
cannot be used by the printer driver. Be sure to configure the settings for the installed options. 11.2.1 Option settings 1 Open the [Print & Fax] (or [Print & Scan]/[Printer Setup Utility]/[Print Center]) window. % The [Print & Fax] or [Print & Scan] window can be opened from [System Preferences - Konica Minolta bizhub 42 | bizhub 36/42 Print Operations User Guide - Page 112
Print] window are saved by selecting [Save As] in [Presets:]. When OS X 10.7 is used, click [Save Current Settings as Preset...]. These settings can be used by selecting them in [Presets:]. d Reference For details on the function and settings of the printer driver, refer to page 11-6. bizhub 42/36 - Konica Minolta bizhub 42 | bizhub 36/42 Print Operations User Guide - Page 113
10.7) or click [Save] (OS X 10.2/10.3). This saves the custom paper size, which can be selected from the Paper Size drop-down list in [Page Attributes]. Reference - For Mac OS X 10.5/10.6/10.7, you can also select [Manage Custom Sizes...] with [Paper Size:] in the [Print] window. bizhub 42/36 11-5 - Konica Minolta bizhub 42 | bizhub 36/42 Print Operations User Guide - Page 114
tails on registering the custom size, refer to page 11-5. - For Mac OS X 10.5/10.6/10.7, you can specify [Paper Size] and [Orientation] also from the Print window. d Reference For details on the paper sizes loadable in the paper trays, refer to the [User's Guide Copy Operations]. bizhub 42/36 11-6 - Konica Minolta bizhub 42 | bizhub 36/42 Print Operations User Guide - Page 115
the right side of [Printer:]. - When the setting items are not displayed in OS X 10.7, click [Show Details]. 11.4.3 [Layout] Function Name Option [Pages per Sheet] − [Layout Direction] − bizhub 42/36 Description Specifies the number of pages to be printed on one sheet of paper. For example, if - Konica Minolta bizhub 42 | bizhub 36/42 Print Operations User Guide - Page 116
[Double Thin line] − ON/OFF Description This prints a border around the image for each of the pages printed on one sheet of paper when more than one page is printed on one sheet of paper. This feature is not available with this printer. The printing direction is inverted vertically. ON/OFF Select - Konica Minolta bizhub 42 | bizhub 36/42 Print Operations User Guide - Page 117
paper used by the printer. Select this option to reduce the printing size. [Automatic]: Select this option to print in the original page order of the document. [Normal]: Select this option to print in the normal page order. [Reverse]: Select this option to print in the reverse page order. bizhub 42 - Konica Minolta bizhub 42 | bizhub 36/42 Print Operations User Guide - Page 118
Document], [After Document] [Standard], [Classified], [Confidential], [Secret], [Top Secret], [Unclassified] − Description Allows you to set cover page before or after document. Allows you to select cover page type. Allows you to set billing information printed on cover page. bizhub 42/36 11-10 - Konica Minolta bizhub 42 | bizhub 36/42 Print Operations User Guide - Page 119
[PostScript Errors] [Tray Switching] Option [No special reporting], [Print detailed report] − Description printing immediately. [At]: Specify the time to begin printing. [On Hold]: Select this option to hold the print job. Select the priority for printing jobs that are being held. bizhub 42/36 - Konica Minolta bizhub 42 | bizhub 36/42 Print Operations User Guide - Page 120
] Description Allows you to set Brightness. Specify the halftone processing applied to the image/text/graphic objects. Specify the edge enhancement applied to images/text/graphics. Select this check box to adjust the printing density in order to save the amount of toner consumed. Select this check - Konica Minolta bizhub 42 | bizhub 36/42 Print Operations User Guide - Page 121
[Secured Job] [Proof then Print] [ID&Print] [Secure Print Set- − tings] [User Authentica- − tion] [Account Track] − Description Select this option to print immediately. Select this option to store print jobs in the HDD with a set password. When [Secured Job] are printed, they are deleted from the - Konica Minolta bizhub 42 | bizhub 36/42 Print Operations User Guide - Page 122
paper that has been printed on with this printer. In addition, the page printed with this setting is not guaranteed. [Layout] Function Name [Print Type] Option [1-Sided], [2-Sided] Description Specify 1-Sided/2-Sided print. To save paper, 2-Sided print is the default setting. bizhub 42/36 11 - Konica Minolta bizhub 42 | bizhub 36/42 Print Operations User Guide - Page 123
[Staple] Option [OFF], [Left Corner], [Right Corner], [2 Position] Description Specify stapling. From the drop-down list, specify the number of staples and the stapling position. Reference - The [Staple] function is available only if the optional Finisher FS-529 is installed. bizhub 42/36 11-15 - Konica Minolta bizhub 42 | bizhub 36/42 Print Operations User Guide - Page 124
12 Print Functions of Linux - Konica Minolta bizhub 42 | bizhub 36/42 Print Operations User Guide - Page 125
different depending on the version of the operating system being used. 1 From the [Application] menu, select [Office], then [Word Processor]. 2 Open the document to be printed. 3 Click [Print] in the [File] menu. The [Print] dialog box appears. bizhub 42/36 12-2 - Konica Minolta bizhub 42 | bizhub 36/42 Print Operations User Guide - Page 126
12.1 Print operations 12 4 Select the name of the printer. 5 Click [Print] to print the document. bizhub 42/36 12-3 - Konica Minolta bizhub 42 | bizhub 36/42 Print Operations User Guide - Page 127
driver 12 12.2 Default settings of the printer driver When you have installed the printer driver, you need to change the initialization conditions such as options and enable functions of the machine from the printer driver. NOTICE Any options that are installed in the machine but not configured - Konica Minolta bizhub 42 | bizhub 36/42 Print Operations User Guide - Page 128
12.2 Default settings of the printer driver 12 12.2.3 [General] Function Name [Nearest Size and Scale] [Resolution] [Paper Type] [Paper Source] [Orientation] [Manually Print on 2nd side] [Paper Sizes] [Collate] [Binding Position] [Offset] [Print Type] [Staple] [Brightness] [Edge Strength] [Toner - Konica Minolta bizhub 42 | bizhub 36/42 Print Operations User Guide - Page 129
12.2 Default settings of the printer driver 12 12.2.5 [Text Options] Function Name [Text Halftone] [Text Edge Enhancement] Option [Line Art], [Detail], [Smooth] [On]/[Off] Description Specifies the halftone for printing text. Select whether text edges are emphasized. 12.2.6 [Graphics Options] - Konica Minolta bizhub 42 | bizhub 36/42 Print Operations User Guide - Page 130
13 Function Details - Konica Minolta bizhub 42 | bizhub 36/42 Print Operations User Guide - Page 131
. 13.1.1 Setting the printer driver The following four printer drivers support this feature. - KONICA MINOLTA PCL Printer Driver for Windows (PCL driver) - KONICA MINOLTA PostScript Printer Driver for Windows (PS driver) - KONICA MINOLTA XPS Printer Driver for Windows (XPS driver) - KONICA MINOLTA - Konica Minolta bizhub 42 | bizhub 36/42 Print Operations User Guide - Page 132
then Print 13 For Mac OS X 1 Display the [Security] window. 2 Select [Proof then Print] in [Job Retention]. 3 Specify the desired number of copies and print. One copy is printed for checking. d Reference For the method of outputting jobs stored on the machine, refer to page 13-8 . bizhub 42/36 - Konica Minolta bizhub 42 | bizhub 36/42 Print Operations User Guide - Page 133
(XPS driver) - KONICA MINOLTA PostScript PPD Printer Driver for Mac OS X Perform printing with the following settings specified. - Job Retention: [Secured Job] For Windows 1 Click to display the [Basic] tab. 2 Select [Secured Job] in [Job Retention]. 3 Click [User Settings...]. bizhub 42/36 13 - Konica Minolta bizhub 42 | bizhub 36/42 Print Operations User Guide - Page 134
Password in the Password box. % When [Password Rules] is enabled on the machine, the passwords that can be used for secure printing are limited. If a password that does not comply with the password rules is entered, the job is deleted. For details on the [Password Rules], refer to the [User's Guide - Konica Minolta bizhub 42 | bizhub 36/42 Print Operations User Guide - Page 135
and the machine cancels the print job. 4 Print the document. % If the user password does not correspond to the user name entered, the Secured Job file is discarded without being registered. d Reference For the method of outputting jobs stored on the machine, refer to page 13-8 . bizhub 42/36 13-6 - Konica Minolta bizhub 42 | bizhub 36/42 Print Operations User Guide - Page 136
Setting the printer driver The following three printer drivers support this feature. - KONICA MINOLTA PCL Printer Driver for Windows (PCL driver) - KONICA MINOLTA PostScript Printer Driver for Windows (PS driver) - KONICA MINOLTA XPS Printer Driver for Windows (XPS driver) Perform printing with - Konica Minolta bizhub 42 | bizhub 36/42 Print Operations User Guide - Page 137
to the [User's Guide Copy Opera- tions]. 1 If [User Authentication] is enabled, log in as registered user or public user. 2 In the home screen, press [USB/HDD]. 3 Press [Proof Print]. 4 From the list, select the user who sent a job. 5 Press [OK]. 6 Select the job to be printed. bizhub 42/36 13-8 - Konica Minolta bizhub 42 | bizhub 36/42 Print Operations User Guide - Page 138
13.4 Recalling a job from the control panel 13 7 Press [Print]. % To delete the job without printing, press [Delete]. % If the job was saved with the [Secured Job] setting, type in the password. 8 Enter the number of copies to be printed, and then press [OK]. bizhub 42/36 13-9 - Konica Minolta bizhub 42 | bizhub 36/42 Print Operations User Guide - Page 139
Printer Driver for Windows (PS driver) - KONICA MINOLTA XPS Printer Driver for Windows (XPS driver) - KONICA MINOLTA PostScript PPD Printer Driver for Mac OS X Reference - If you enter an incorrect user name or password for the [User Authentication] settings of this machine or have not enabled [User - Konica Minolta bizhub 42 | bizhub 36/42 Print Operations User Guide - Page 140
machine. - When authentication is performed with the PageScope Authentication Manager, in the Administrator mode of the PageScope Web Connection, set [Network] − [OpenAPI Settings] − [Authentication] to [OFF]. For details, refer to the [User's Guide Administrator Operations]. bizhub 42/36 13-11 - Konica Minolta bizhub 42 | bizhub 36/42 Print Operations User Guide - Page 141
user. Reference - When authentication is performed with the PageScope Authentication Manager, in the Administrator mode of the PageScope Web Connection, set [Network] − [OpenAPI Settings] − [Authentication] to [OFF]. For details, refer to the [User's Guide Administrator Operations]. bizhub 42/36 - Konica Minolta bizhub 42 | bizhub 36/42 Print Operations User Guide - Page 142
enabled The following four printer drivers support this feature. - KONICA MINOLTA PCL Printer Driver for Windows (PCL driver) - KONICA MINOLTA PostScript Printer Driver for Windows (PS driver) - KONICA MINOLTA XPS Printer Driver for Windows (XPS driver) - KONICA MINOLTA PostScript PPD Printer Driver - Konica Minolta bizhub 42 | bizhub 36/42 Print Operations User Guide - Page 143
that are registered with the machine. % The account name and password can each contain up to 8 characters. 4 Click [Print] to start printing. If the entered access code is an access code enabled on the machine, the job is printed and counted as a job for the specified account. bizhub 42/36 13-14 - Konica Minolta bizhub 42 | bizhub 36/42 Print Operations User Guide - Page 144
To enable the ID & Print function when printing a document from the commuter, specify the function from the printer driver. For details, refer to page 13-15. 13.7.1 Setting the printer driver For Windows 1 Click to display the [Basic] tab. 2 Click [Authentication/Account Track...]. bizhub 42/36 - Konica Minolta bizhub 42 | bizhub 36/42 Print Operations User Guide - Page 145
user authentication, refer to page 13-10. % If an attempt is made to print or save a file by specifying a user name that contains ["] (a double quotation mark), a login error results and the machine cancels the print job. 4 Select [ID&Print] in [Job Retention]. 5 Print the document. bizhub 42/36 - Konica Minolta bizhub 42 | bizhub 36/42 Print Operations User Guide - Page 146
% For details on the user authentication, refer to page 13-10. % If an attempt is made to print or save a file by specifying a user name that contains ["] (a double quotation mark), a login error results and the machine cancels the print job. 5 Click [Print] to start printing. bizhub 42/36 13-17 - Konica Minolta bizhub 42 | bizhub 36/42 Print Operations User Guide - Page 147
unit can be selected and used as the authentication method. Specifying a job to print 1 Enter the [User Name] and [Password] from the control panel of the printer. 2 Select [Access Basic Screen], and press [Login]. Log in to the machine. 3 In the home screen, press [USB/HDD]. bizhub 42/36 13-18 - Konica Minolta bizhub 42 | bizhub 36/42 Print Operations User Guide - Page 148
[ID & Print]. 5 Select [Login User] or [Public User] as the user who sends a job. 6 Select the job you want to print and then press [Print]. % To stop operations, press [Close]. % The ID & Print file is automatically deleted as soon as the printing is normally terminated. bizhub 42/36 13-19 - Konica Minolta bizhub 42 | bizhub 36/42 Print Operations User Guide - Page 149
the [User Name] and [Password] from the control panel of the printer. 2 Select [Access Basic Screen], and press [Login]. Log in to the machine. 3 In the home screen, press [USB/HDD]. 4 Press [ID & Print]. 5 Select [Login User] or [Public User] as the user who sends a job. bizhub 42/36 13-20 - Konica Minolta bizhub 42 | bizhub 36/42 Print Operations User Guide - Page 150
13.7 ID & Print 13 6 Select the job you want to delete and then press [Delete]. 7 Press [Yes], and then press [OK]. bizhub 42/36 13-21 - Konica Minolta bizhub 42 | bizhub 36/42 Print Operations User Guide - Page 151
device. - Do not disconnect the external memory just after connecting it. 13.8.2 Printing from a connected external memory device 1 Plug the external memory device into the USB port (Type A). The icon appears at the bottom of the screen. 2 In the home screen, press [USB/HDD]. bizhub 42/36 13-22 - Konica Minolta bizhub 42 | bizhub 36/42 Print Operations User Guide - Page 152
of folders and files are displayed given priority over the names of folders or files. - A maximum of eight folder levels can be displayed. - In [File Type], the type of file to be displayed can be selected. - Do not unplug the external memory device from the USB port during printing. bizhub 42/36 - Konica Minolta bizhub 42 | bizhub 36/42 Print Operations User Guide - Page 153
13.8 External Memory 13 13.8.3 Selecting the type of files to be displayed 1 In the home screen, press [USB/HDD]. 2 Press [External Memory]. 3 Press [File Type]. 4 Select the type of files to be displayed. 5 Press [OK]. bizhub 42/36 13-24 - Konica Minolta bizhub 42 | bizhub 36/42 Print Operations User Guide - Page 154
14 Settings on the Control Panel - Konica Minolta bizhub 42 | bizhub 36/42 Print Operations User Guide - Page 155
1 Press the Utility/Counter key. 2 Press [User Settings]. The User Settings screen appears. % To finish configuring the Utility mode settings, press the Utility/Counter key. % To return through the hierarchy of the Utility menu, press [Close] until the desired screen appears. bizhub 42/36 14-2 - Konica Minolta bizhub 42 | bizhub 36/42 Print Operations User Guide - Page 156
settings 14 14.2 User settings 14.2.1 [Print Settings] [Paper Settings] Specify settings for the paper and paper trays. % Press the Utility/Counter key ö[User Settings] ö [Print Settings] ö [Paper Settings]. Settings [Paper Tray Settings] [Default Tray] [Tray 1] [Tray 2] [Tray 3] [Tray 4] [Tray - Konica Minolta bizhub 42 | bizhub 36/42 Print Operations User Guide - Page 157
tray that is used for printing when a print job is received from another manufacturer's printer driver. d Reference For [Logical Tray 1], the default value is [Physical Tray 1]. [Logical Tray 4] [Logical Tray 5] [Logical Tray 6] [Logical Tray 7] [Logical Tray 8] [Logical Tray 9] bizhub 42/36 - Konica Minolta bizhub 42 | bizhub 36/42 Print Operations User Guide - Page 158
the method for paper arrangement (adjusting the binding position) for 2-sided printing. [Adjust Orientation]: Execute the Adjust Orientation processing. [Control Adjustments]: Follow the instruction from the printer driver without executing the Adjust Orientation processing. bizhub 42/36 14-5 - Konica Minolta bizhub 42 | bizhub 36/42 Print Operations User Guide - Page 159
14.3 Administrator Settings 14 14.3 Administrator Settings d Reference For details on the Administrator Settings screen, refer to the [User's Guide Administrator Operations]. bizhub 42/36 14-6 - Konica Minolta bizhub 42 | bizhub 36/42 Print Operations User Guide - Page 160
15 PageScope Web Connection - Konica Minolta bizhub 42 | bizhub 36/42 Print Operations User Guide - Page 161
the Web browser to access PageScope Web Connection. 0 If User Authentication is enabled, enter the user name and password. For details, refer to page 15-5. 0 For details on setting the IP address of this machine, refer to [User's Guide Administrator Operations]. 1 Start the Web browser. 2 Enter the - Konica Minolta bizhub 42 | bizhub 36/42 Print Operations User Guide - Page 162
[OK]. For Mozilla Firefox 1 Select [Options] in the [Tools] menu. 2 Select [Privacy], and select the [Clear history when Firefox closes] check box. 3 Click [Settings], and select the [Cache] check box under [Settings for Clearing History], and then click [OK]. 4 Click [OK]. bizhub 42/36 15-3 - Konica Minolta bizhub 42 | bizhub 36/42 Print Operations User Guide - Page 163
on the control panel remains the same. Logging in as a public user If user authentication is not enabled on the machine, or a user except the registered user is logging in, you will be logging in as a public user. In the login page, select [Public User], and click [Log in]. bizhub 42/36 15-4 - Konica Minolta bizhub 42 | bizhub 36/42 Print Operations User Guide - Page 164
is enabled, select an external authentication server. Logging in to the administrator mode To configure the system, security, print or network setting, log in to the administrator mode. d Reference For details on how to log in the Administrator mode, refer to the [User's Guide Administrator - Konica Minolta bizhub 42 | bizhub 36/42 Print Operations User Guide - Page 165
user mode are different from those in administrator mode. 8 Menu Displays information and setting for the selected icon. The menu that appears in this area varies depending on which icon was selected. 9 Information and settings Displays the details of the item selected in the menu. bizhub 42 - Konica Minolta bizhub 42 | bizhub 36/42 Print Operations User Guide - Page 166
Web Connection windows. The scanning or printing can continue. Error Fatal Caution is required before the next scanning or printing job can be performed. The machine must be restarted. If the error is not corrected after the machine has been restarted, the machine must be repaired. bizhub 42/36 - Konica Minolta bizhub 42 | bizhub 36/42 Print Operations User Guide - Page 167
pages that have been printed in the machine according to paper type. Enables you to check the online assistance about this machine. Configuring some settings is not available in the user mode. For details on each setting item, refer to the [User's Guide Administrator Operations]. bizhub 42/36 15-8 - Konica Minolta bizhub 42 | bizhub 36/42 Print Operations User Guide - Page 168
the password of the login user. Public users cannot use this function. Enables you to check the registration details on the users currently logging in. 15.5.2 Job Item [Current Jobs] [Job History] [Communication List] [Print] [Send] [Receive] [Save] [Print] [Send] [Receive] [Save] [Scan] [Fax TX - Konica Minolta bizhub 42 | bizhub 36/42 Print Operations User Guide - Page 169
Settings] [Tray Mapping Settings] [PCL Settings] [PostScript Settings] [XPS Settings] [PCL Font] [PostScript Font] [Form Overlay] [Report Types] [Direct Print] Description Enables you to check the various settings for printing functions. Configuring some settings is not available in the user mode - Konica Minolta bizhub 42 | bizhub 36/42 Print Operations User Guide - Page 170
Enables you to manage the scanned data stored in the hard disk. For details, refer to the [User's Guide Scan Operations]. Enables you to manage the data of PC-Fax reception and memory reception that is stored in the machine. For details, refer to the [User's Guide Fax Operations]. bizhub 42/36 - Konica Minolta bizhub 42 | bizhub 36/42 Print Operations User Guide - Page 171
15.6 Administrator mode 15 15.6 Administrator mode d Reference For details on the Administrator mode, refer to the [User's Guide Administrator Operations]. bizhub 42/36 15-12 - Konica Minolta bizhub 42 | bizhub 36/42 Print Operations User Guide - Page 172
16 Troubleshooting - Konica Minolta bizhub 42 | bizhub 36/42 Print Operations User Guide - Page 173
may be insufficient. There may be an error in the application software settings. The file printing settings may be incorrect. The printer driver specified when printing may not be supported by the printer controller. The network or USB cable may be disconnected. An error may have occurred on this - Konica Minolta bizhub 42 | bizhub 36/42 Print Operations User Guide - Page 174
be displayed. Select [Enable] in [Administrator Settings] - [External Memory Print]. Contact the administrator of the machine. Encrypted USB flash memory cannot be used. When the above troubleshooting does not eliminate the problem, refer to the [User's Guide Copy Operations]. bizhub 42/36 16-3 - Konica Minolta bizhub 42 | bizhub 36/42 Print Operations User Guide - Page 175
settings. Align the orientations of the original. Simplify the overlay to reduce the data size. If garbled characters are detected while printing data using the PCL driver, set download fonts to bitmap fonts, and set printer fonts to OFF. Simplify the images to reduce the data size. bizhub 42/36 - Konica Minolta bizhub 42 | bizhub 36/42 Print Operations User Guide - Page 176
the desired paper source. In the [Configure] tab, enable user authentication or account track. 16.2.2 Others Problem Cannot install the printer driver. Possible Cause It has already been installed in Windows Vista/Server 2008 as a printer compatible with the Web service print function. Remedy - Konica Minolta bizhub 42 | bizhub 36/42 Print Operations User Guide - Page 177
Cannot configure the settings/Cannot print according to the settings 16 Message [Job Registration Limit Over] [Registered jobs reached limit.] [USB Connection Error] [The same type of USB device has been connected. Please disconnect all devices.] [The USB device is invalid.] [Disconnect USB device - Konica Minolta bizhub 42 | bizhub 36/42 Print Operations User Guide - Page 178
17 Appendix - Konica Minolta bizhub 42 | bizhub 36/42 Print Operations User Guide - Page 179
Operating environment conditions Resolution Data processing Print Supported paper sizes Fonts (Built-in fonts) Compatible computer Specifications Built-in printer controller Common with the machine 1,536 MB 320 GB Ethernet (1000Base-T/100Base-TX/10Base-T) USB 2.0 IEEE 802.2 IEEE 802.3 Ethernet II - Konica Minolta bizhub 42 | bizhub 36/42 Print Operations User Guide - Page 180
Product specifications 17 Item Printer driver Specifications KONICA MINOLTA PCL Driver (PCL driver) KONICA MINOLTA PostScript Driver (PS driver) Windows XP Home Edition (Service Pack 3 or later) Windows XP Professional (Service Pack 3 or later) Windows Server 2003, Standard Edition (Service Pack - Konica Minolta bizhub 42 | bizhub 36/42 Print Operations User Guide - Page 181
Printer driver Utility Citrix Operating Environment Specifications KONICA MINOLTA XPS Driver (XPS driver) Windows Vista Business (Service Pack 2 or later) * Windows Vista Enterprise (Service Pack 2 or later) * Windows Vista Home Basic (Service Pack 2 or later) * Windows Vista Home Premium (Service - Konica Minolta bizhub 42 | bizhub 36/42 Print Operations User Guide - Page 182
17.2 Printing reports 17 17.2 Printing reports 17.2.1 Configuration Page bizhub 42/36 17-5 - Konica Minolta bizhub 42 | bizhub 36/42 Print Operations User Guide - Page 183
17.2 Printing reports 17 17.2.2 Statistics Page bizhub 42/36 17-6 - Konica Minolta bizhub 42 | bizhub 36/42 Print Operations User Guide - Page 184
17.2 Printing reports 17 17.2.3 Font list PS font list bizhub 42/36 17-7 - Konica Minolta bizhub 42 | bizhub 36/42 Print Operations User Guide - Page 185
17.2 Printing reports 17 PCL font list bizhub 42/36 17-8 - Konica Minolta bizhub 42 | bizhub 36/42 Print Operations User Guide - Page 186
17.2 Printing reports 17 17.2.4 HDD Directory List bizhub 42/36 17-9 - Konica Minolta bizhub 42 | bizhub 36/42 Print Operations User Guide - Page 187
17.2 Printing reports 17 17.2.5 Counter List bizhub 42/36 17-10 - Konica Minolta bizhub 42 | bizhub 36/42 Print Operations User Guide - Page 188
4 Open the [Print Properties] window of the created printer. 5 Select the [Sharing] tab, and select the [Share This Printer] check box. 6 Click [Additional Drivers]. The additional drivers page appears. 7 Select the [x64] check box in the [Processor] column, and click [OK]. 8 Specify the folder that - Konica Minolta bizhub 42 | bizhub 36/42 Print Operations User Guide - Page 189
name in network environments. This system enables a user to access other computers on the network by specifying host names instead of elusive and non-intuitive IP addresses. The acronym for Dots Per Inch. A unit of resolution used for printers and scanners. This indicates the number of dots used - Konica Minolta bizhub 42 | bizhub 36/42 Print Operations User Guide - Page 190
NT or UNIX based systems. It uses TCP/IP to output printing data from Windows or UNIX to a printer on the network. MAC is the acronym for Media Access Control. A MAC address is an ID number unique to each Ethernet card, enabling sending or receiving data to or from other Ethernet cards. A Mac - Konica Minolta bizhub 42 | bizhub 36/42 Print Operations User Guide - Page 191
OHP/OHT OS Outline font PDF PDL Peer-to-peer Plug and play PostScript PPD Print job Print queue Printer buffer Printer driver Property Protocol Proxy server PServer Queue name Resolution RGB RIP Samba bizhub 42/36 17 Description A network operating system developed by Novell. This uses NetWare - Konica Minolta bizhub 42 | bizhub 36/42 Print Operations User Guide - Page 192
Windows environments, to call the name server responsible for conversion between a computer name and an IP address. The abbreviation for XML Paper Specification. This is one of the electronic document formats developed by Microsoft Corporation. It is first supported in Windows Vista. bizhub 42/36 - Konica Minolta bizhub 42 | bizhub 36/42 Print Operations User Guide - Page 193
18 Index - Konica Minolta bizhub 42 | bizhub 36/42 Print Operations User Guide - Page 194
10-13 Configure tab 10-4 Connection diagram 2-7 Connection methods 3-5 Control panel 2-4 Copy Protect 10-16 Counter list print 17-10 Cover mode tab 10-15 Cover page 11-10 Cover page type 11-10 Create Overlay File 10-16 Current Status 15-7 Custom size 10-11, 11-5 D Default settings 10 - Konica Minolta bizhub 42 | bizhub 36/42 Print Operations User Guide - Page 195
-2 Setup 2-8 Skipping blank pages 10-13 Stamp/composition tab 10-15 Staple 11-15 Stapling 10-14 Statistics page 17-6 Store address 15-11 Store job 13-7 System 15-8 T TCP/IP settings 4-3 Toner save 10-20, 11-12 Tray switching 11-11 Troubleshooting 16-2 Two-sided 11-8 bizhub 42/36 18-3 - Konica Minolta bizhub 42 | bizhub 36/42 Print Operations User Guide - Page 196
User settings 14-2 W Watermark 10-16 Web browser 15-3 Web service 3-5, 5-9 Windows 2-6, 9-2 Windows 7 3-5 Windows Server 2003 3-6, 5-15 Windows Server 2008 3-5, 5-2 Windows Server 2008 R2 3-5 Windows Vista 3-5, 5-2 Windows XP 3-6, 5-15 X XPS driver 3-4, 10-2 Z Zoom 10-11 bizhub 42/36 - Konica Minolta bizhub 42 | bizhub 36/42 Print Operations User Guide - Page 197
Print Reports 14-5 Printer Install 4-3 Printer View 10-7 Properties 10-2 S Save Custom Size 10-5 Size Detection Mode 14-3 Statistics Page 14-5 T Tray Mapping 14-4 Tray Mapping Mode 14-4 U Uninstall 9-3, 9-5, 9-6 User Box 13-18 User Settings 10-12, 14-2 Utility/Counter 14-2 bizhub 42 - Konica Minolta bizhub 42 | bizhub 36/42 Print Operations User Guide - Page 198
http://konicaminolta.com A3EW-9561IC-11 2011 Copyright 2011. 11
-
 1
1 -
 2
2 -
 3
3 -
 4
4 -
 5
5 -
 6
6 -
 7
7 -
8
-
9
-
10
-
11
-
12
-
13
-
14
-
15
-
16
-
17
-
18
-
19
-
20
-
21
-
22
-
23
-
24
-
25
-
26
-
27
-
28
-
29
-
30
-
31
-
32
-
33
-
34
-
35
-
36
-
37
-
38
-
39
-
40
-
41
-
42
-
43
-
44
-
45
-
46
-
47
-
48
-
49
-
50
-
51
-
52
-
53
-
54
-
55
-
56
-
57
-
58
-
59
-
60
-
61
-
62
-
63
-
64
-
65
-
66
-
67
-
68
-
69
-
70
-
71
-
72
-
73
-
74
-
75
-
76
-
77
-
78
-
79
-
80
-
81
-
82
-
83
-
84
-
85
-
86
-
87
-
88
-
89
-
90
-
91
-
92
-
93
-
94
-
95
-
96
-
97
-
98
-
99
-
100
-
101
-
102
-
103
-
104
-
105
-
106
-
107
-
108
-
109
-
110
-
111
-
112
-
113
-
114
-
115
-
116
-
117
-
118
-
119
-
120
-
121
-
122
-
123
-
124
-
125
-
126
-
127
-
128
-
129
-
130
-
131
-
132
-
133
-
134
-
135
-
136
-
137
-
138
-
139
-
140
-
141
-
142
-
143
-
144
-
145
-
146
-
147
-
148
-
149
-
150
-
151
-
152
-
153
-
154
-
155
-
156
-
157
-
158
-
159
-
160
-
161
-
162
-
163
-
164
-
165
-
166
-
167
-
168
-
169
-
170
-
171
-
172
-
173
-
174
-
175
-
176
-
177
-
178
-
179
-
180
-
181
-
182
-
183
-
184
-
185
-
186
-
187
-
188
-
189
-
190
-
191
-
192
-
193
-
194
-
195
-
196
-
197
-
198
 |
 |
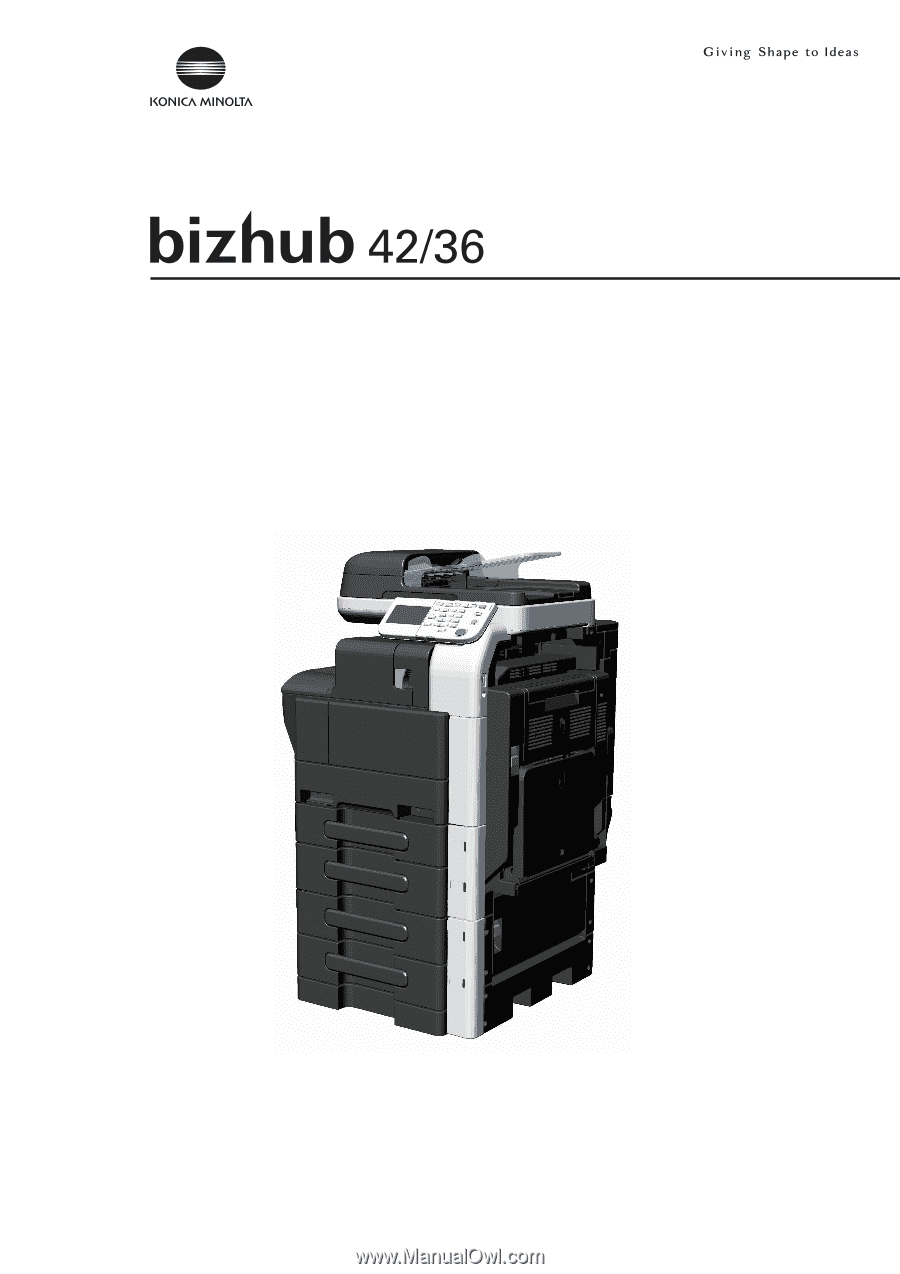
User’s Guide
[Print Operations]