LG HMC030KD1 Service Manual - Page 23
Flaring, Connection, Piping
 |
View all LG HMC030KD1 manuals
Add to My Manuals
Save this manual to your list of manuals |
Page 23 highlights
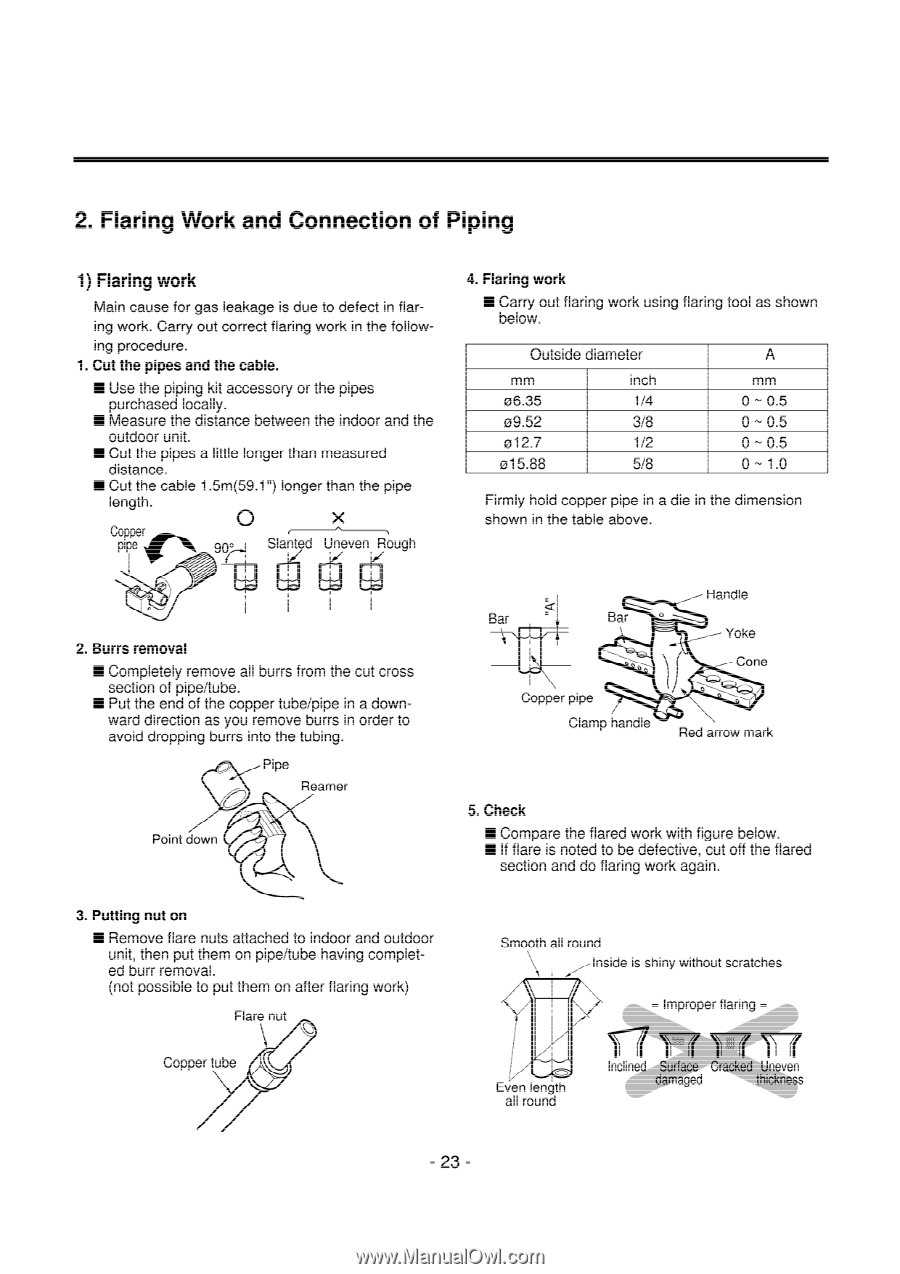
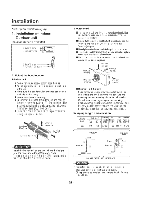
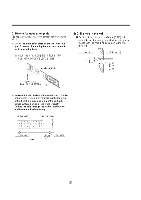
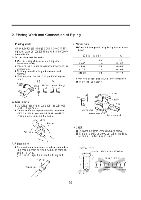
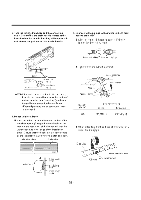
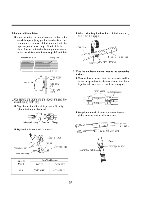
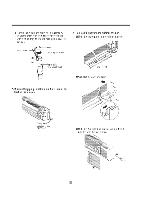
2. Flaring Work and Connection of Piping 1) Flaring work Main cause for gas leakage is due to defect in flaring work. Carry out correct flaring work in the following procedure. 1. Cut the pipes and the cable. • Use the piping kit accessory or the pipes purchased locally. • Measure the distance between the indoor and the outdoor unit. • Cut the pipes a little longer than measured distance. • Cut the cable 1.5m(59.1") longer than the pipe length. Copper pipe 0 X 90/-1, Slanted Uneven Rough Ej 2. Burrs removal • Completely remove all burrs from the cut cross section of pipe/tube. • Put the end of the copper tube/pipe in a downward direction as you remove burrs in order to avoid dropping burrs into the tubing. Pipe Reamer Point down 4. Flaring work • Carry out flaring work using flaring tool as shown below. Outside diameter mm inch 06.35 1/4 09.52 3/8 012.7 1/2 015.88 5/8 A mm 0 - 0.5 0 - 0.5 0 - 0.5 0 - 1.0 Firmly hold copper pipe in a die in the dimension shown in the table above. Handle Bar Bar O Yoke Cone Copper pipe Clamp handle Red arrow mark 5. Check • Compare the flared work with figure below. • If flare is noted to be defective, cut off the flared section and do flaring work again. 3. Putting nut on • Remove flare nuts attached to indoor and outdoor unit, then put them on pipe/tube having completed burr removal. (not possible to put them on after flaring work) Flare nut 11 Copper tube Smooth all round Inside is shiny without scratches Even ength all round Improper flaring 1-1 Inclined Surface Cracked Uneven damaged thickness - 23 -
-
 1
1 -
2
-
3
-
4
-
5
-
6
-
7
-
8
-
9
-
10
-
11
-
12
-
13
-
14
-
15
-
16
-
17
-
 18
18 -
 19
19 -
 20
20 -
 21
21 -
 22
22 -
 23
23 -
 24
24 -
 25
25 -
 26
26 -
 27
27 -
 28
28 -
29
-
30
-
31
-
32
-
33
-
34
-
35
-
36
-
37
-
38
-
39
-
40
-
41
-
42
-
43
-
44
-
45
-
46
-
47
-
48
-
49
-
50
-
51
-
52
-
53
-
54
-
55
-
56
-
57
-
58
-
59
-
60
-
61
-
62
-
63
-
64
 |
 |